Introduction
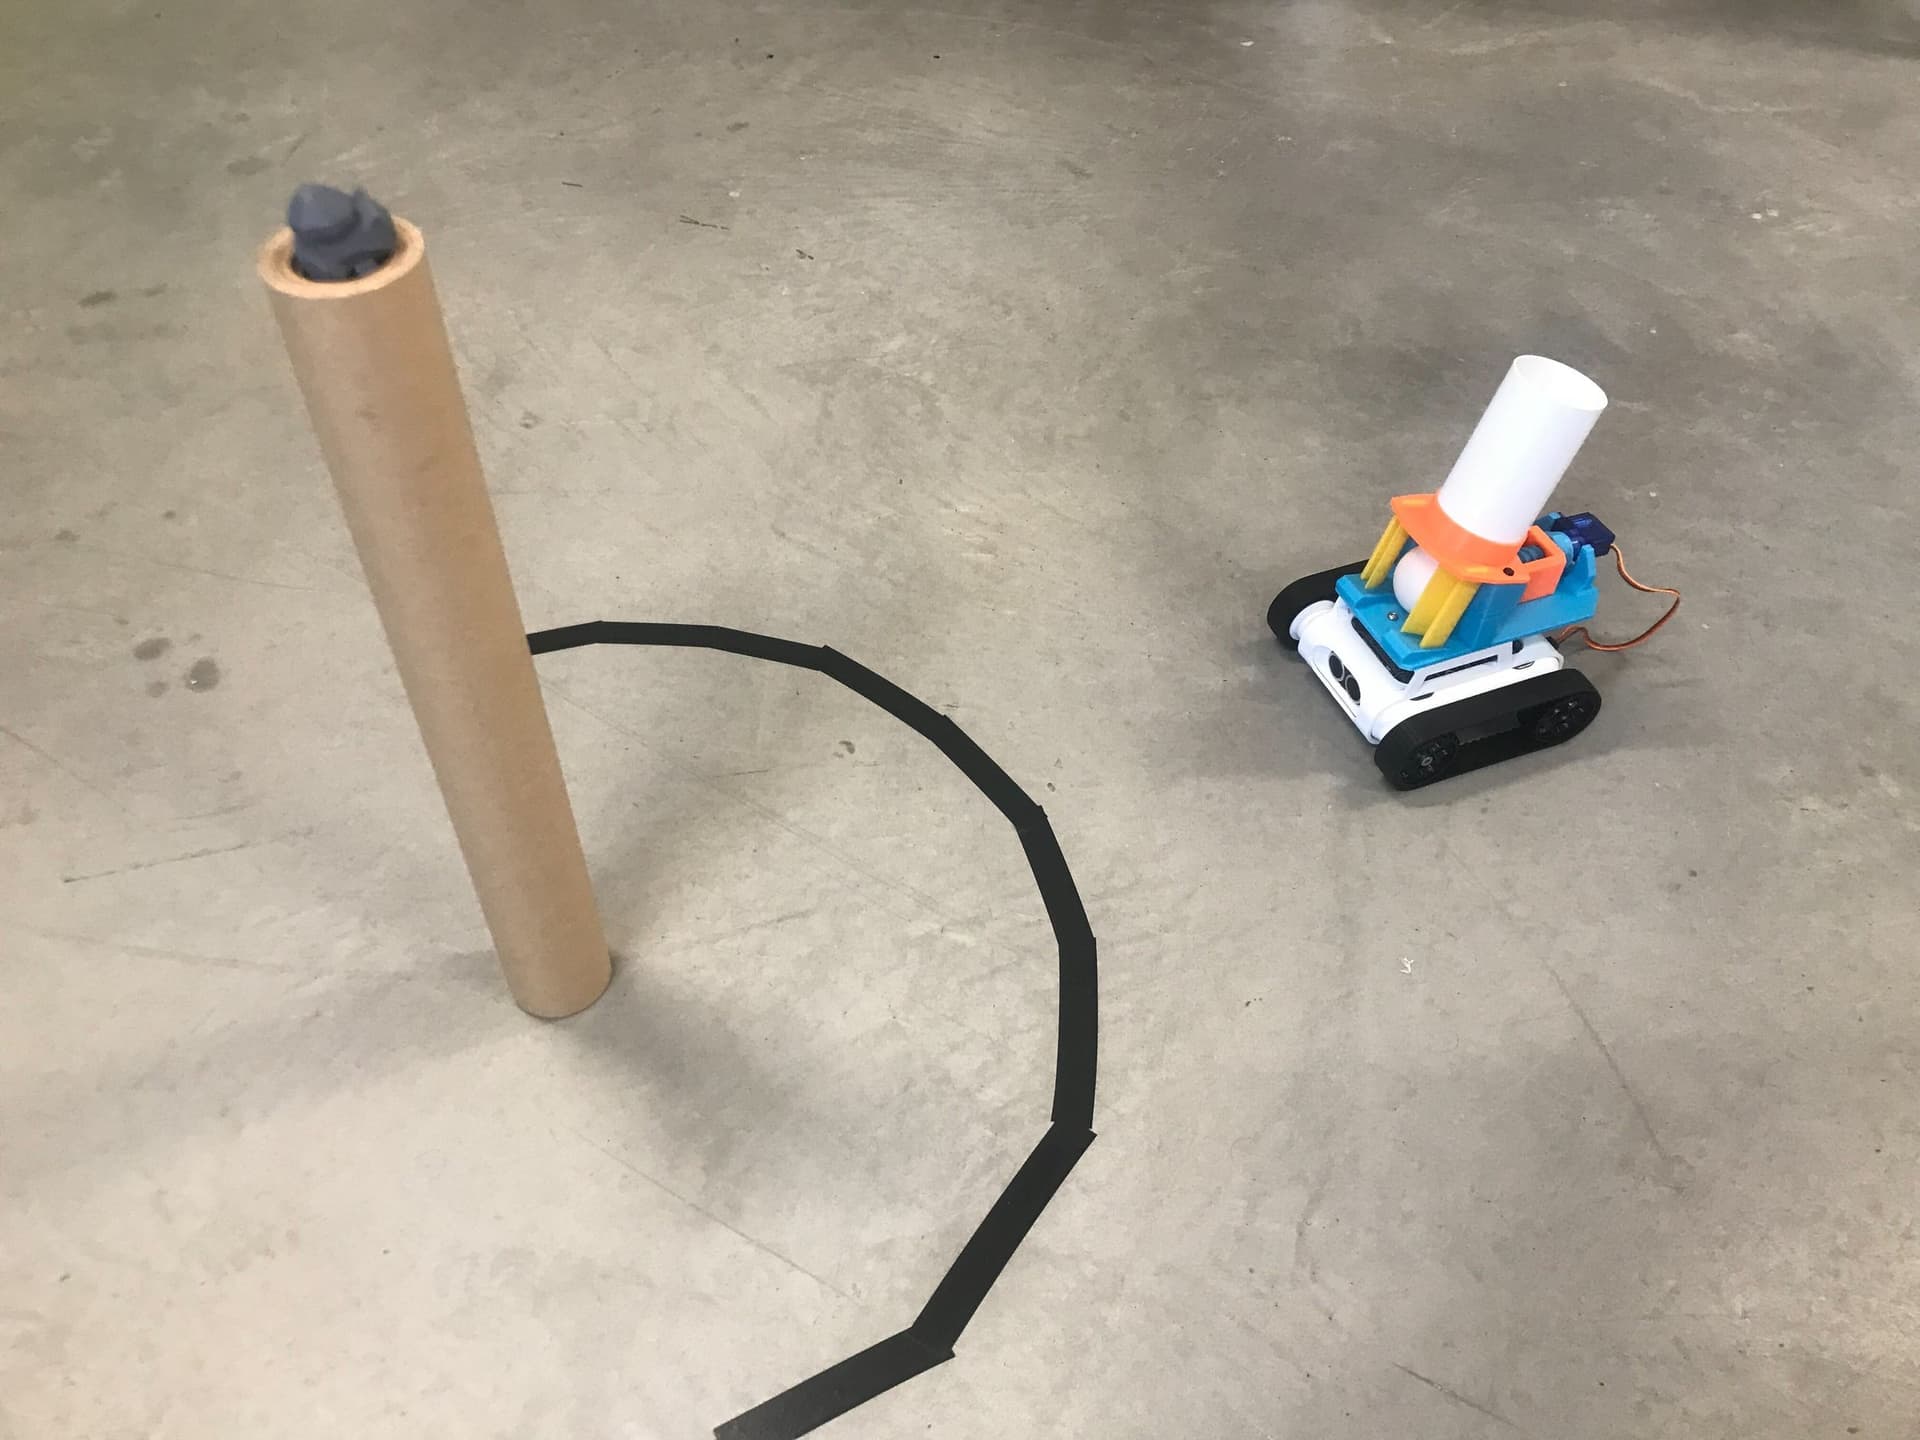
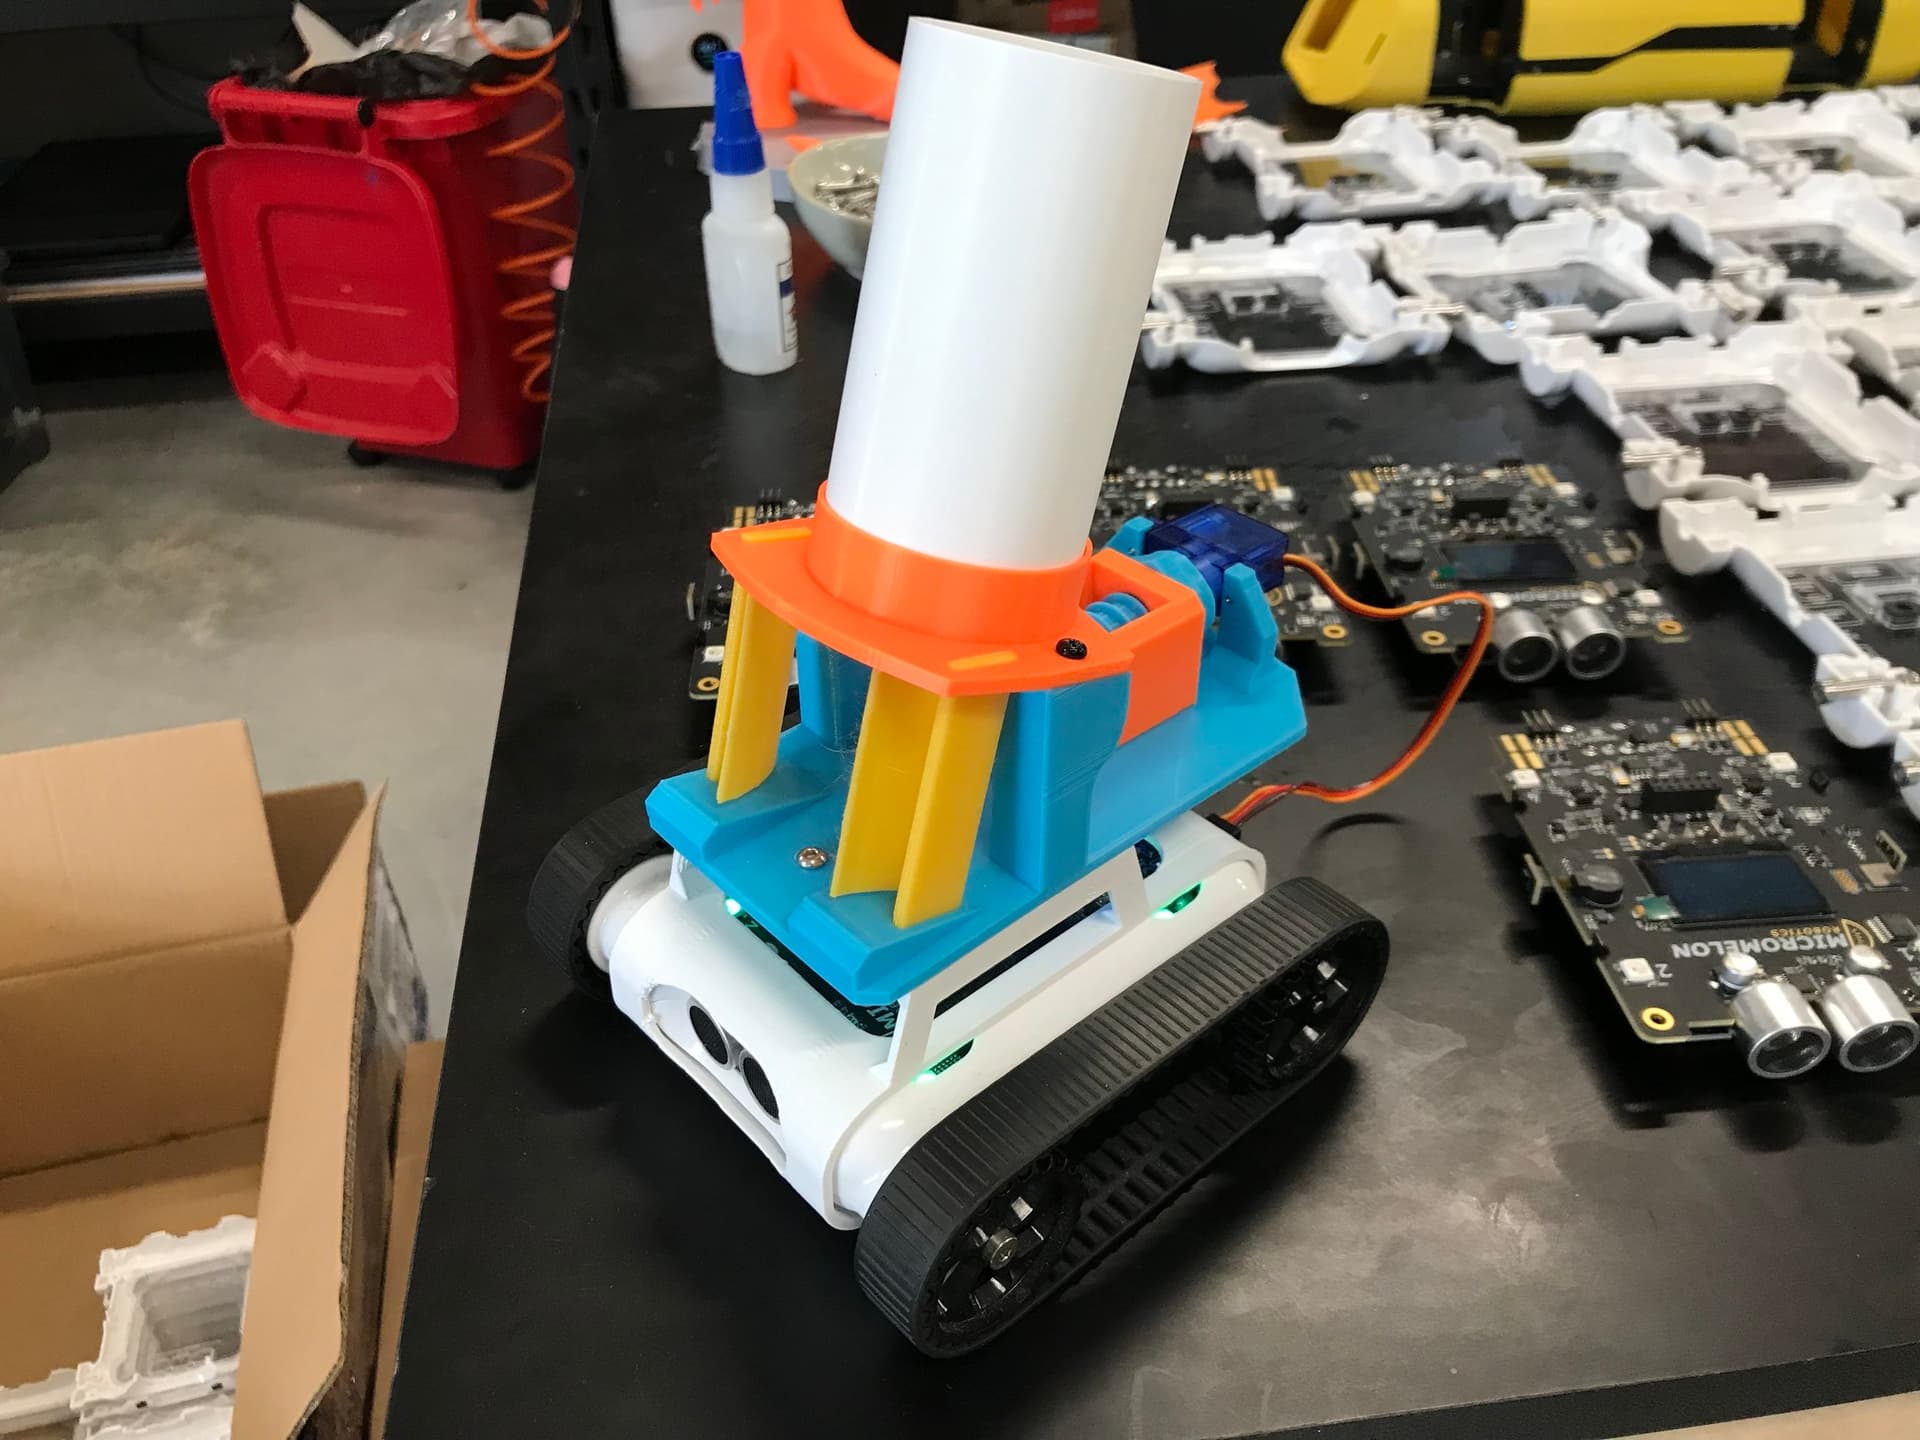
The ping pong shooter attachment lets your Rover launch ping pong balls using a spring-loaded mechanism powered by a continuous servo motor. It clips onto the front of the Rover via the bolt clip adapter. The wings must be printed using PETG so they are flexible enough to shoot the balls. This guide will walk you through printing and assembling the attachment step by step.
What You'll Need
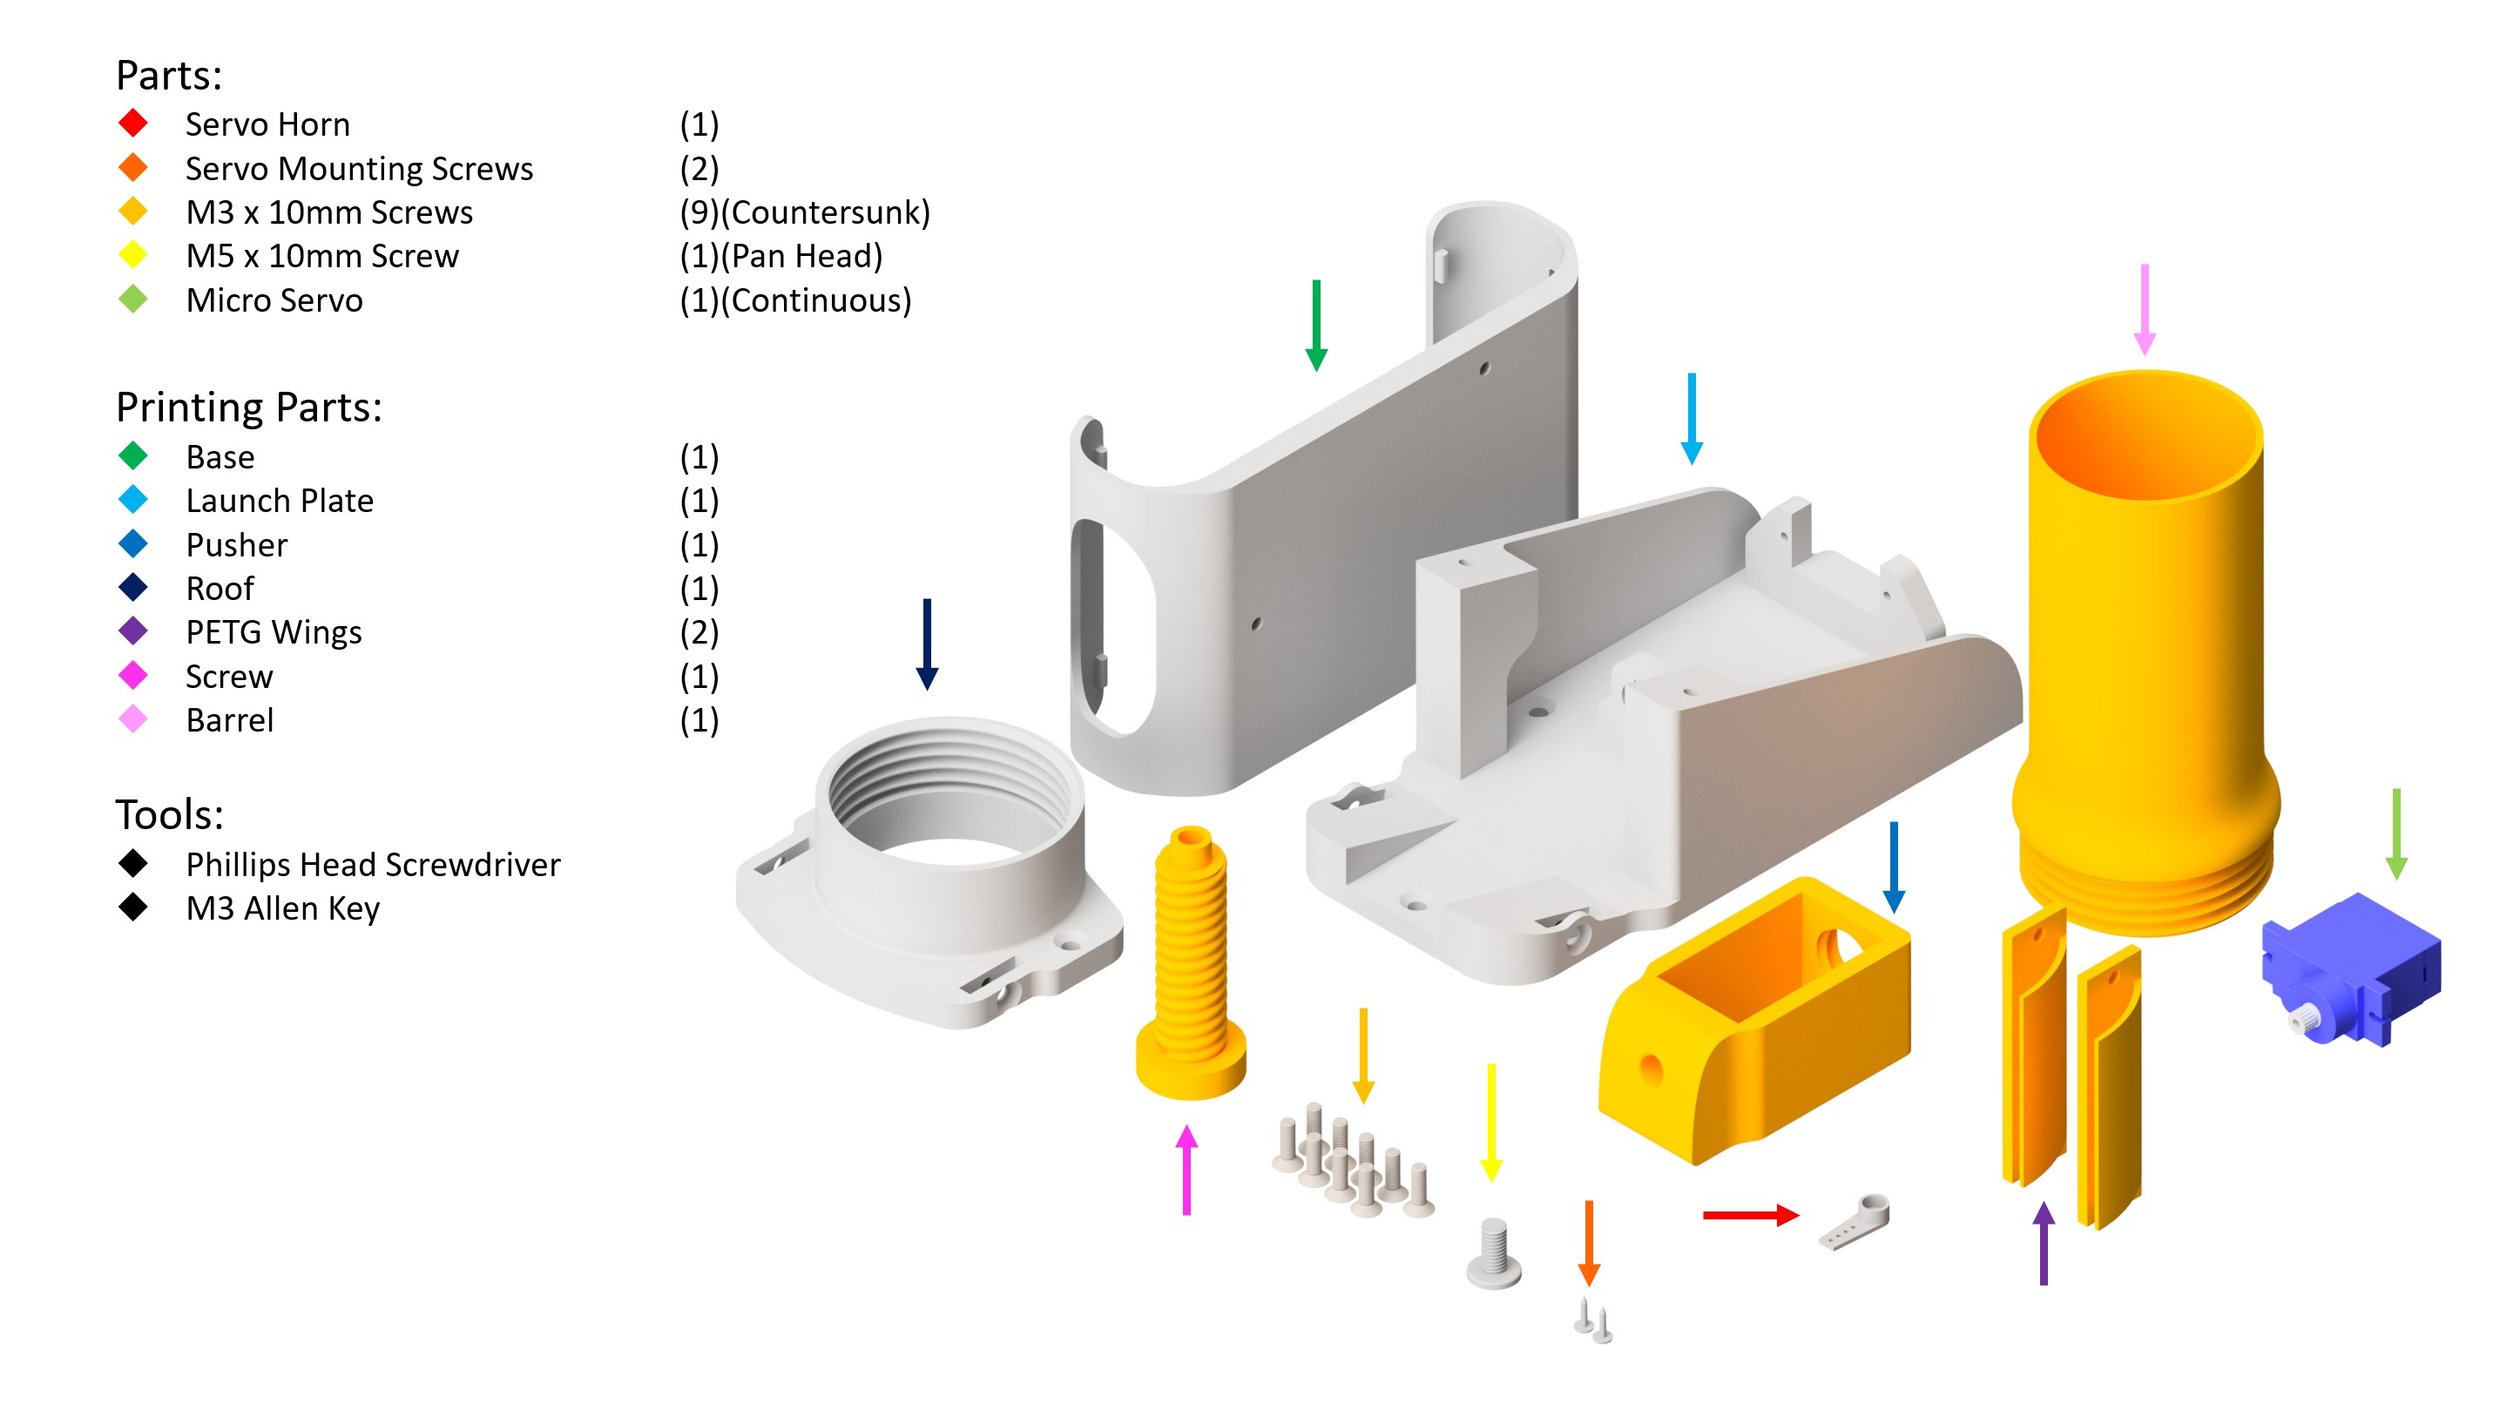
Parts:
- 1x Servo Horn
- 2x Servo Mounting Screws
- 9x M3 x 10mm Screws (Countersunk)
- 1x M5 x 10mm Screw (Pan Head)
- 1x Micro Servo (Continuous)
Tools:
- Phillips Head Screwdriver
- M3 Allen Key
 Thingiverse
 Printables
 Makerworld
13D Print Your Parts
- 1x Base
- 1x Launch Plate
- 1x Pusher
- 1x Roof
- 2x PETG Wings
- 1x Screw
- 1x Barrel
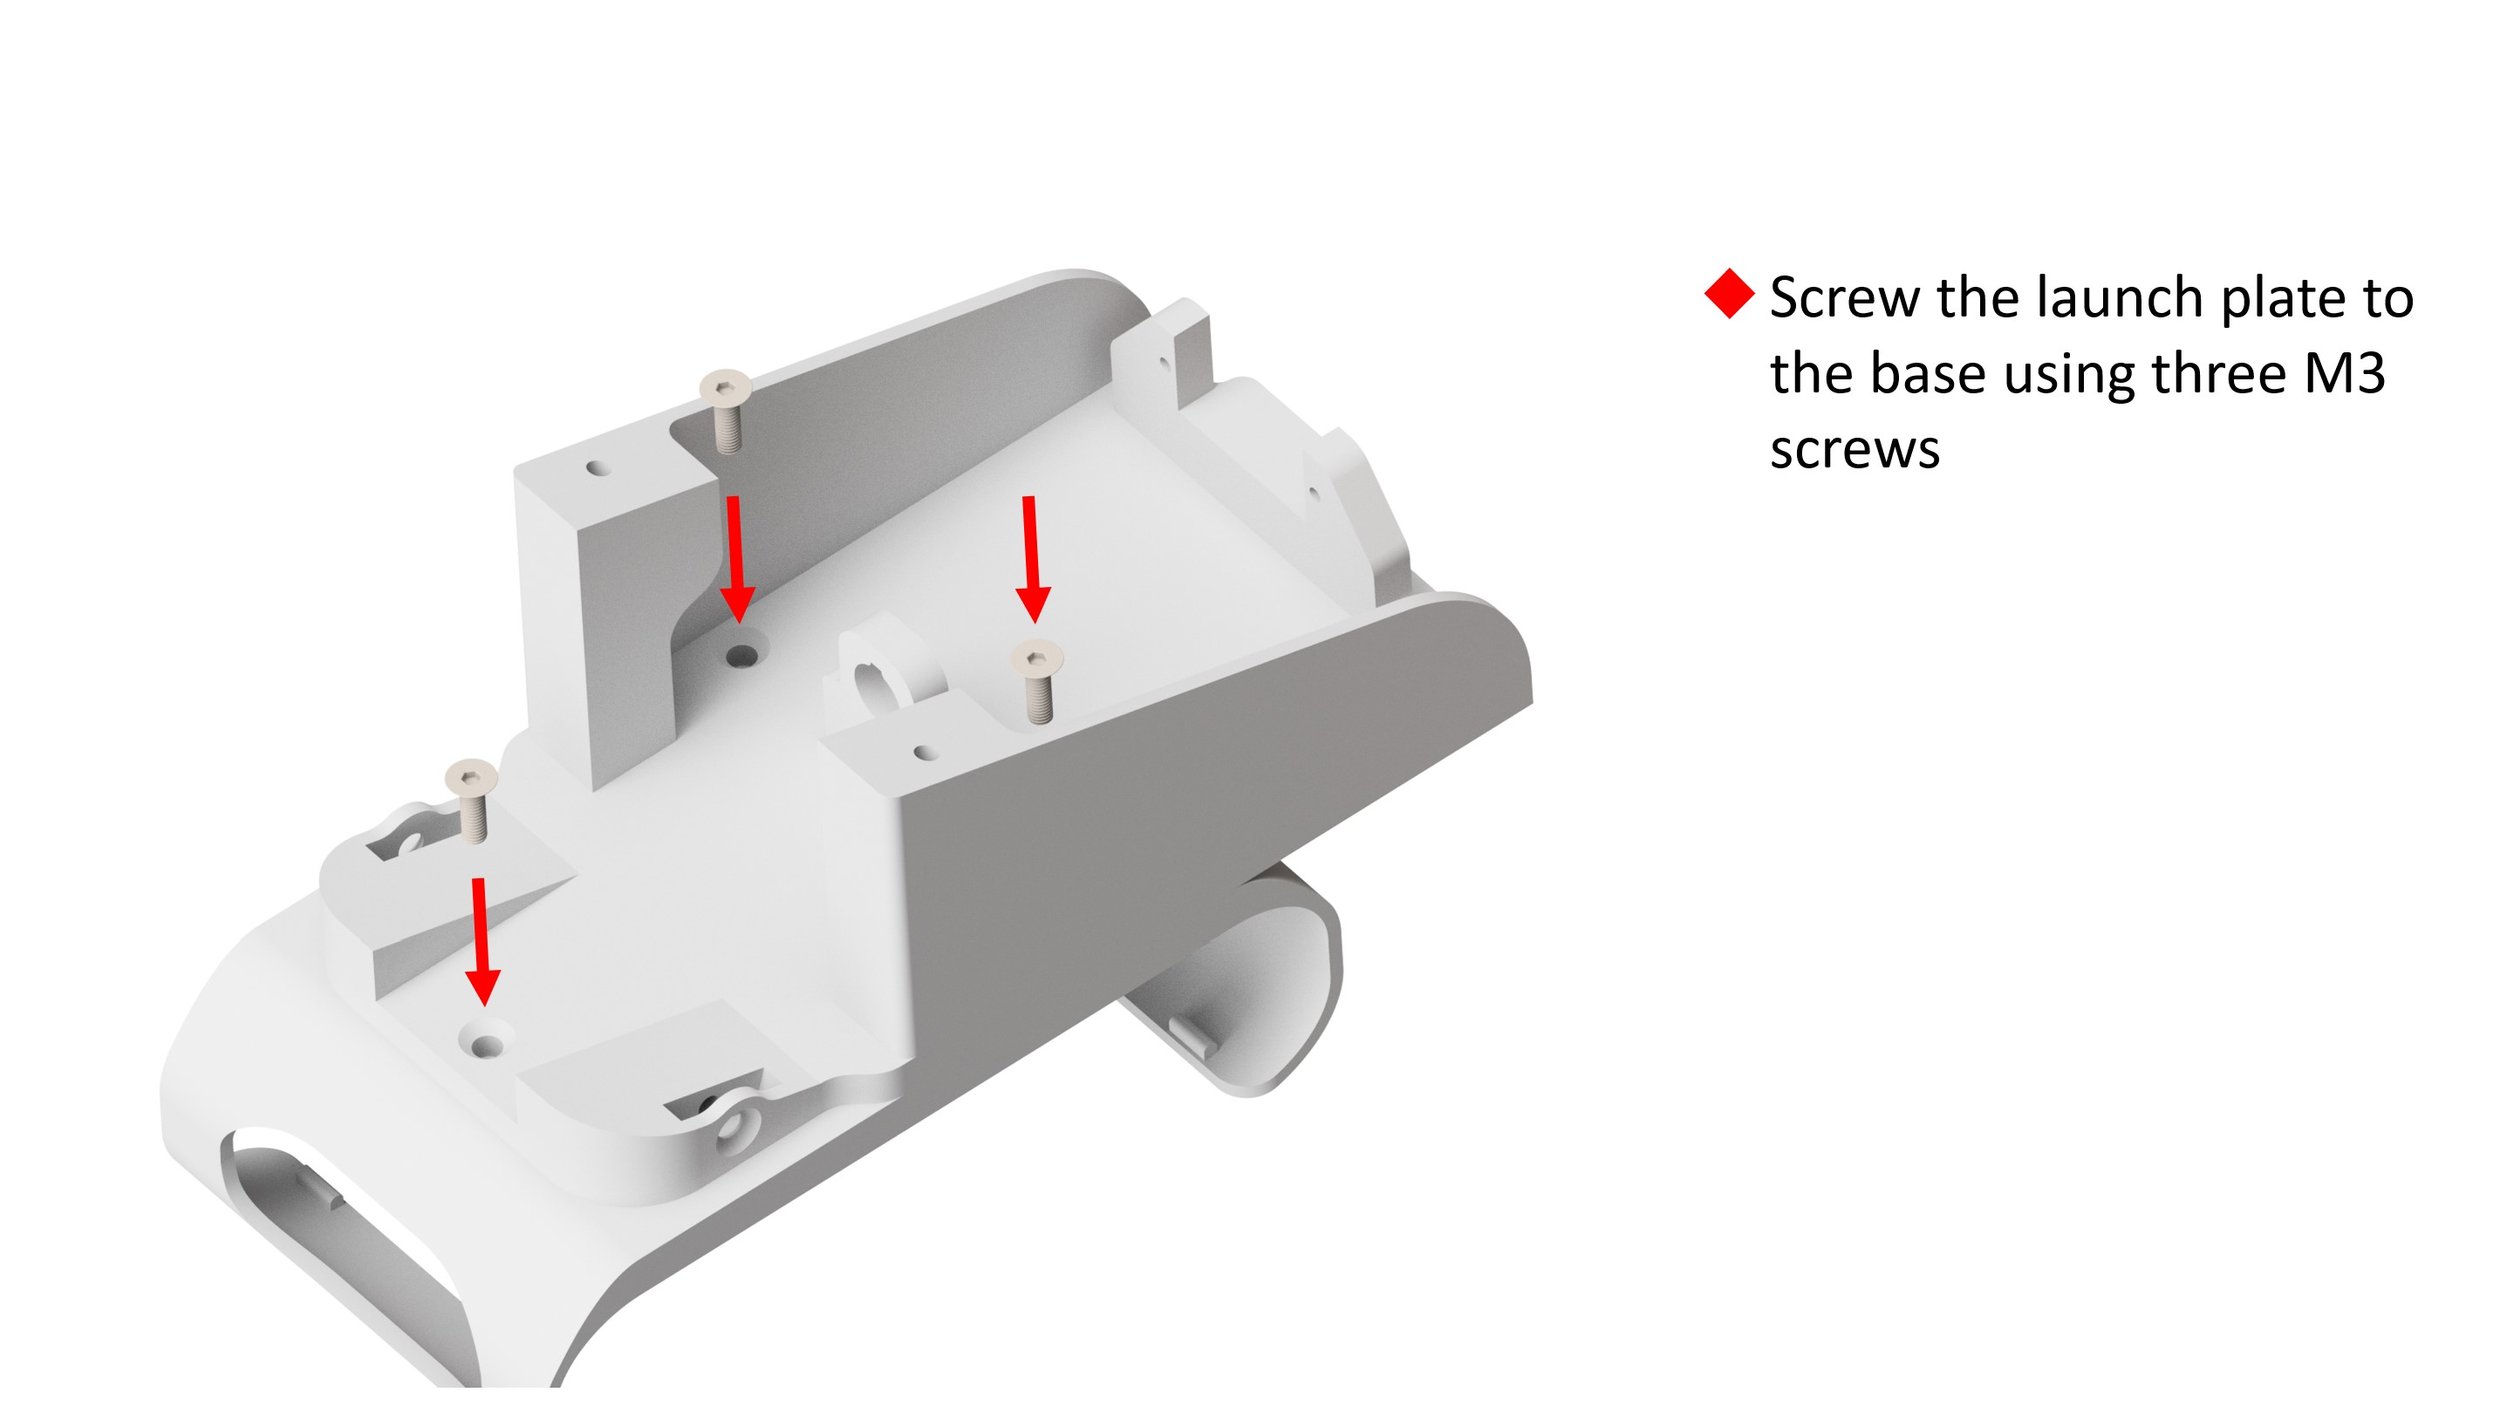
2Attach the Launch Plate
- Screw the launch plate to the base using three M3 screws.
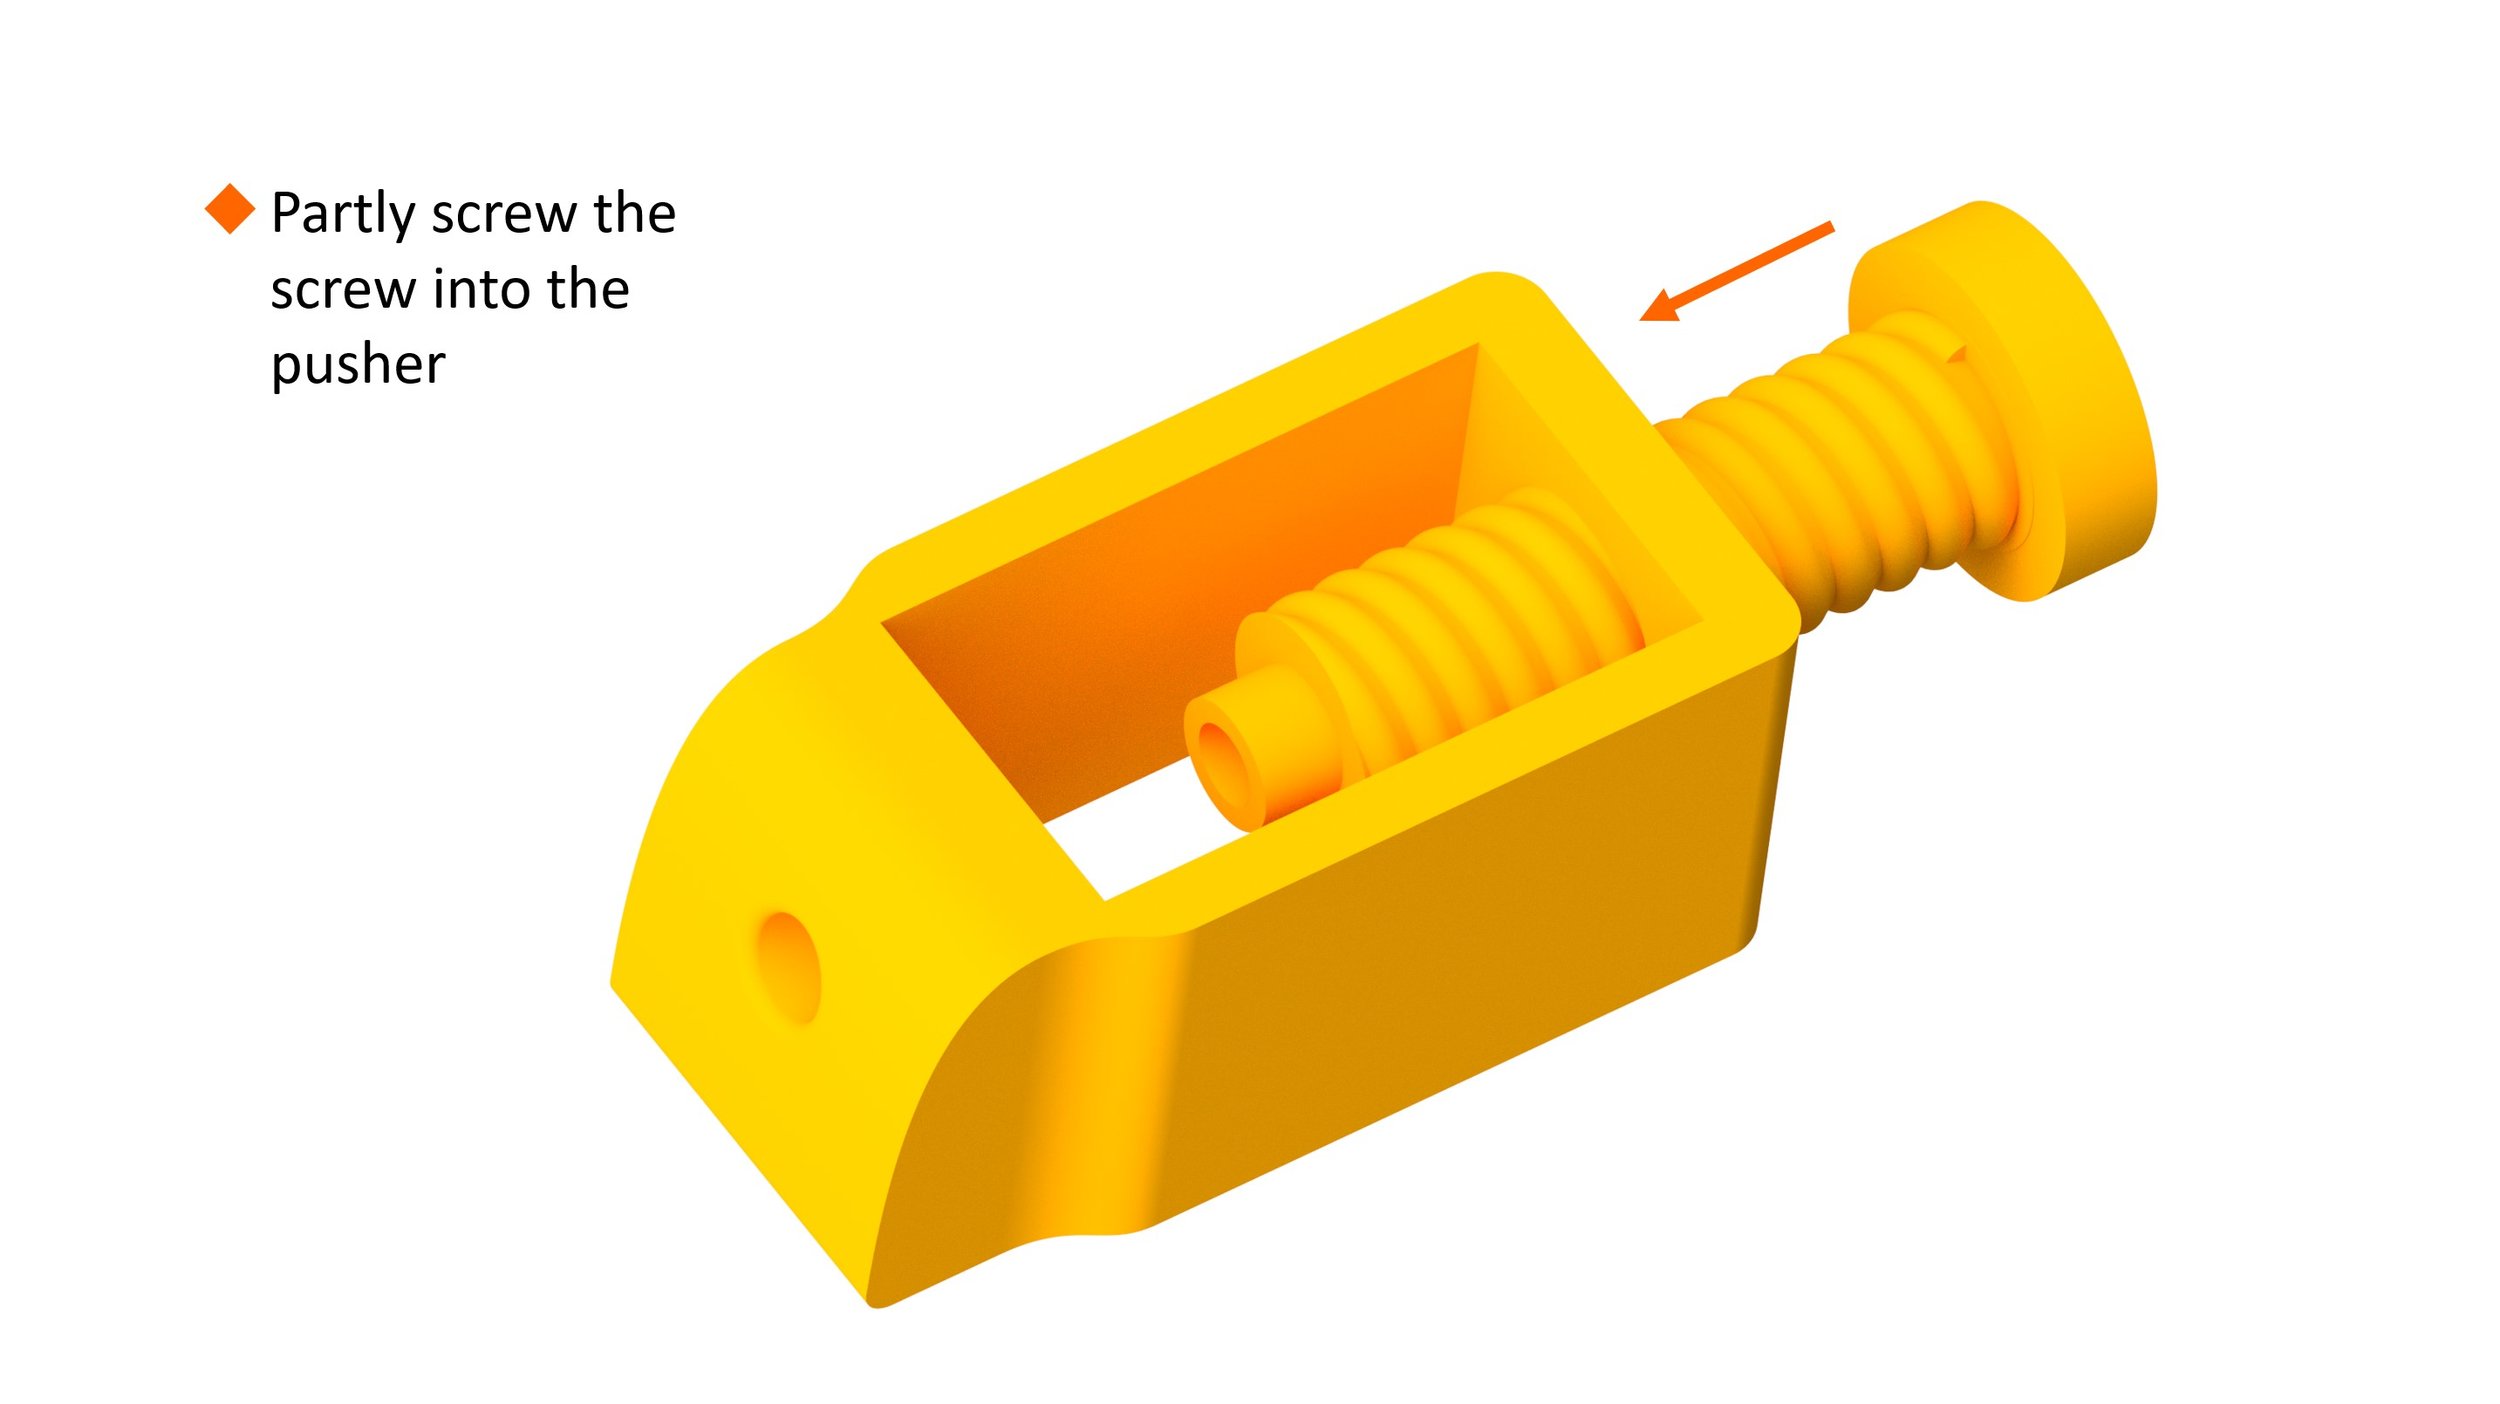
3Assemble the Pusher
- Partly screw the screw into the pusher.
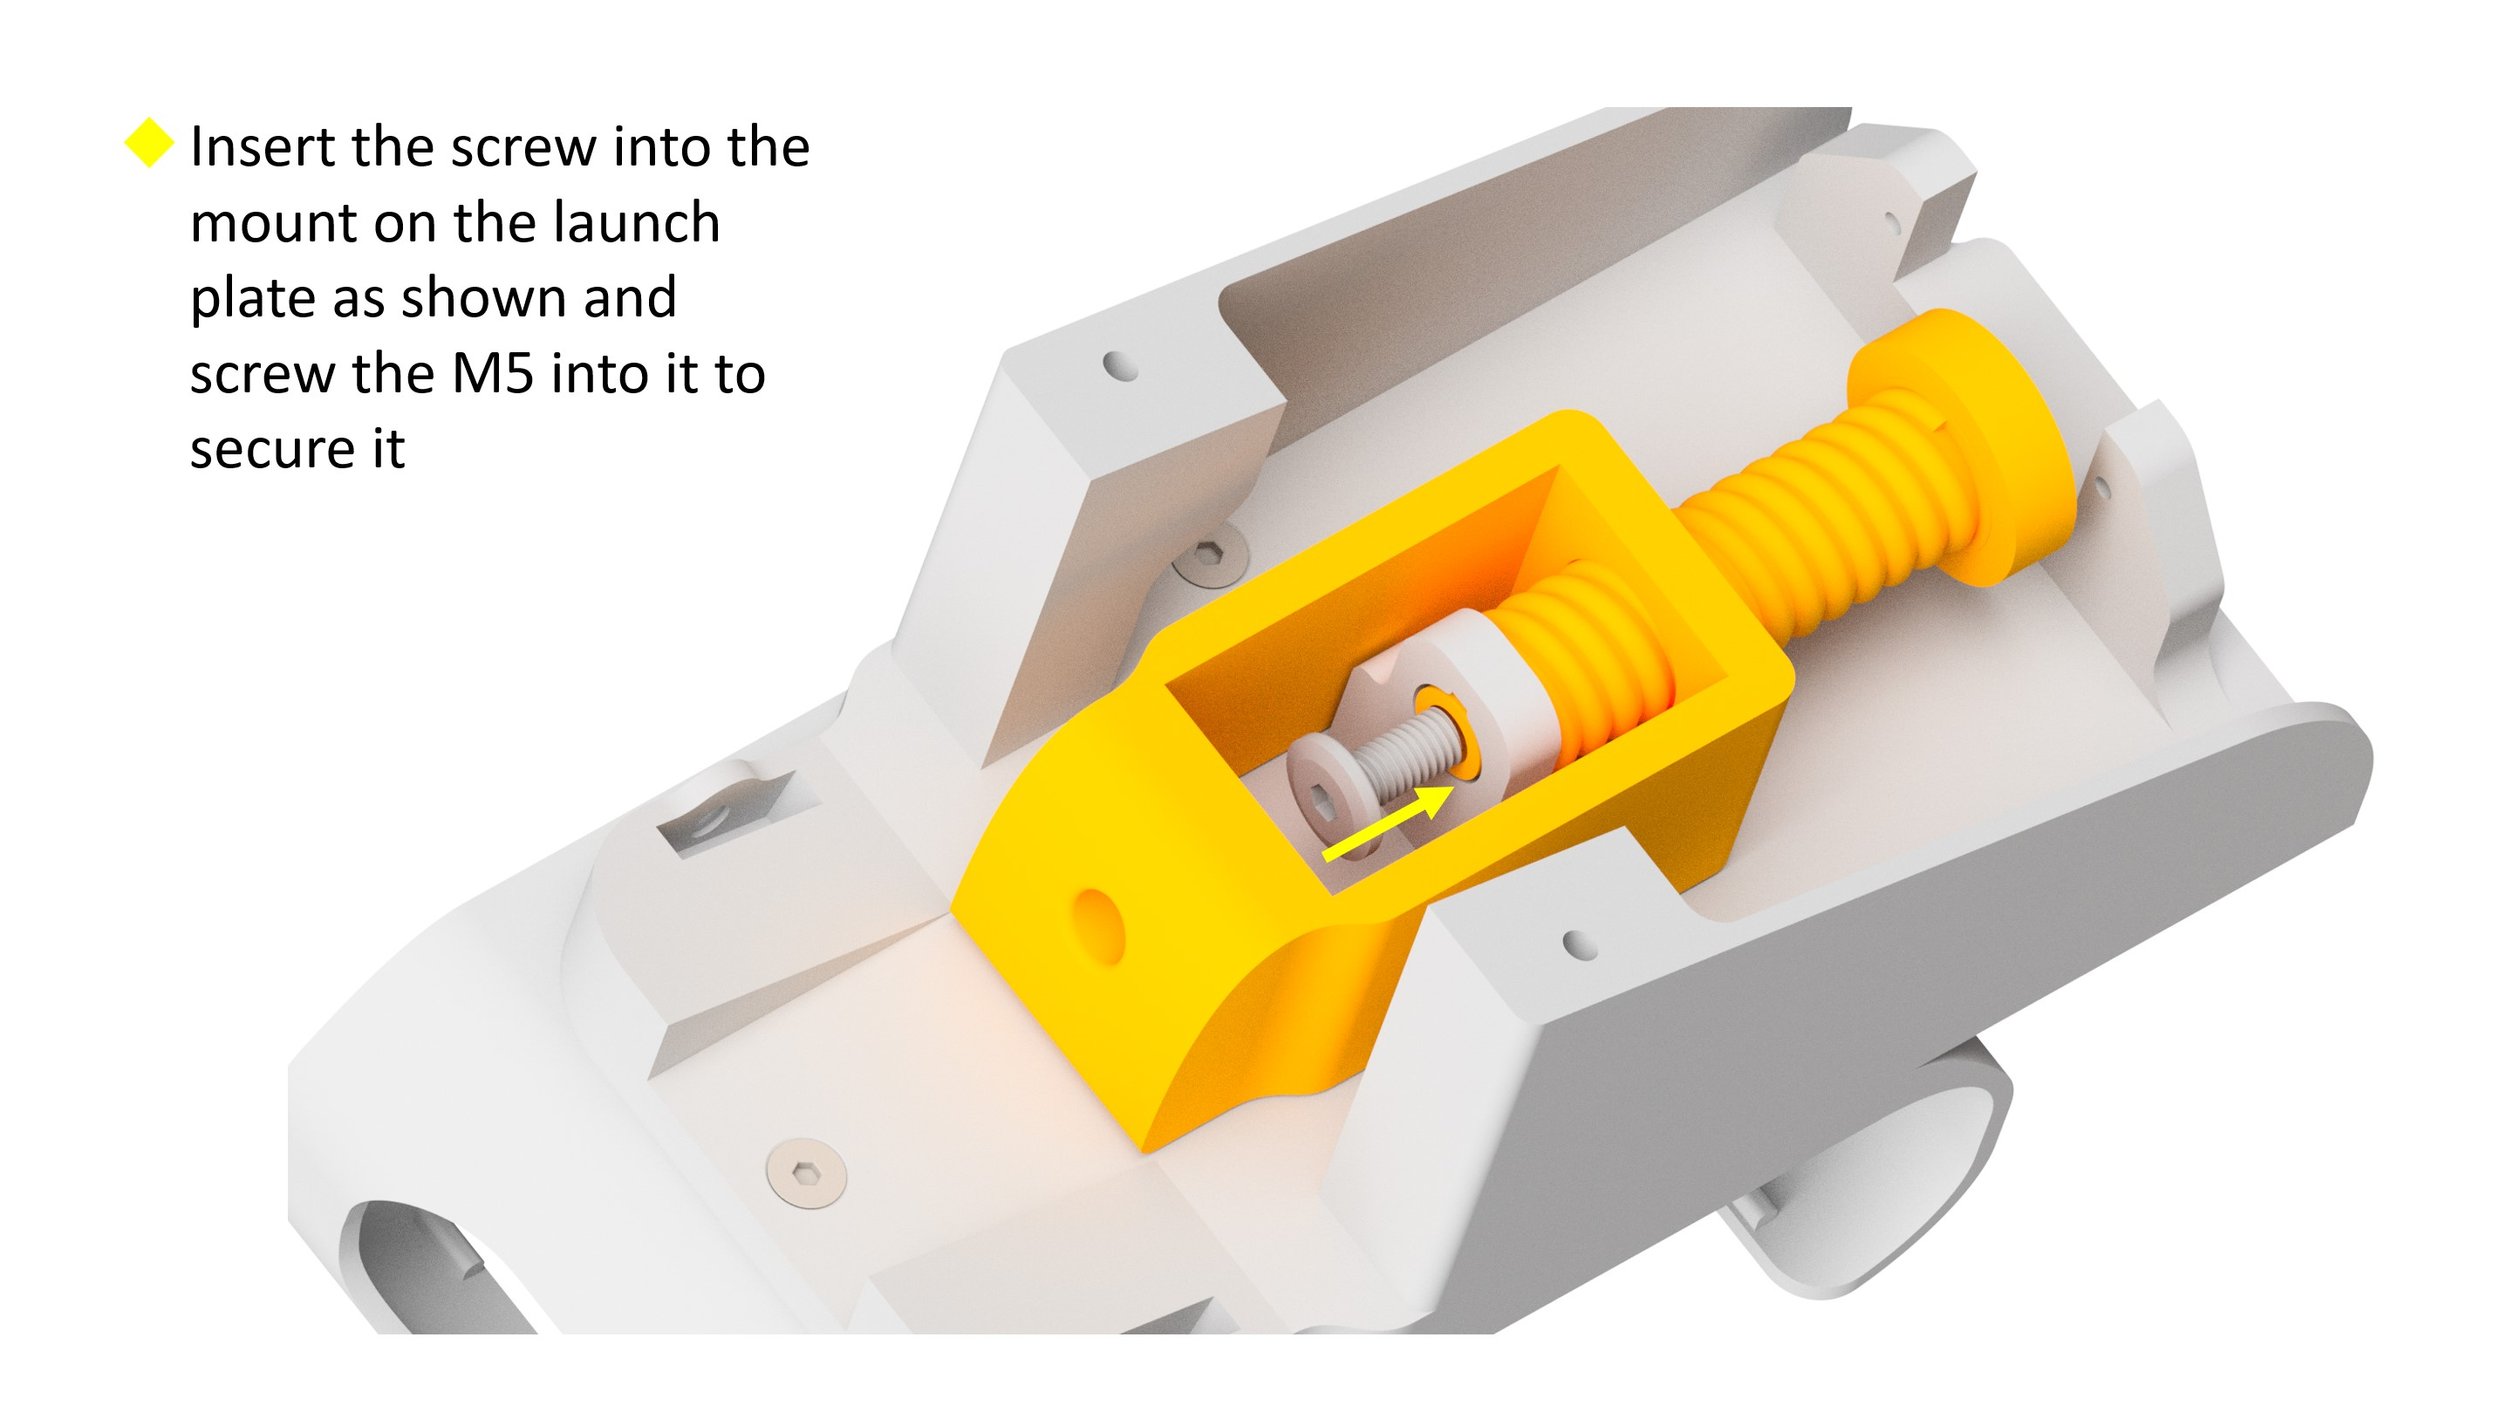
4Mount the Pusher
- Insert the screw into the mount on the launch plate as shown.
- Screw the M5 into it to secure it.
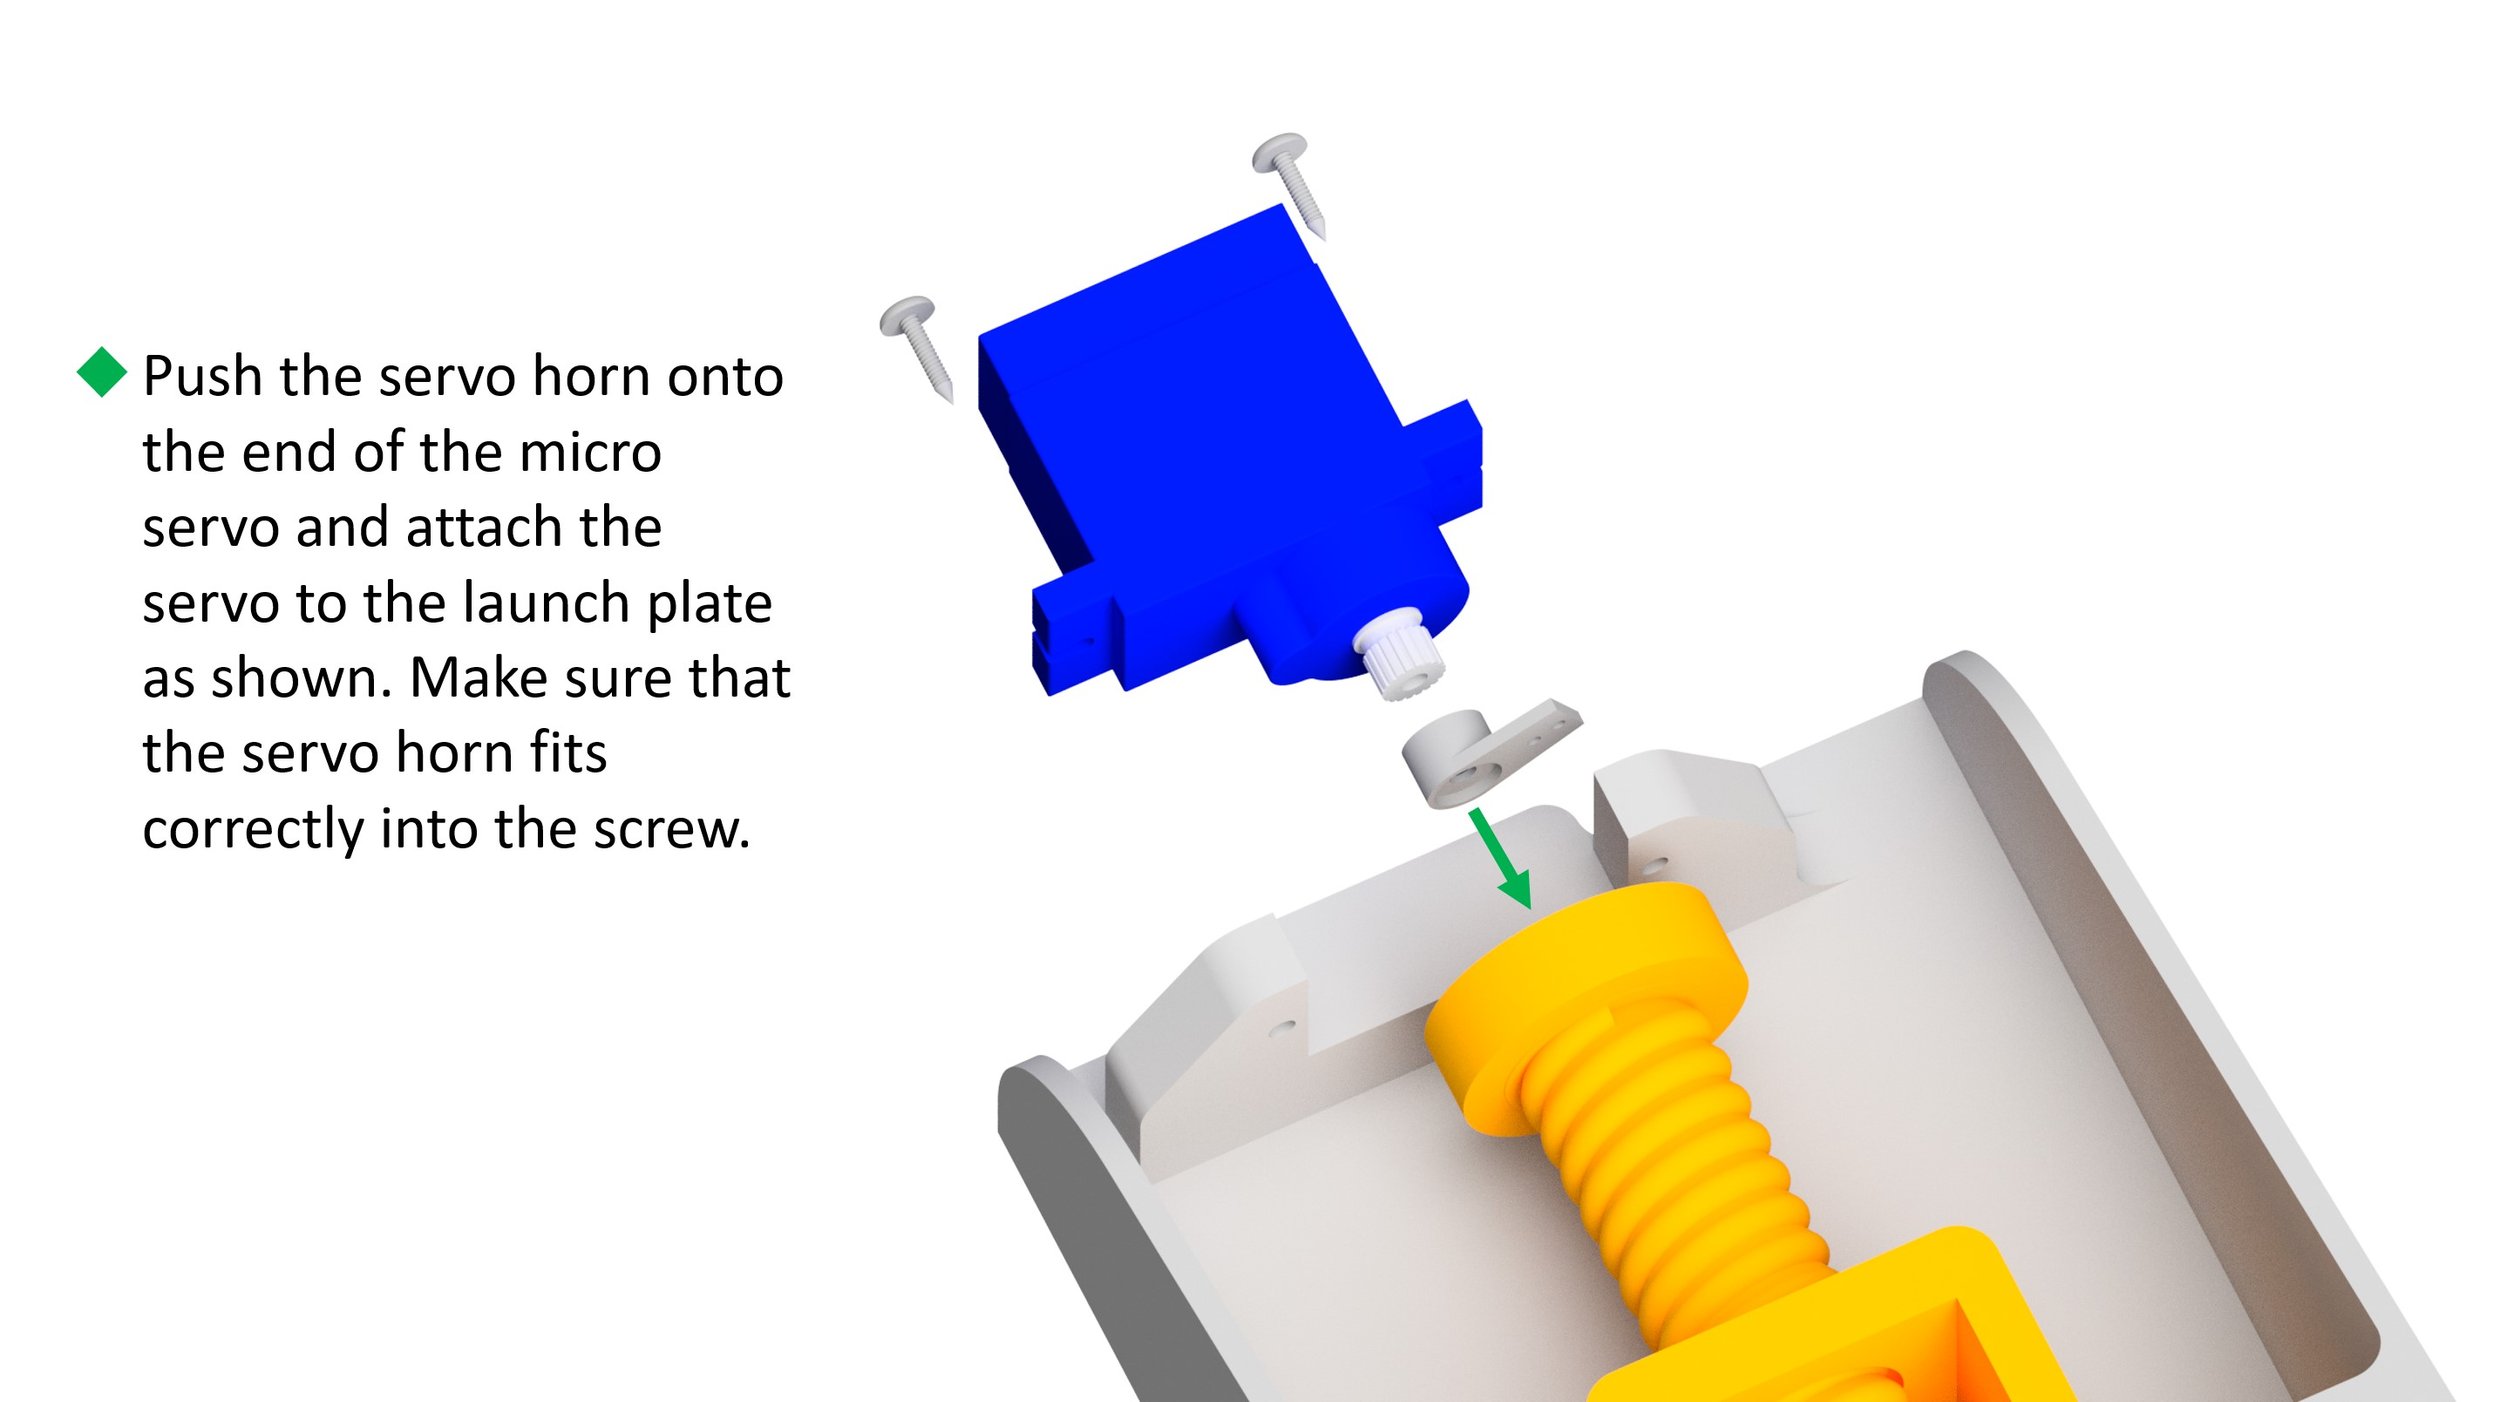
5Install the Servo
- Push the servo horn onto the end of the micro servo.
- Attach the servo to the launch plate as shown using two servo mounting screws.
- Make sure that the servo horn fits correctly into the screw.
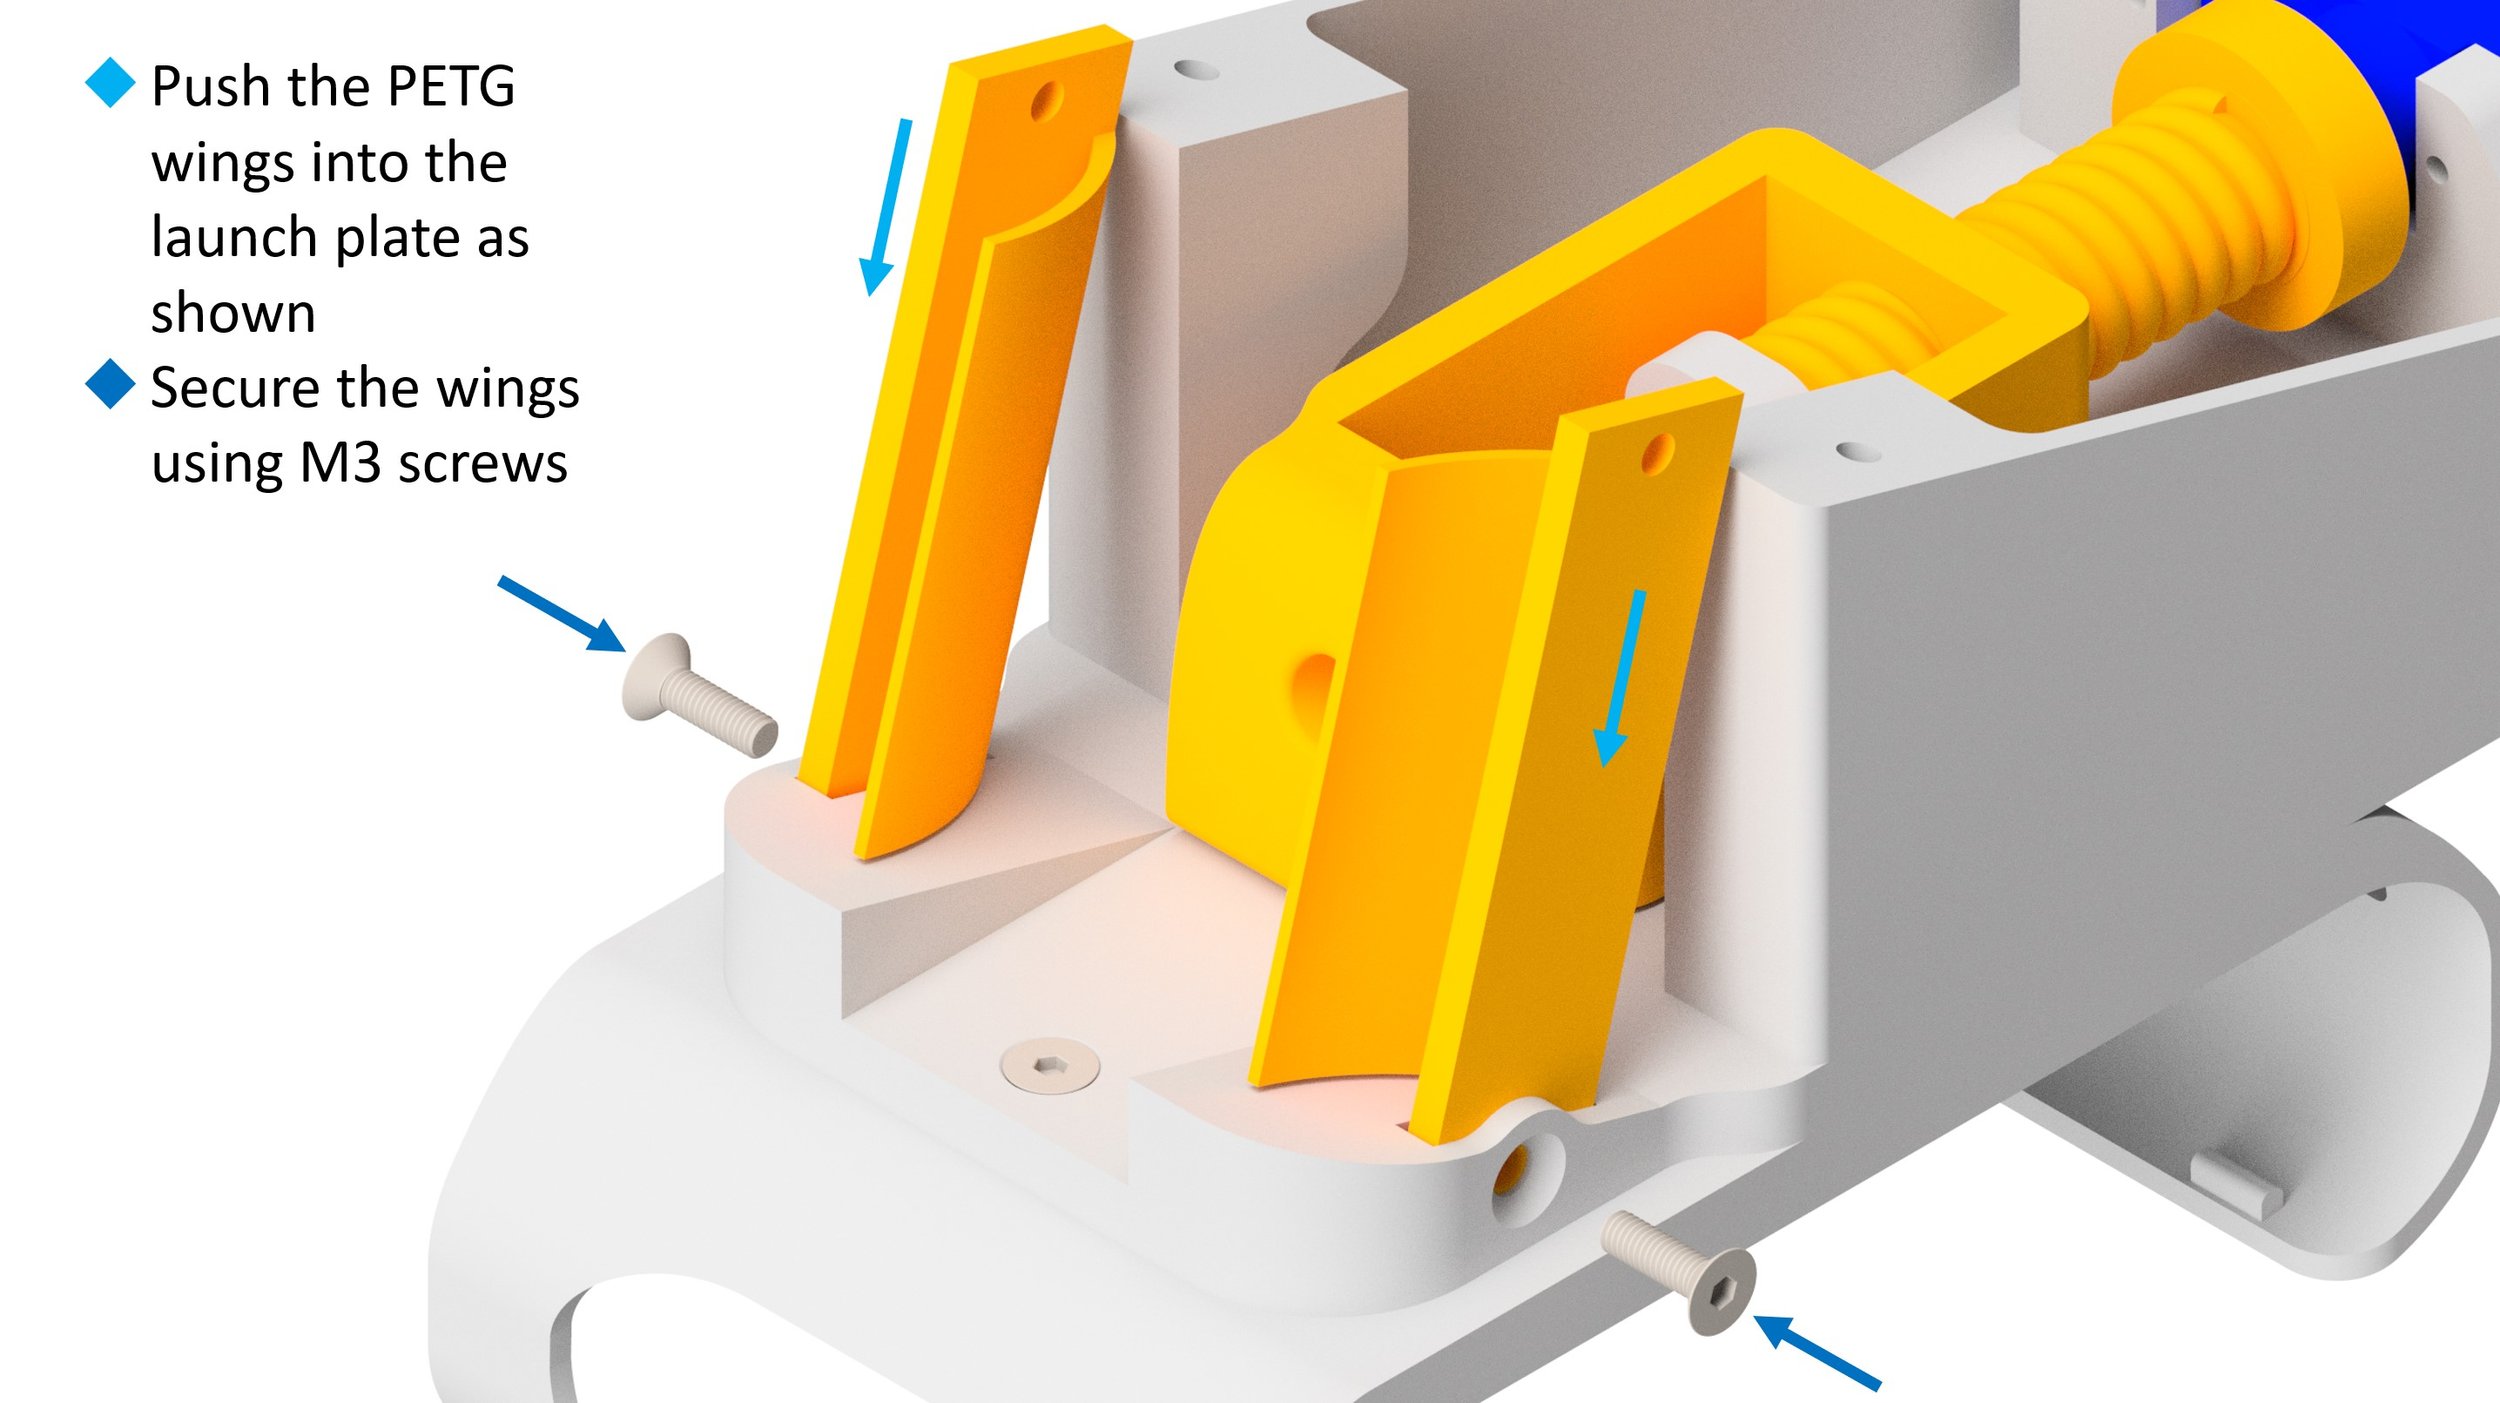
6Attach the Wings
- Push the PETG wings into the launch plate as shown.
- Secure the wings using M3 screws.
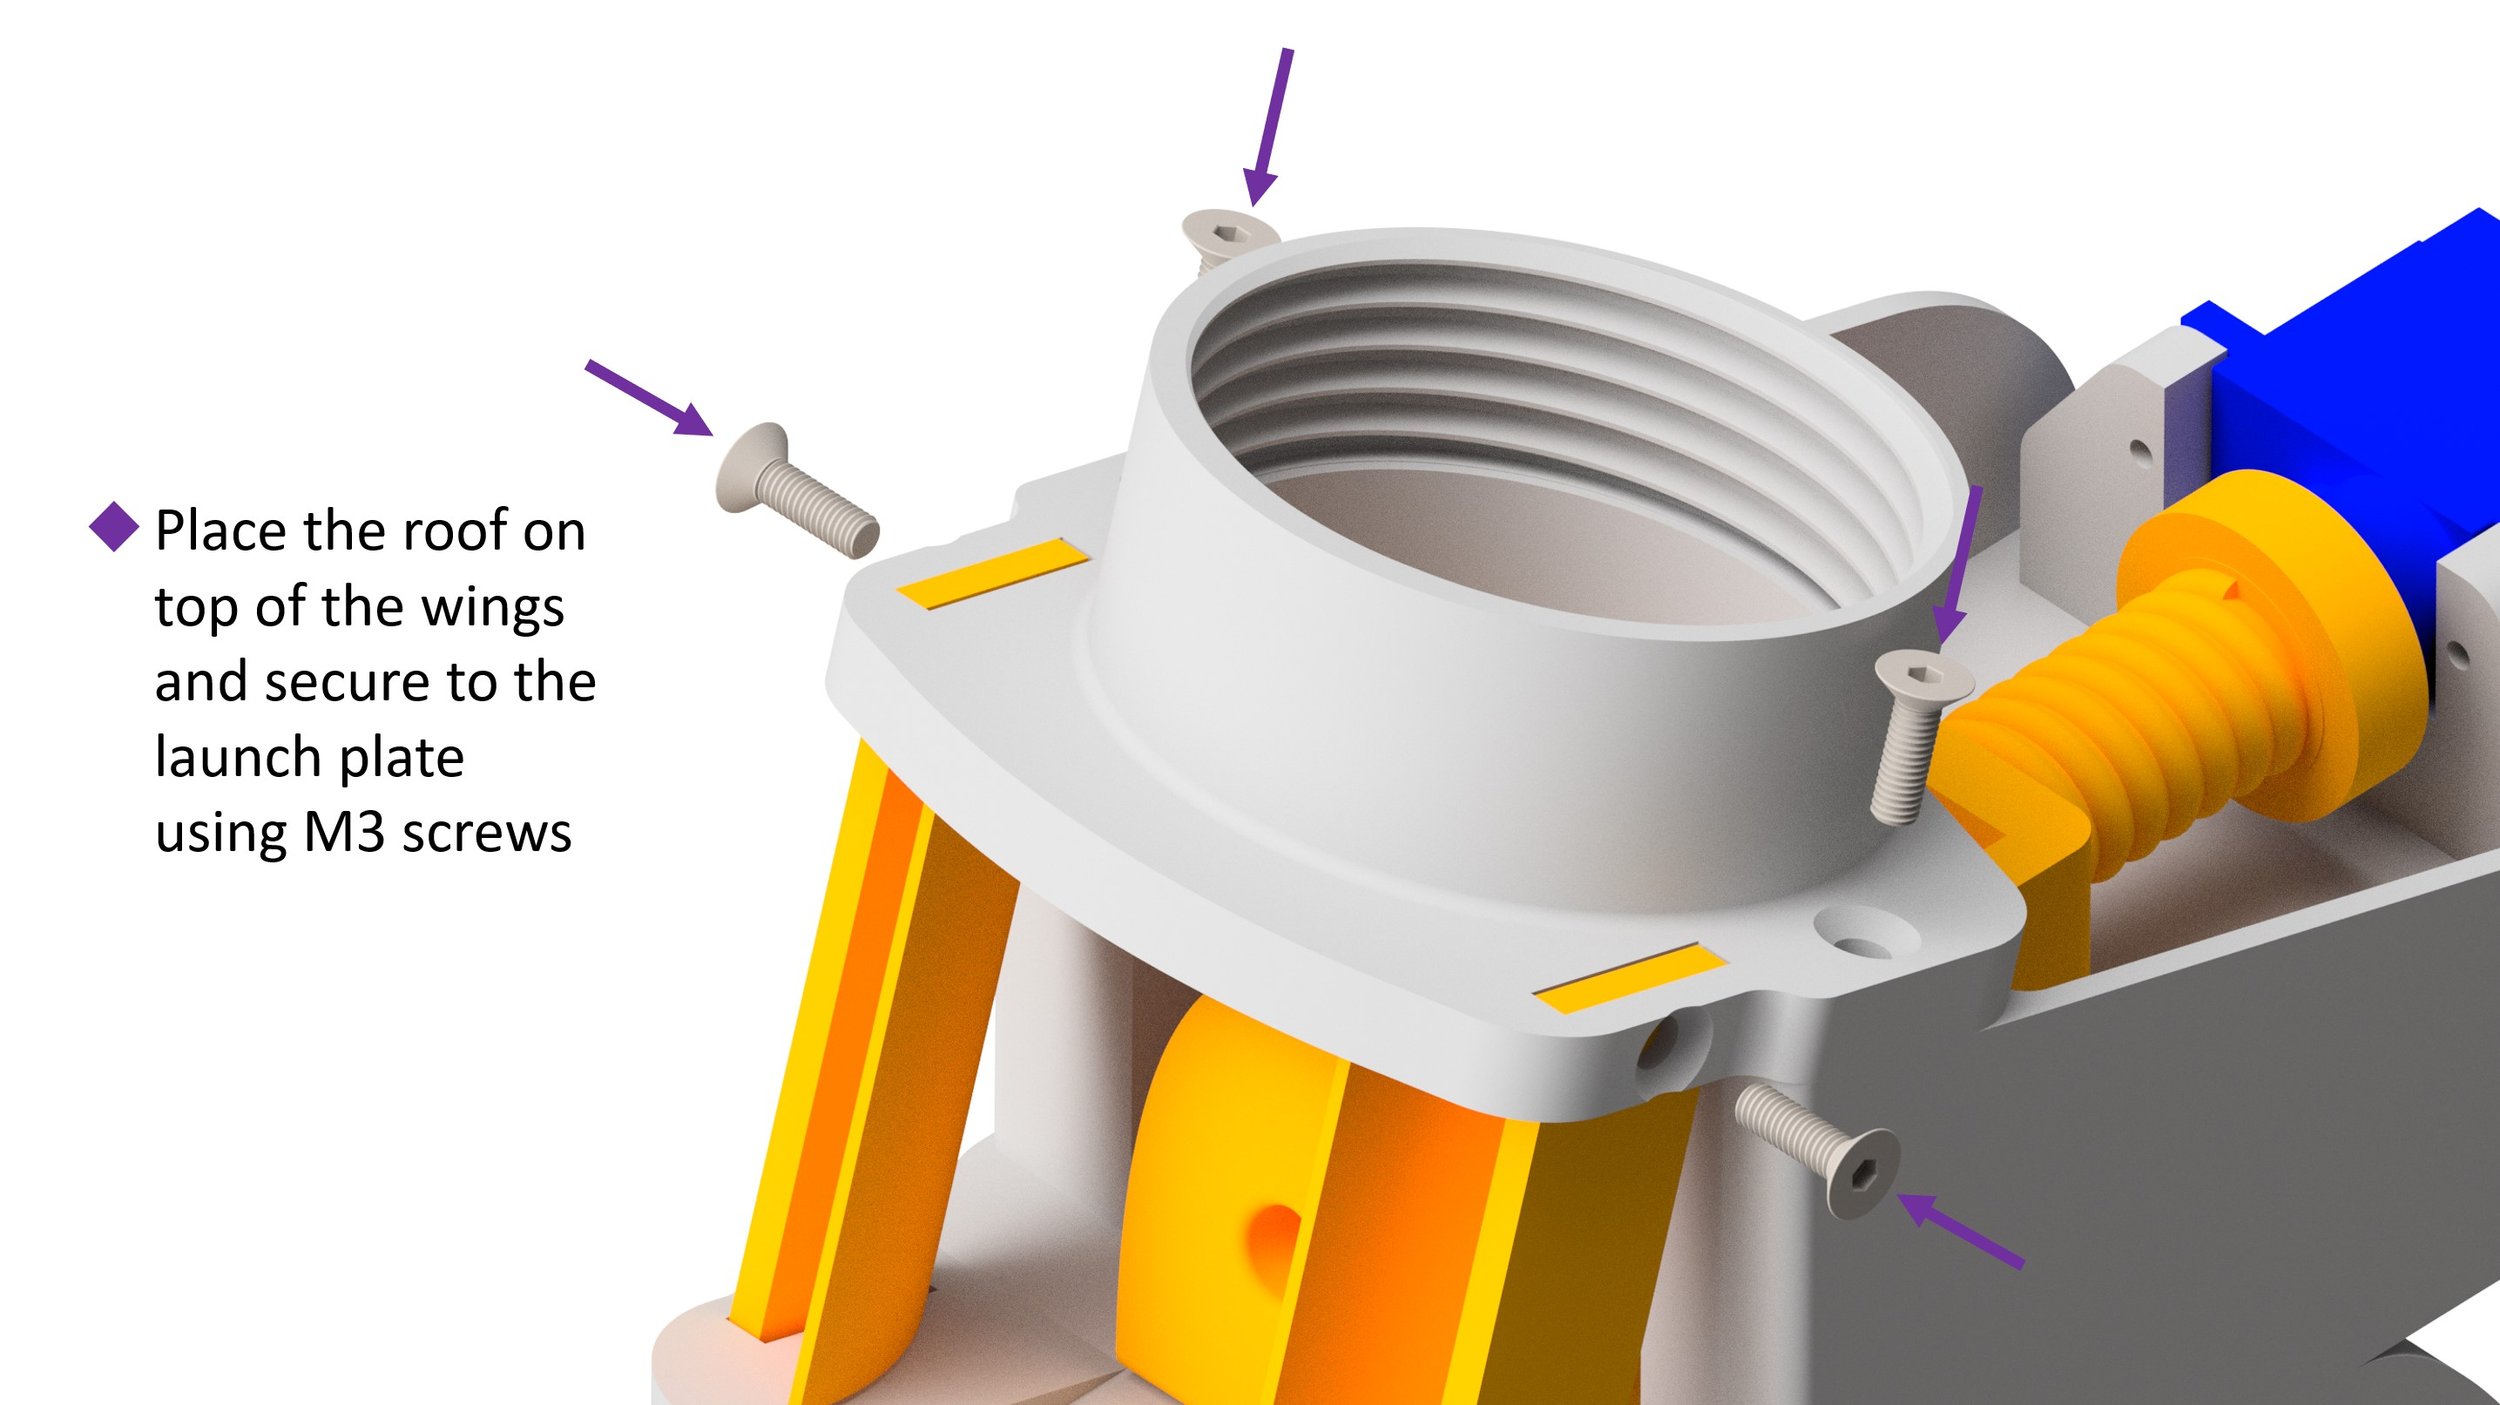
7Attach the Roof
- Place the roof on top of the wings and secure to the launch plate using M3 screws.
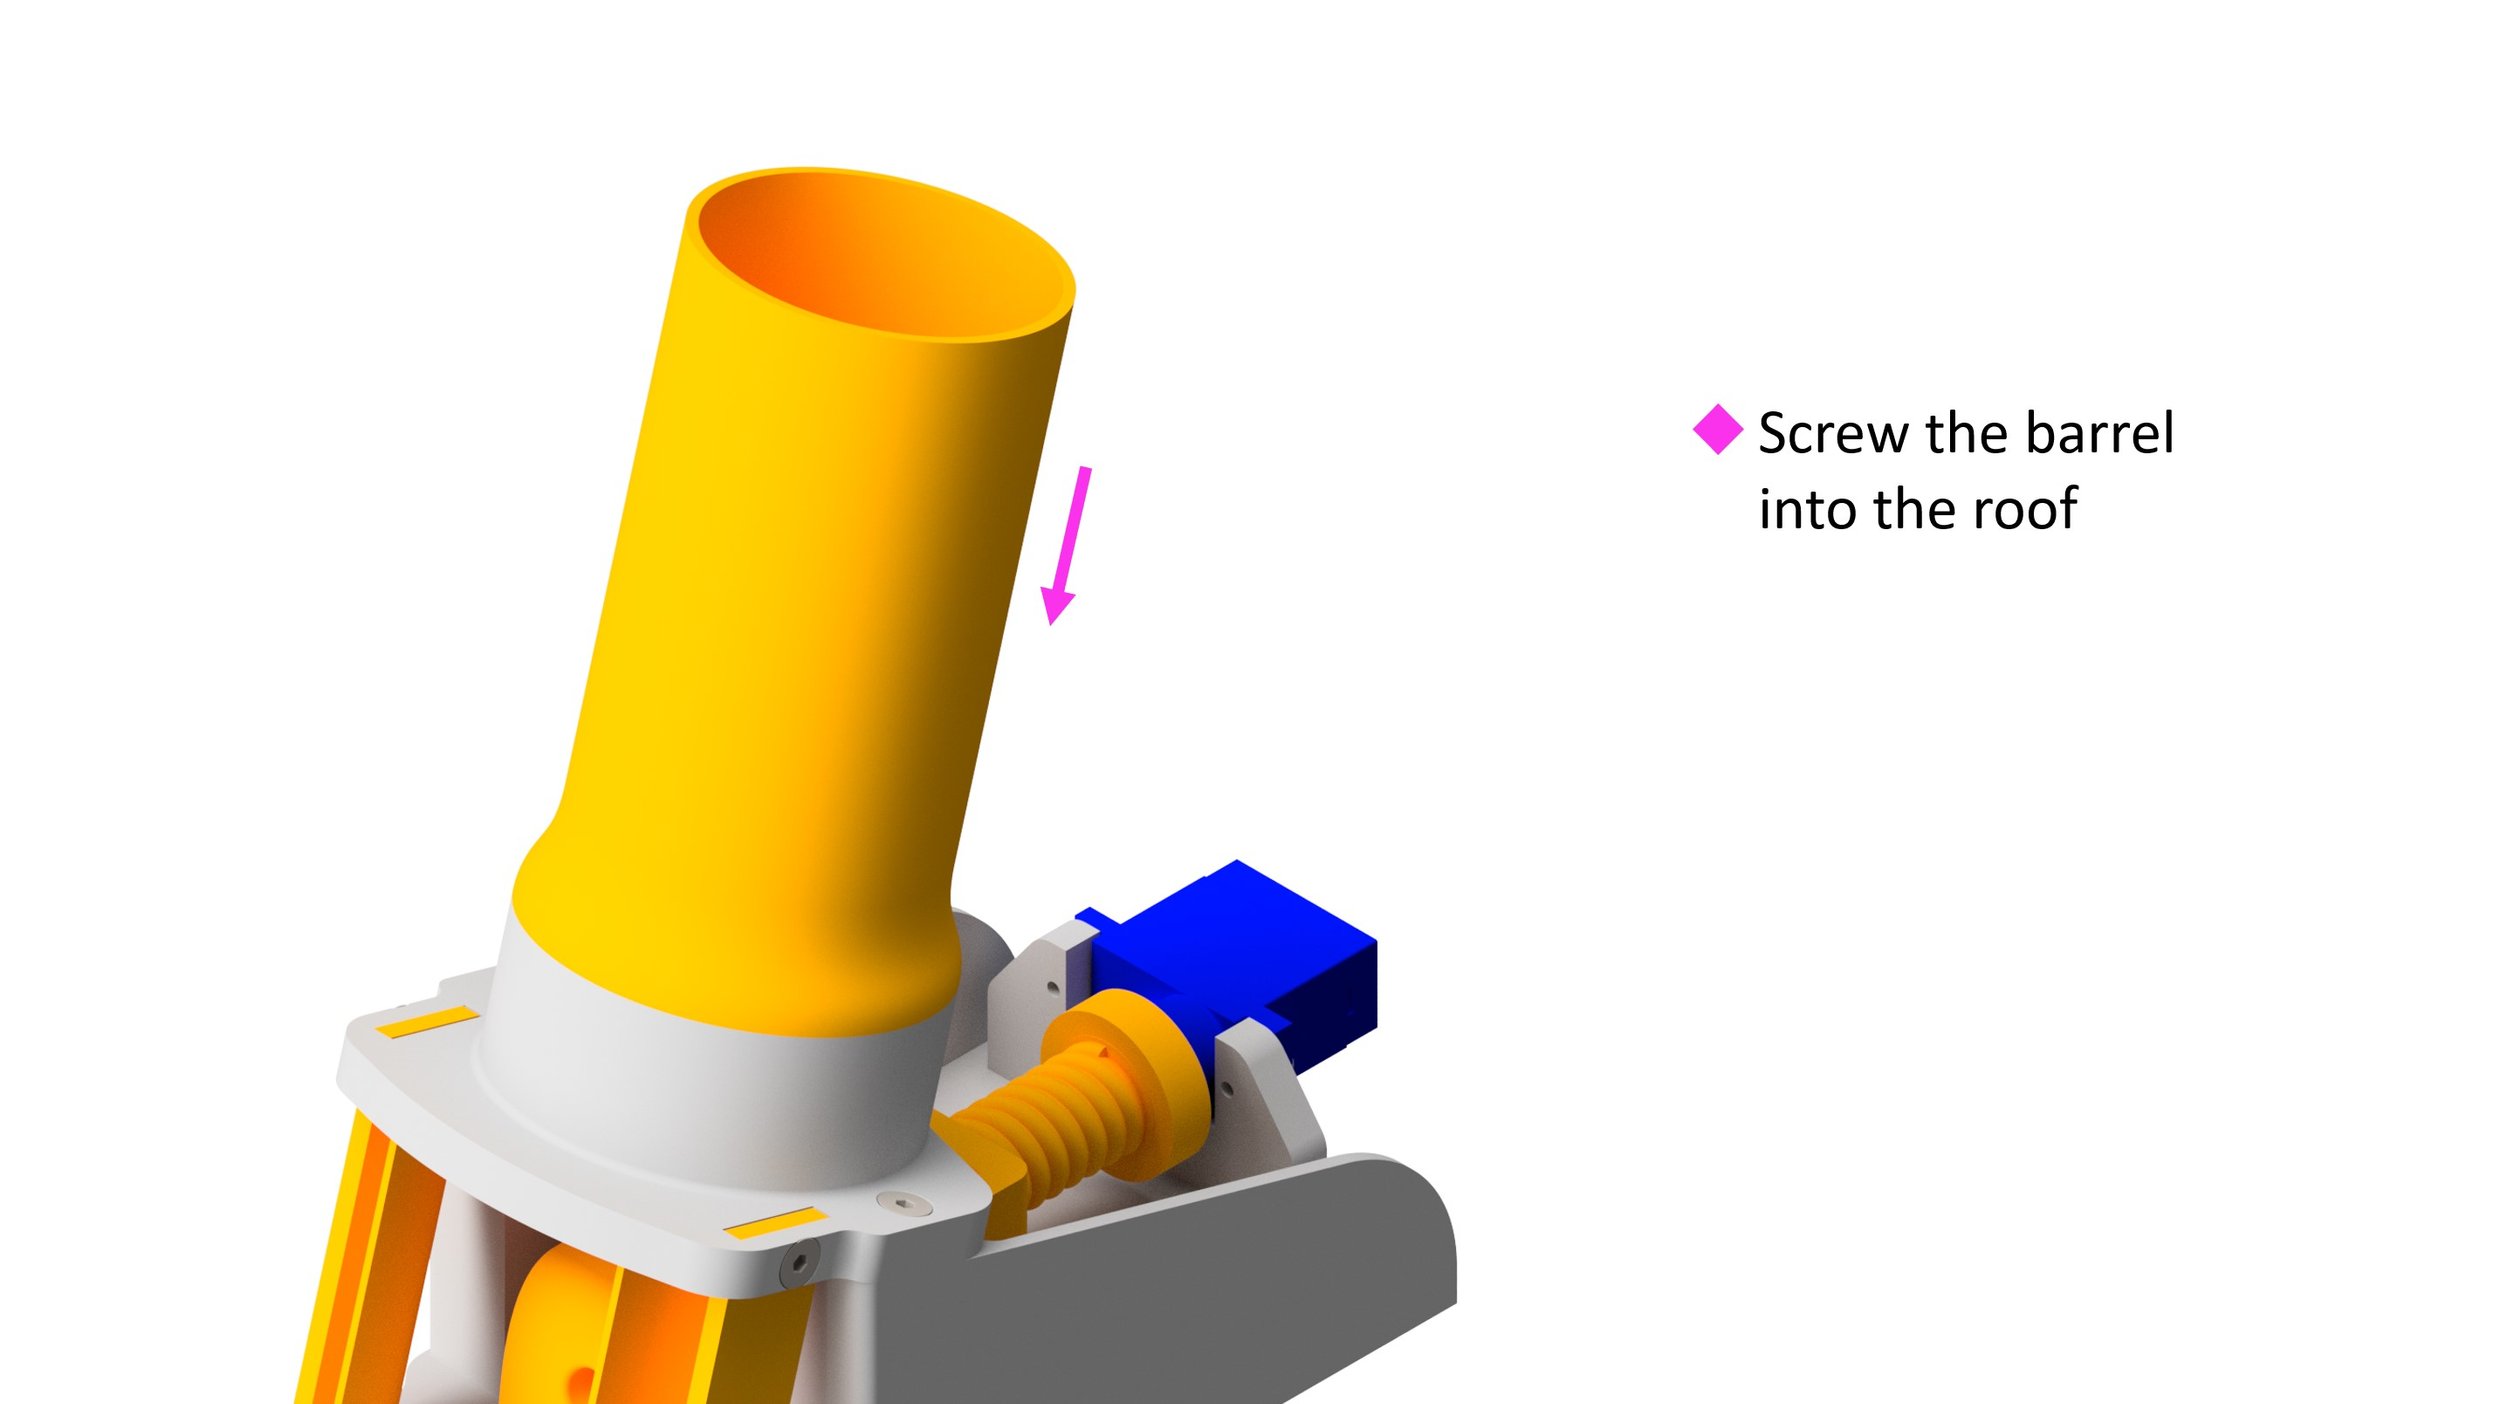
Attach the barrel
8Attach the Barrel
- Screw the barrel into the roof.
You're Done!
Your ping pong shooter attachment is fully assembled and ready to clip onto your Micromelon Rover. Load a ping pong ball into the barrel and program the servo to fire using the Code Editor.