Introduction
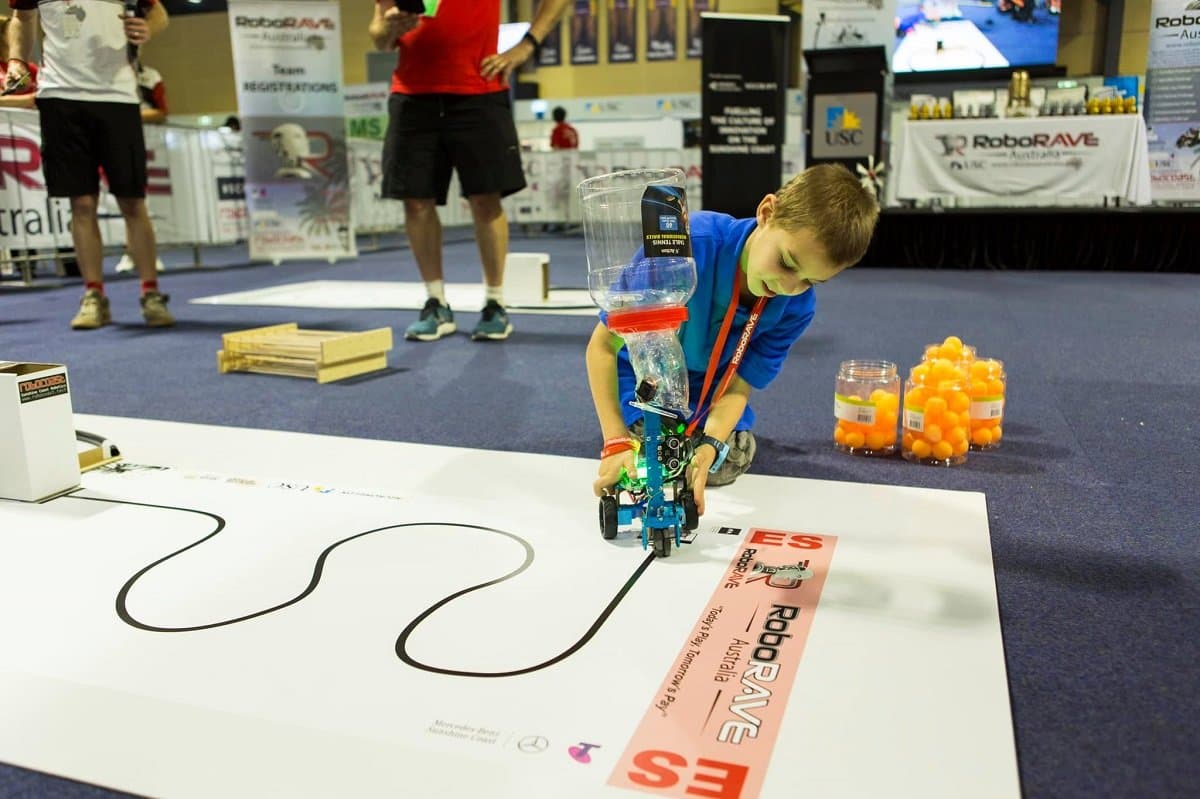
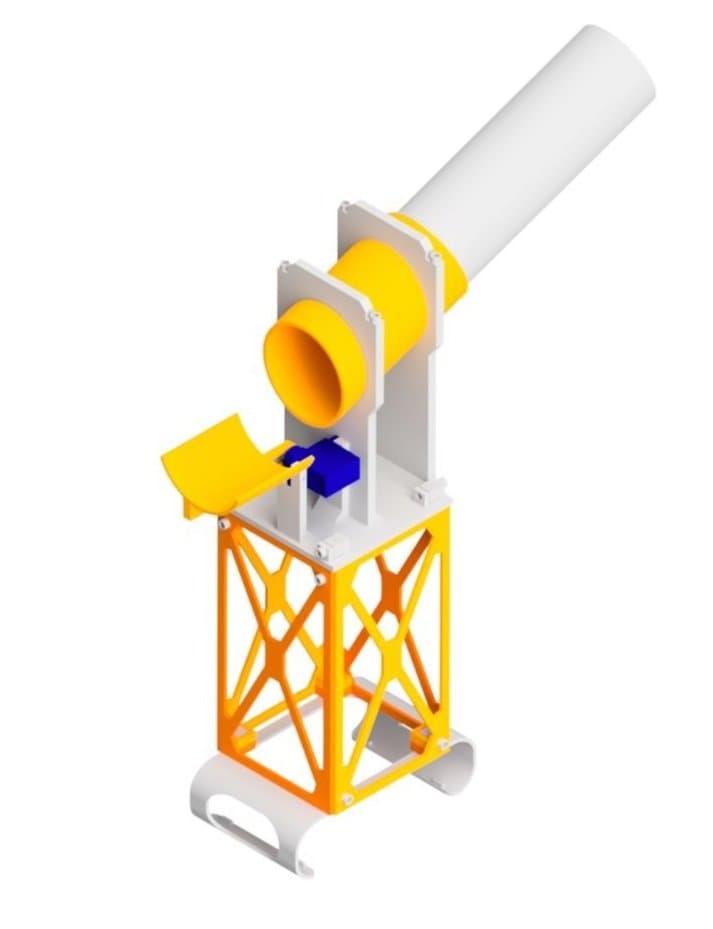
The RoboRAVE Line Follow attachment adds an ultrasonic sensor barrel and servo-controlled aiming mechanism to your Rover, allowing it to follow lines on the ground during RoboRAVE competitions. The attachment clips onto the Rover shell and uses a micro servo to tilt the sensor. This guide will walk you through printing and assembling the attachment step by step.
What You'll Need
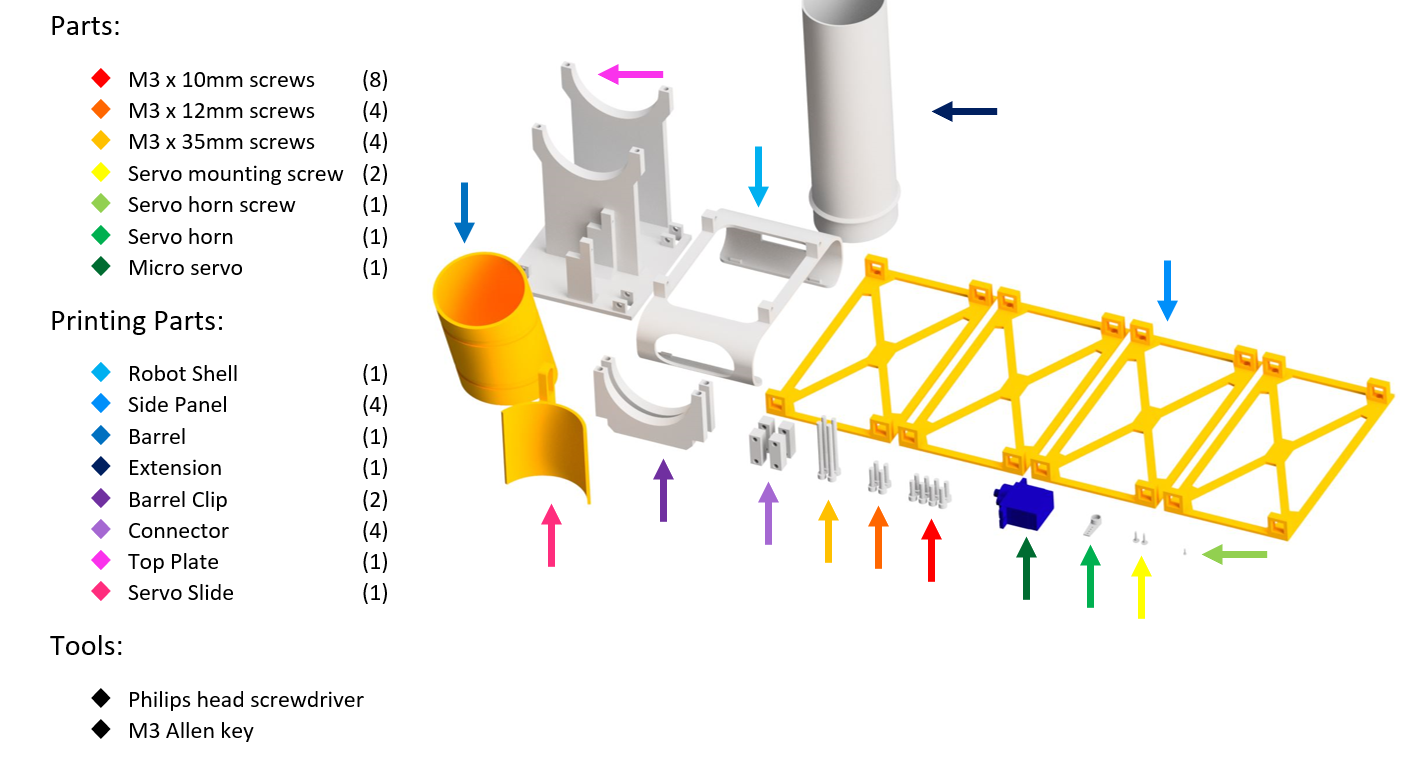
Parts:
- 8x M3 x 10mm Screws
- 4x M3 x 12mm Screws
- 4x M3 x 35mm Screws
- 2x Servo Mounting Screws
- 1x Servo Horn Screw
- 1x Servo Horn
- 1x Micro Servo
Tools:
- Phillips Head Screwdriver
- M3 Allen Key
 Thingiverse
 Printables
 Makerworld
13D Print Your Parts
- 1x Robot Shell
- 4x Side Panel
- 1x Barrel
- 1x Extension
- 4x Barrel Clip
- 4x Connector
- 1x Top Plate
- 1x Servo Slide
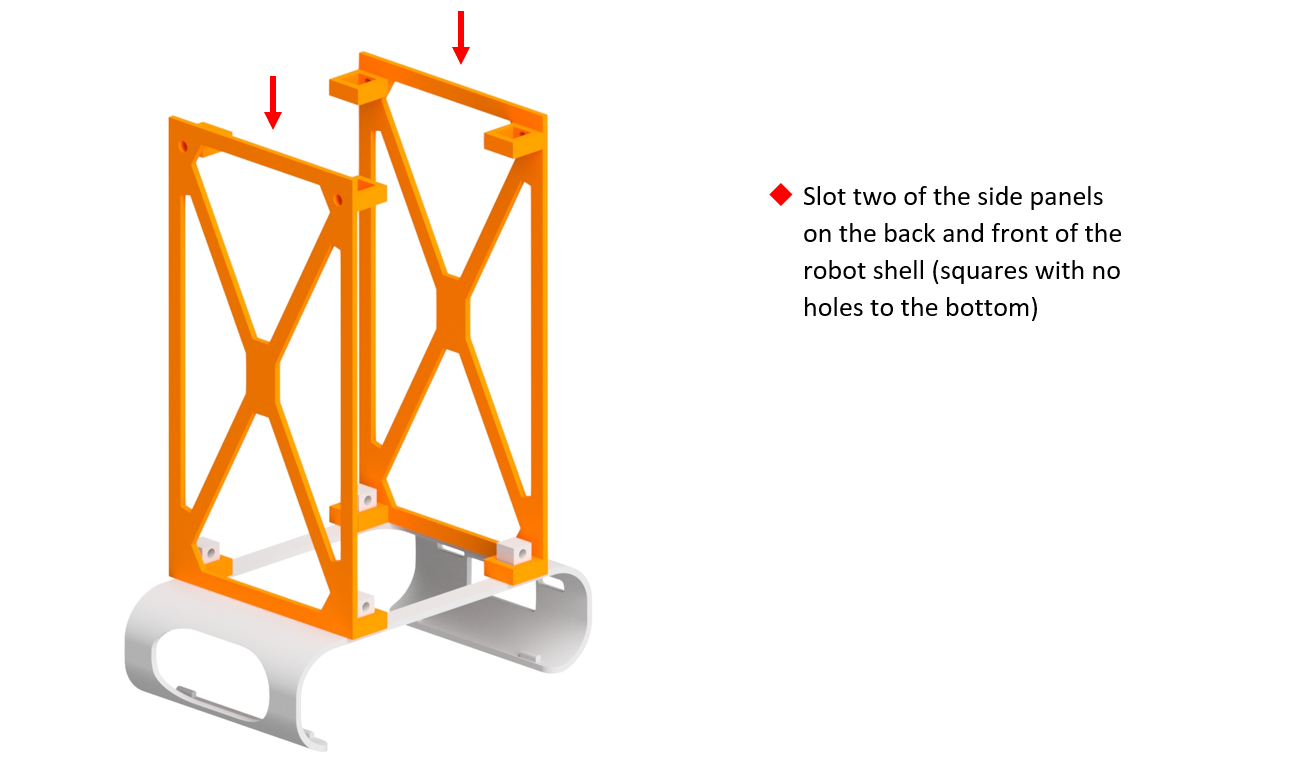
2Attach the First Two Side Panels
- Slot two of the side panels on the back and front of the robot shell (squares with no holes to the bottom).
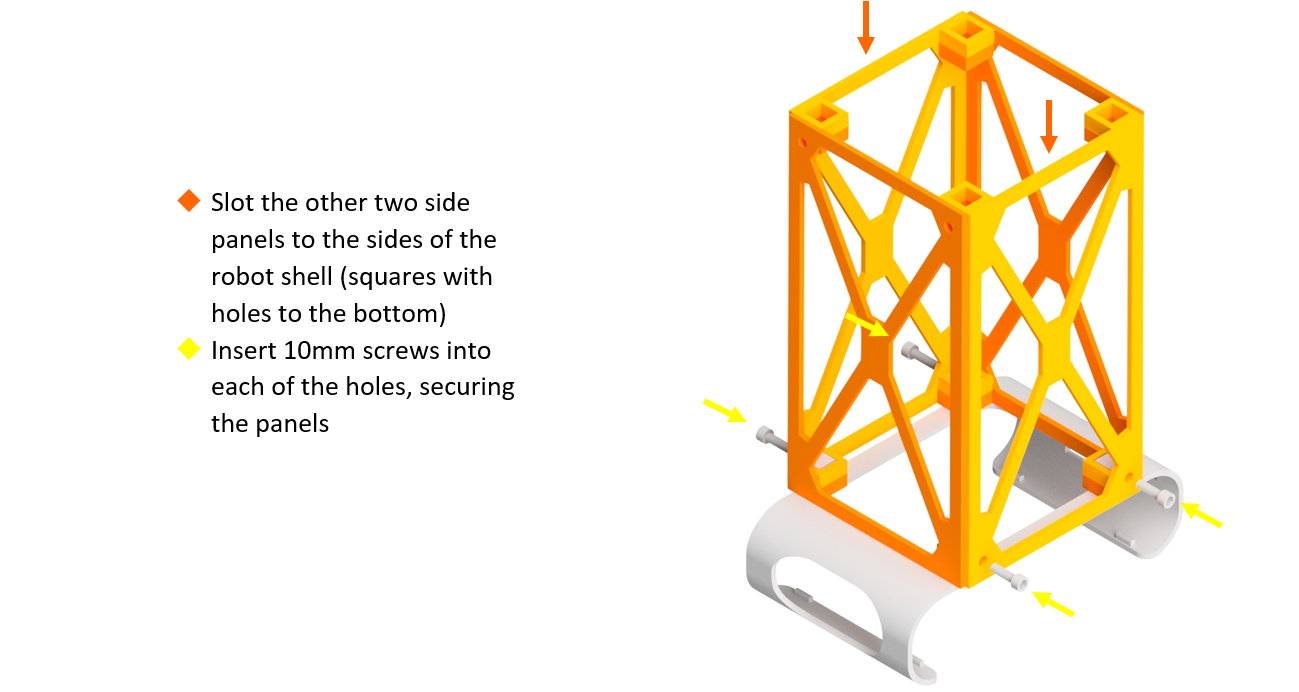
3Attach the Remaining Side Panels
- Slot the other two side panels to the sides of the robot shell (squares with holes to the bottom).
- Insert 10mm screws into each of the holes, securing the panels.
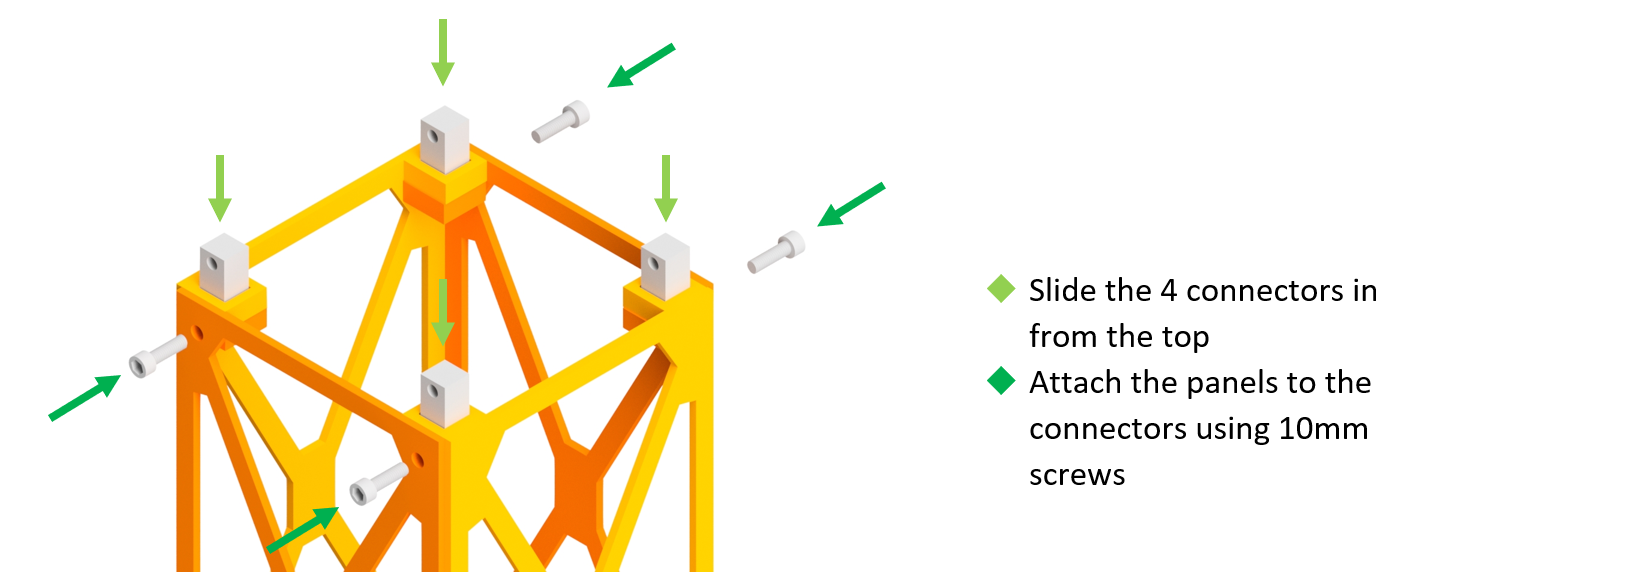
4Install the Connectors
- Slide the 4 connectors in from the top.
- Attach the panels to the connectors using 10mm screws.
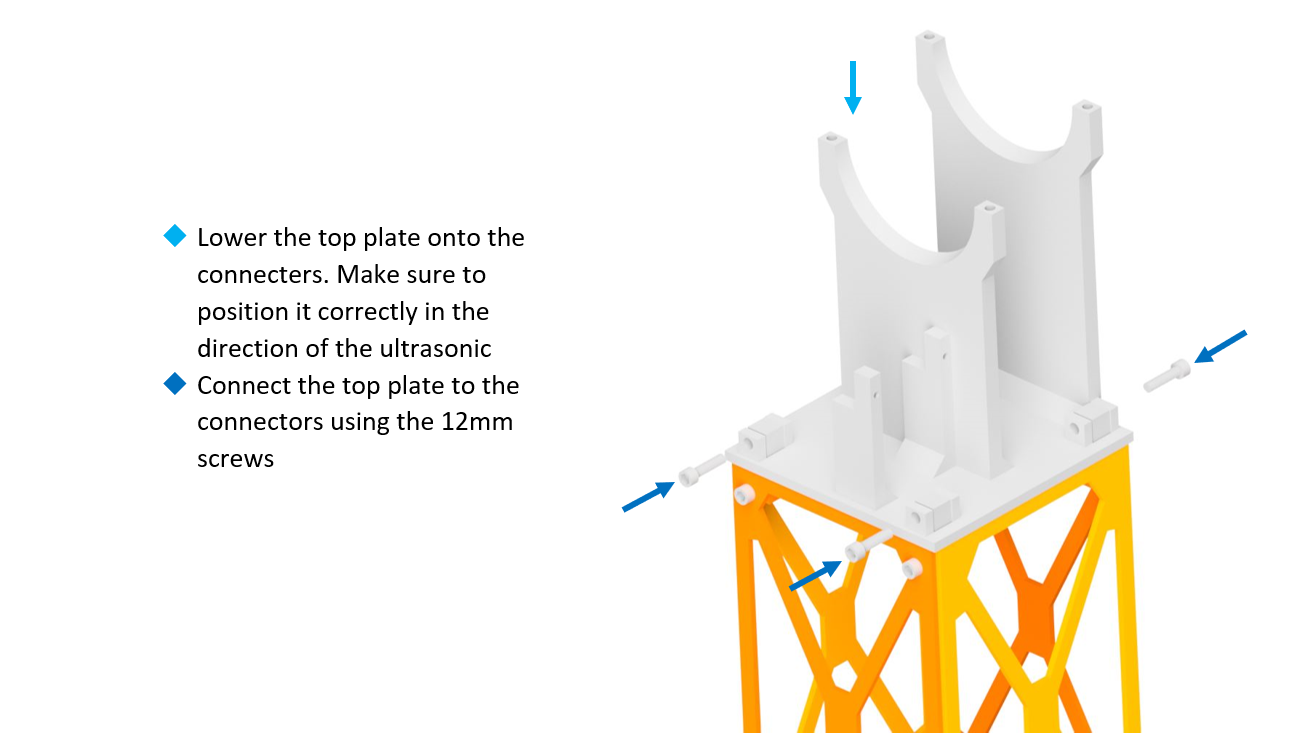
5Attach the Top Plate
- Lower the top plate onto the connectors. Make sure to position it correctly in the direction of the ultrasonic.
- Connect the top plate to the connectors using the 12mm screws.
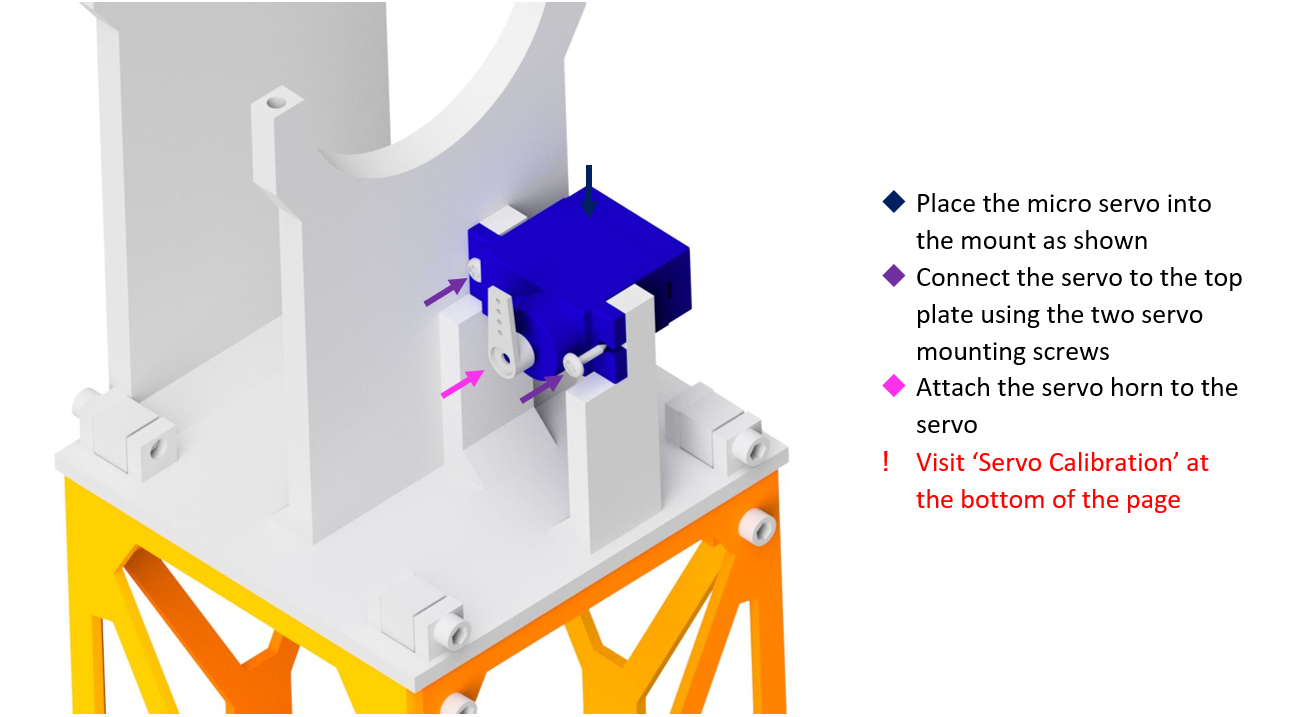
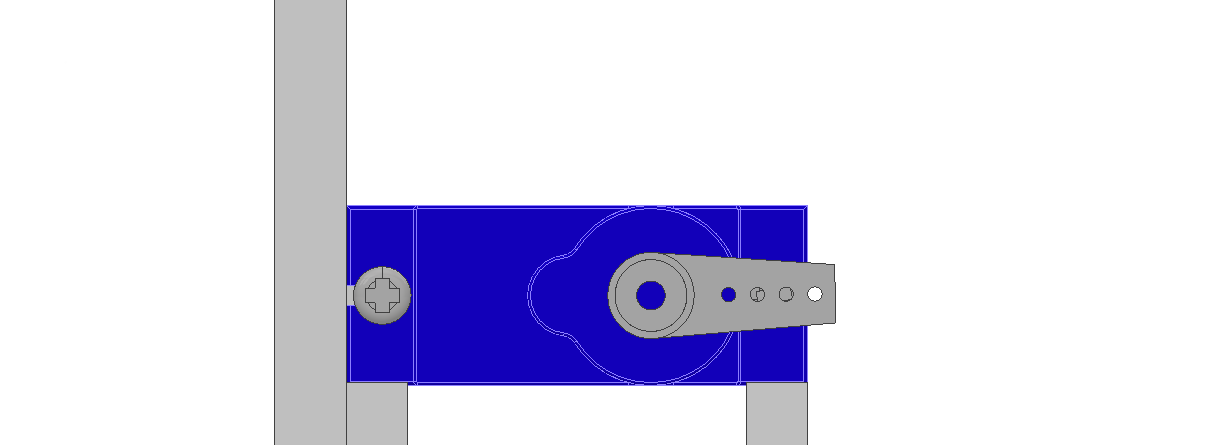
6Install the Servo
- Place the micro servo into the mount as shown.
- Connect the servo to the top plate using the two servo mounting screws.
- Attach the servo horn to the servo.
- Calibrate the servo before proceeding (see the next step).
7Calibrate the Servo
- Before attaching the servo horn to the servo, you need to make sure the servo moves in the correct range.
- Plug the servo into the right port and run the following code.
- Upload the code and attach the servo horn to the servo so it's in the correct position when the servo is at 0.
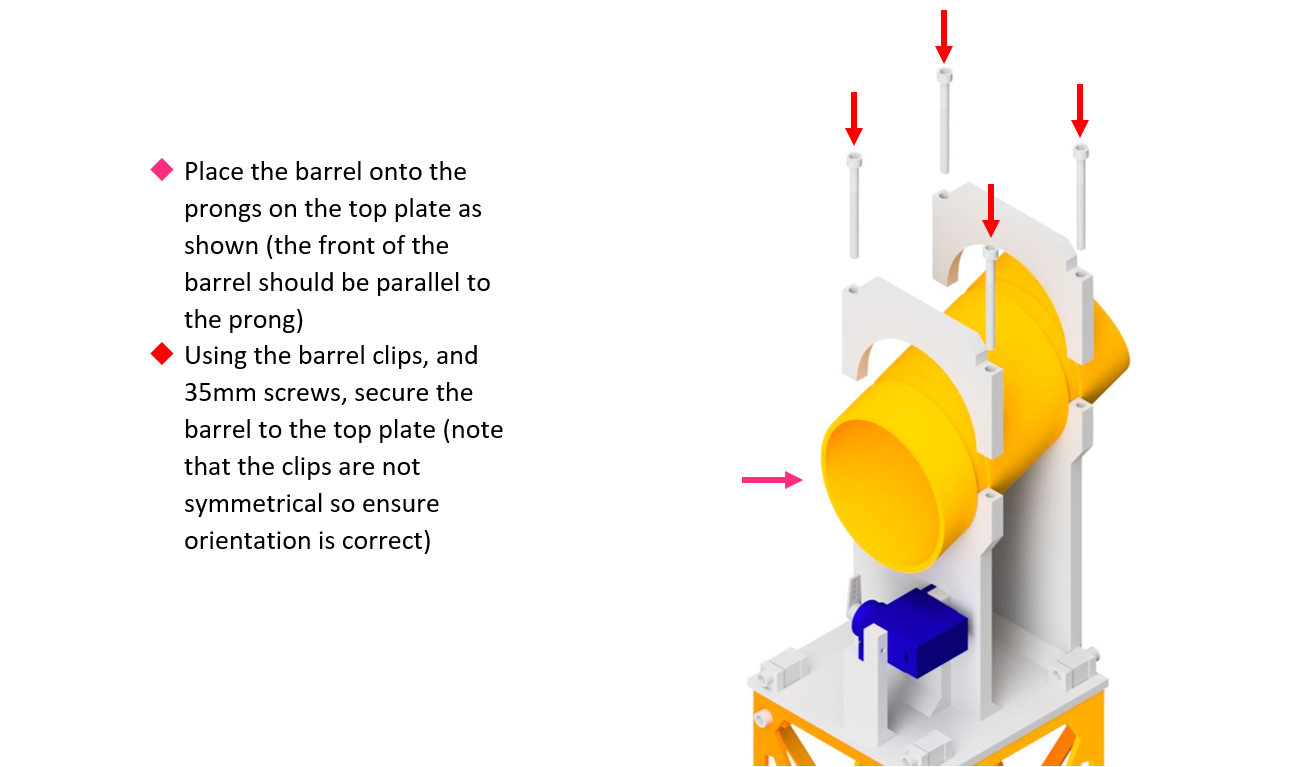
8Attach the Barrel
- Place the barrel onto the prongs on the top plate as shown (the front of the barrel should be parallel to the prong).
- Using the barrel clips and 35mm screws, secure the barrel to the top plate (note that the clips are not symmetrical so ensure orientation is correct).
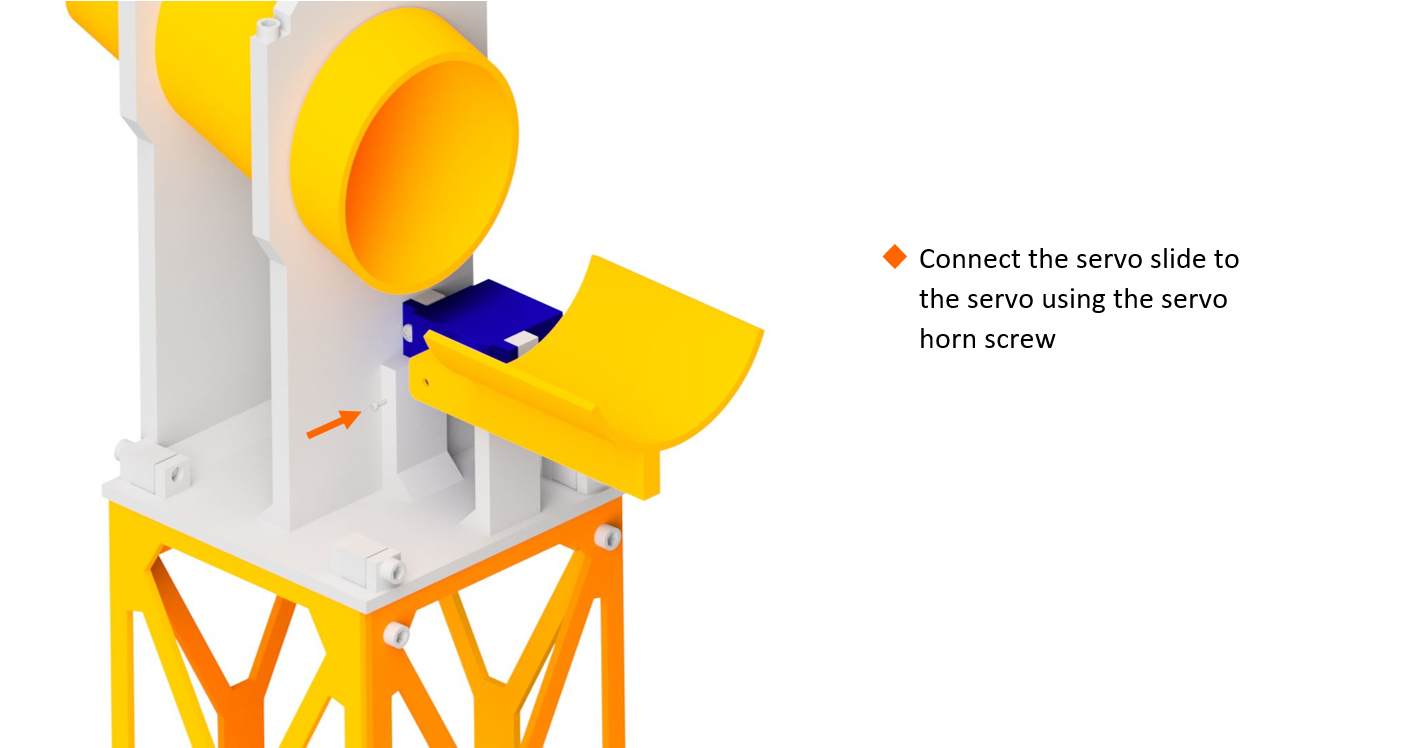
9Attach the Servo Slide
- Connect the servo slide to the servo using the servo horn screw.
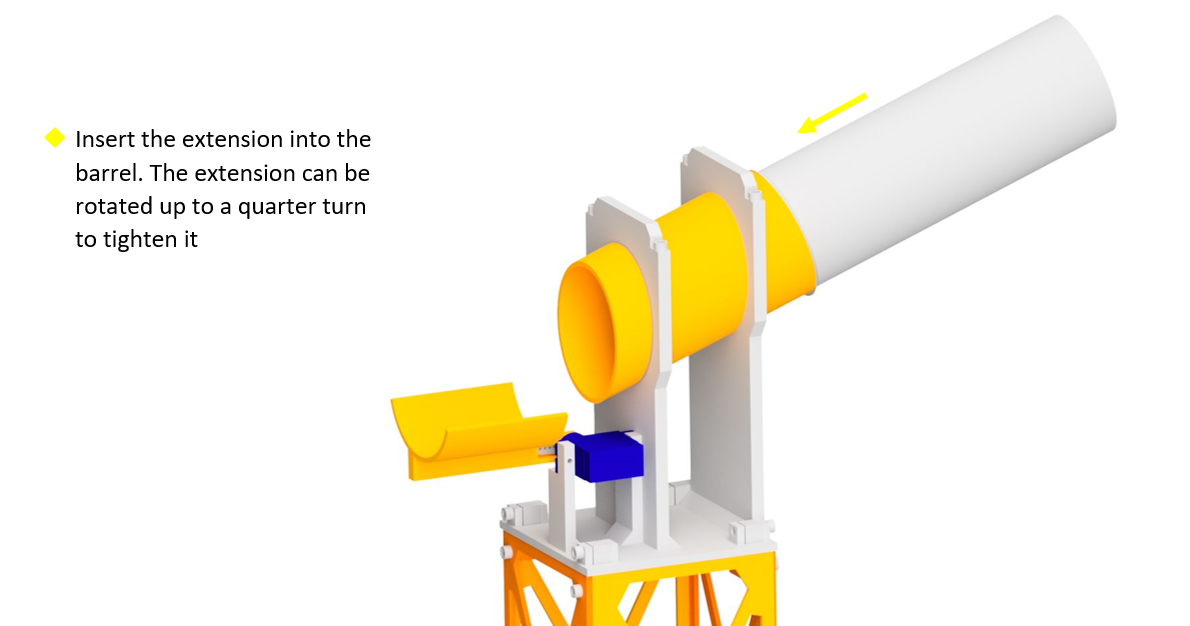
10Insert the Extension
- Insert the extension into the barrel. The extension can be rotated up to a quarter turn to tighten it.
You're Done!
Your RoboRAVE Line Follow attachment is fully assembled and ready to clip onto your Micromelon Rover. The servo-controlled barrel lets you aim the ultrasonic sensor for line detection during RoboRAVE competitions.