My name is Binara, and I will be taking you through the entire design process of how I created the domino layer attachment. The original task was to develop an attachment for the rover to store and lay dominos in patterns coded by the user.
Step 1: Research
Every idea has to start somewhere, so the best way to get inspiration is to see what others have done. If your idea doesn't exist, it can be helpful to break it up into smaller, existing ideas.
Here are some of the ideas I found out there for domino layers:
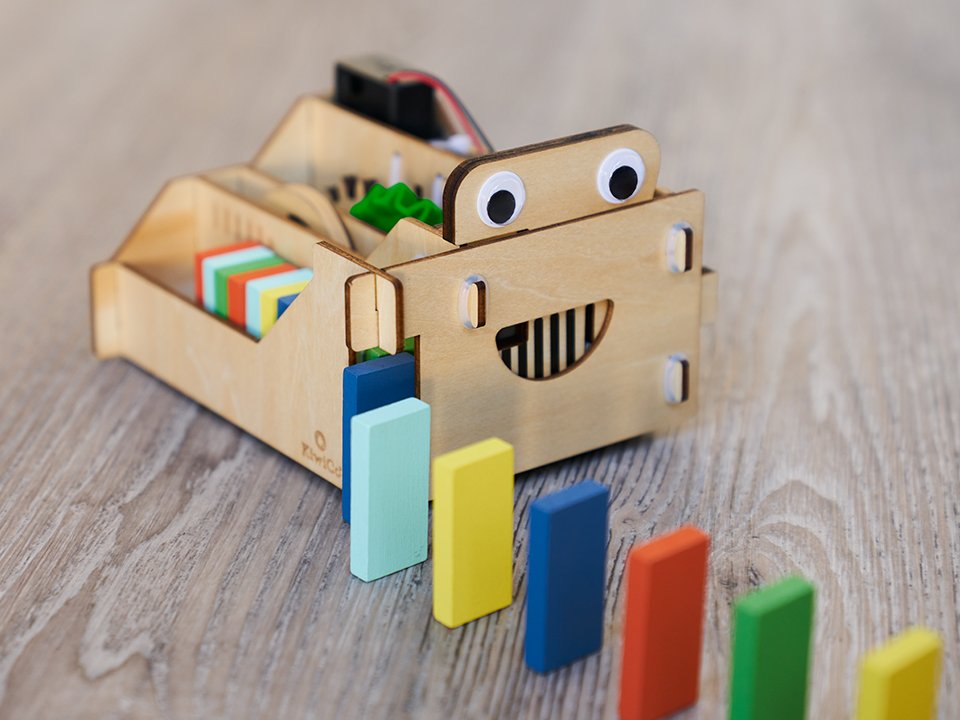
Existing domino layer machine for inspiration
Most of these designs have the same core concept. They store the dominoes in a stack and shift them to the ground one by one. While they are not identical, all the designs are similar.
Step 2: Ideation
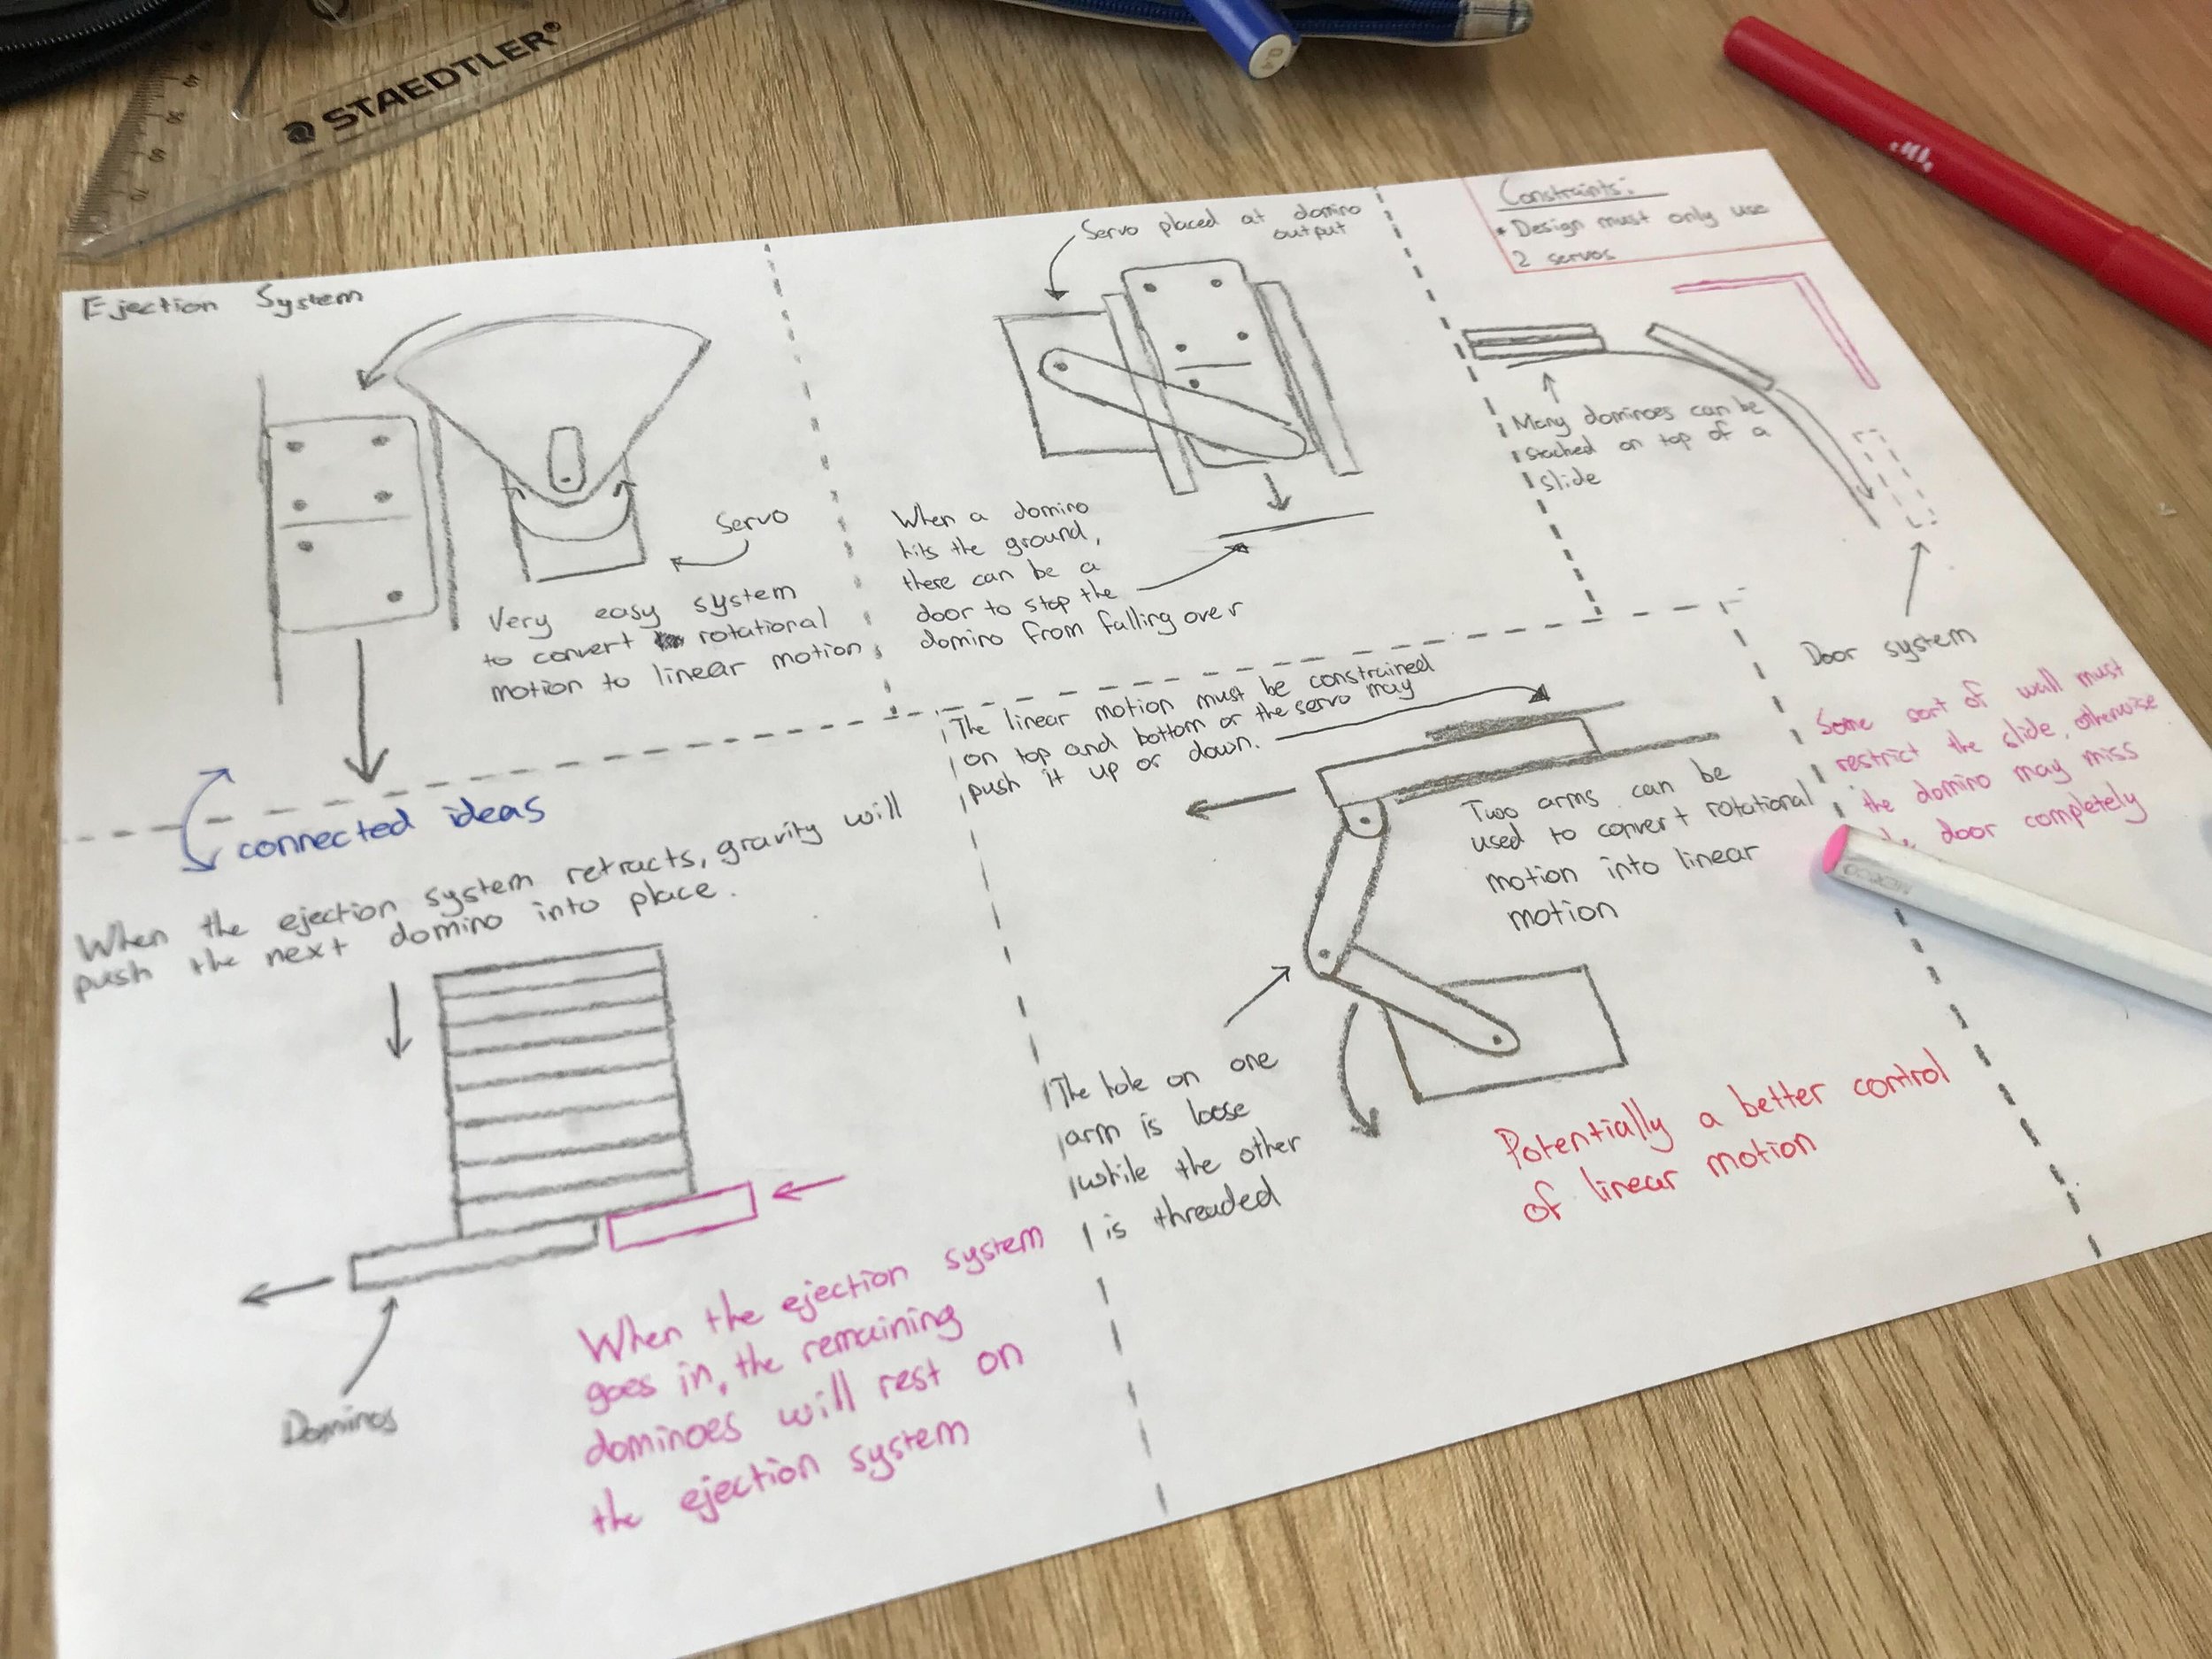
Now that we have a couple ideas, it's time to plan out how you will tackle the problem. Sometimes sketches are a great way to get ideas down on paper, which helps to get an idea of the whole picture.
Step 3: Prototype
Pick a design and get started on it! Depending on how you make your creations, this part will differ for many. I planned on using 3D printing to prototype my domino layer. To design the parts, I used Autodesk Inventor to visualise and slowly build a printable model.
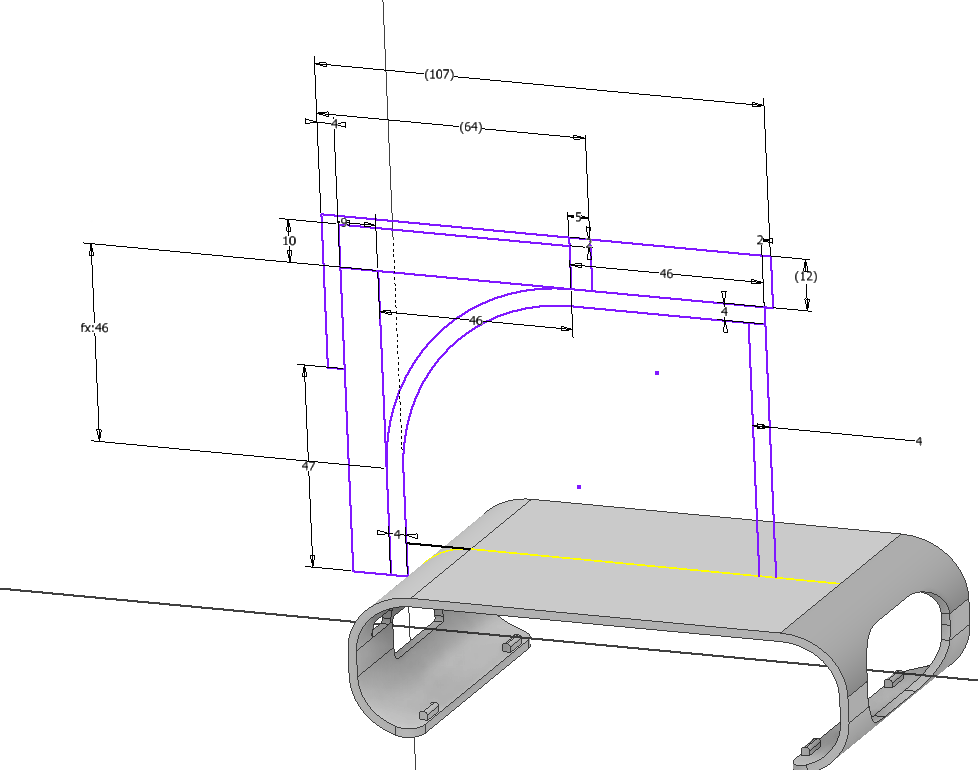
CAD model of the domino layer in Autodesk Inventor
Step 4: Iterate and Evaluate (Back to the drawing board)
Unfortunately, it's very unlikely that idea number 1 will go exactly as you want, and I was no exception. The important thing is to sit down, grab a pen, and write down what was good and bad about your design. Think about what you would change if you could build it again.
After that, go back to step 3 and give it another shot!
While thousands of tiny changes may be made along the way, a new version isn't made until there is a significant change in how the design works.
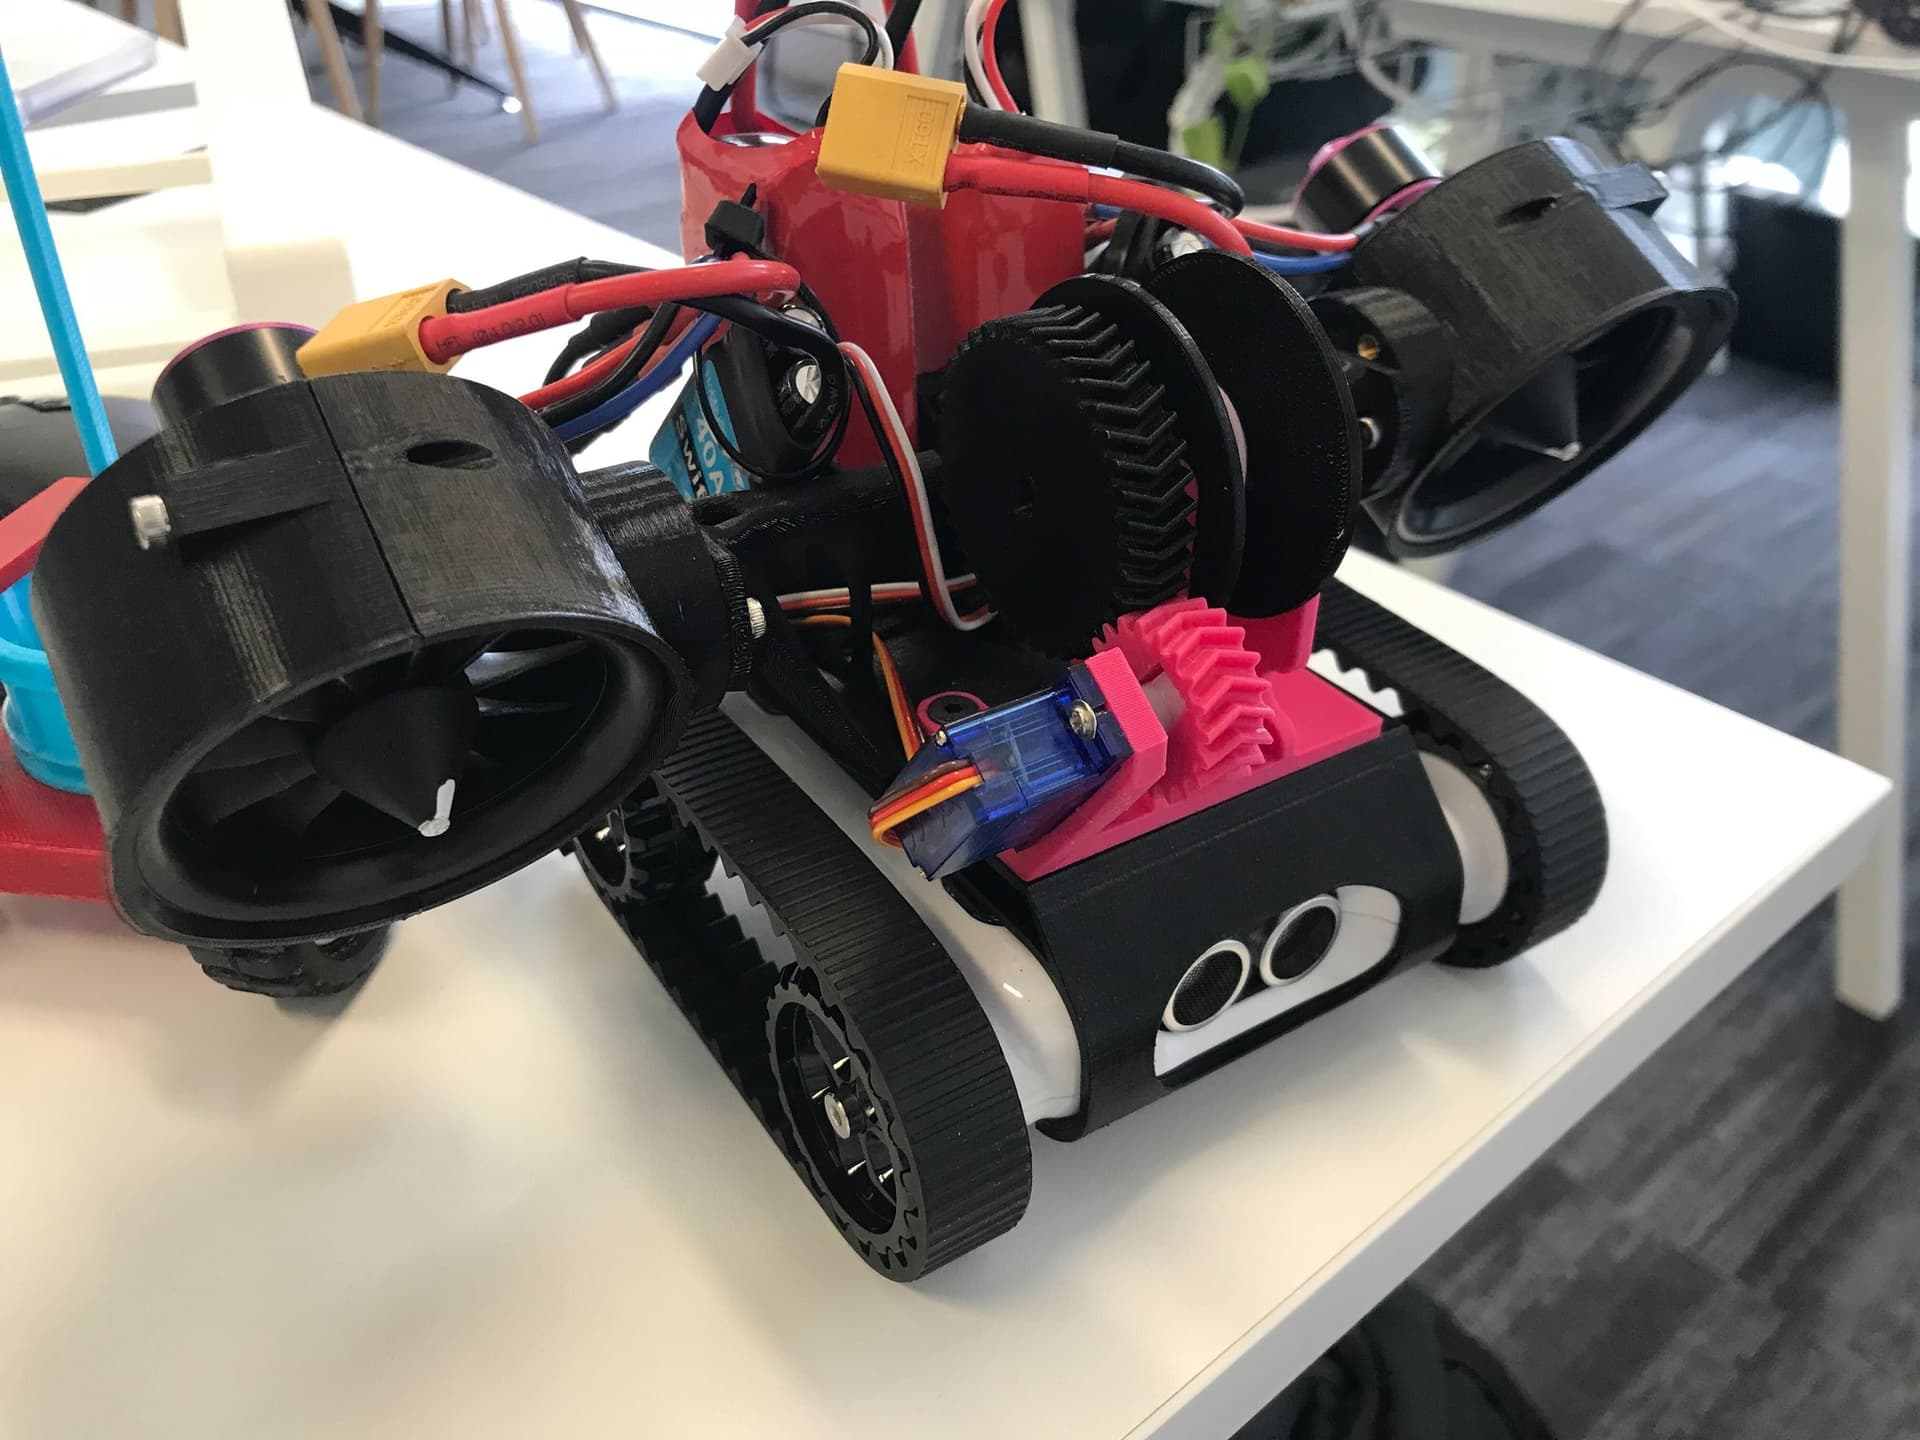
Version 1:
Here we've got the dominoes coming in from the top. The paddle spins around and knocks a domino down into a slide. The domino then slides down to a door on a servo. The door is needed to prevent the dominoes from falling over from the impact of hitting the ground.
Notes to fix for the following design:
-
The screen is completely hidden by the attachment, so the rover can't be controlled while it's mounted.
-
Even with the servo door closed, dominoes still fell over from the impact of hitting the ground.
-
The paddle's swing path didn't always clear the next domino cleanly, jamming the mechanism.
-
The slide angle was too steep, so dominoes picked up speed and bounced off the door instead of being held upright.
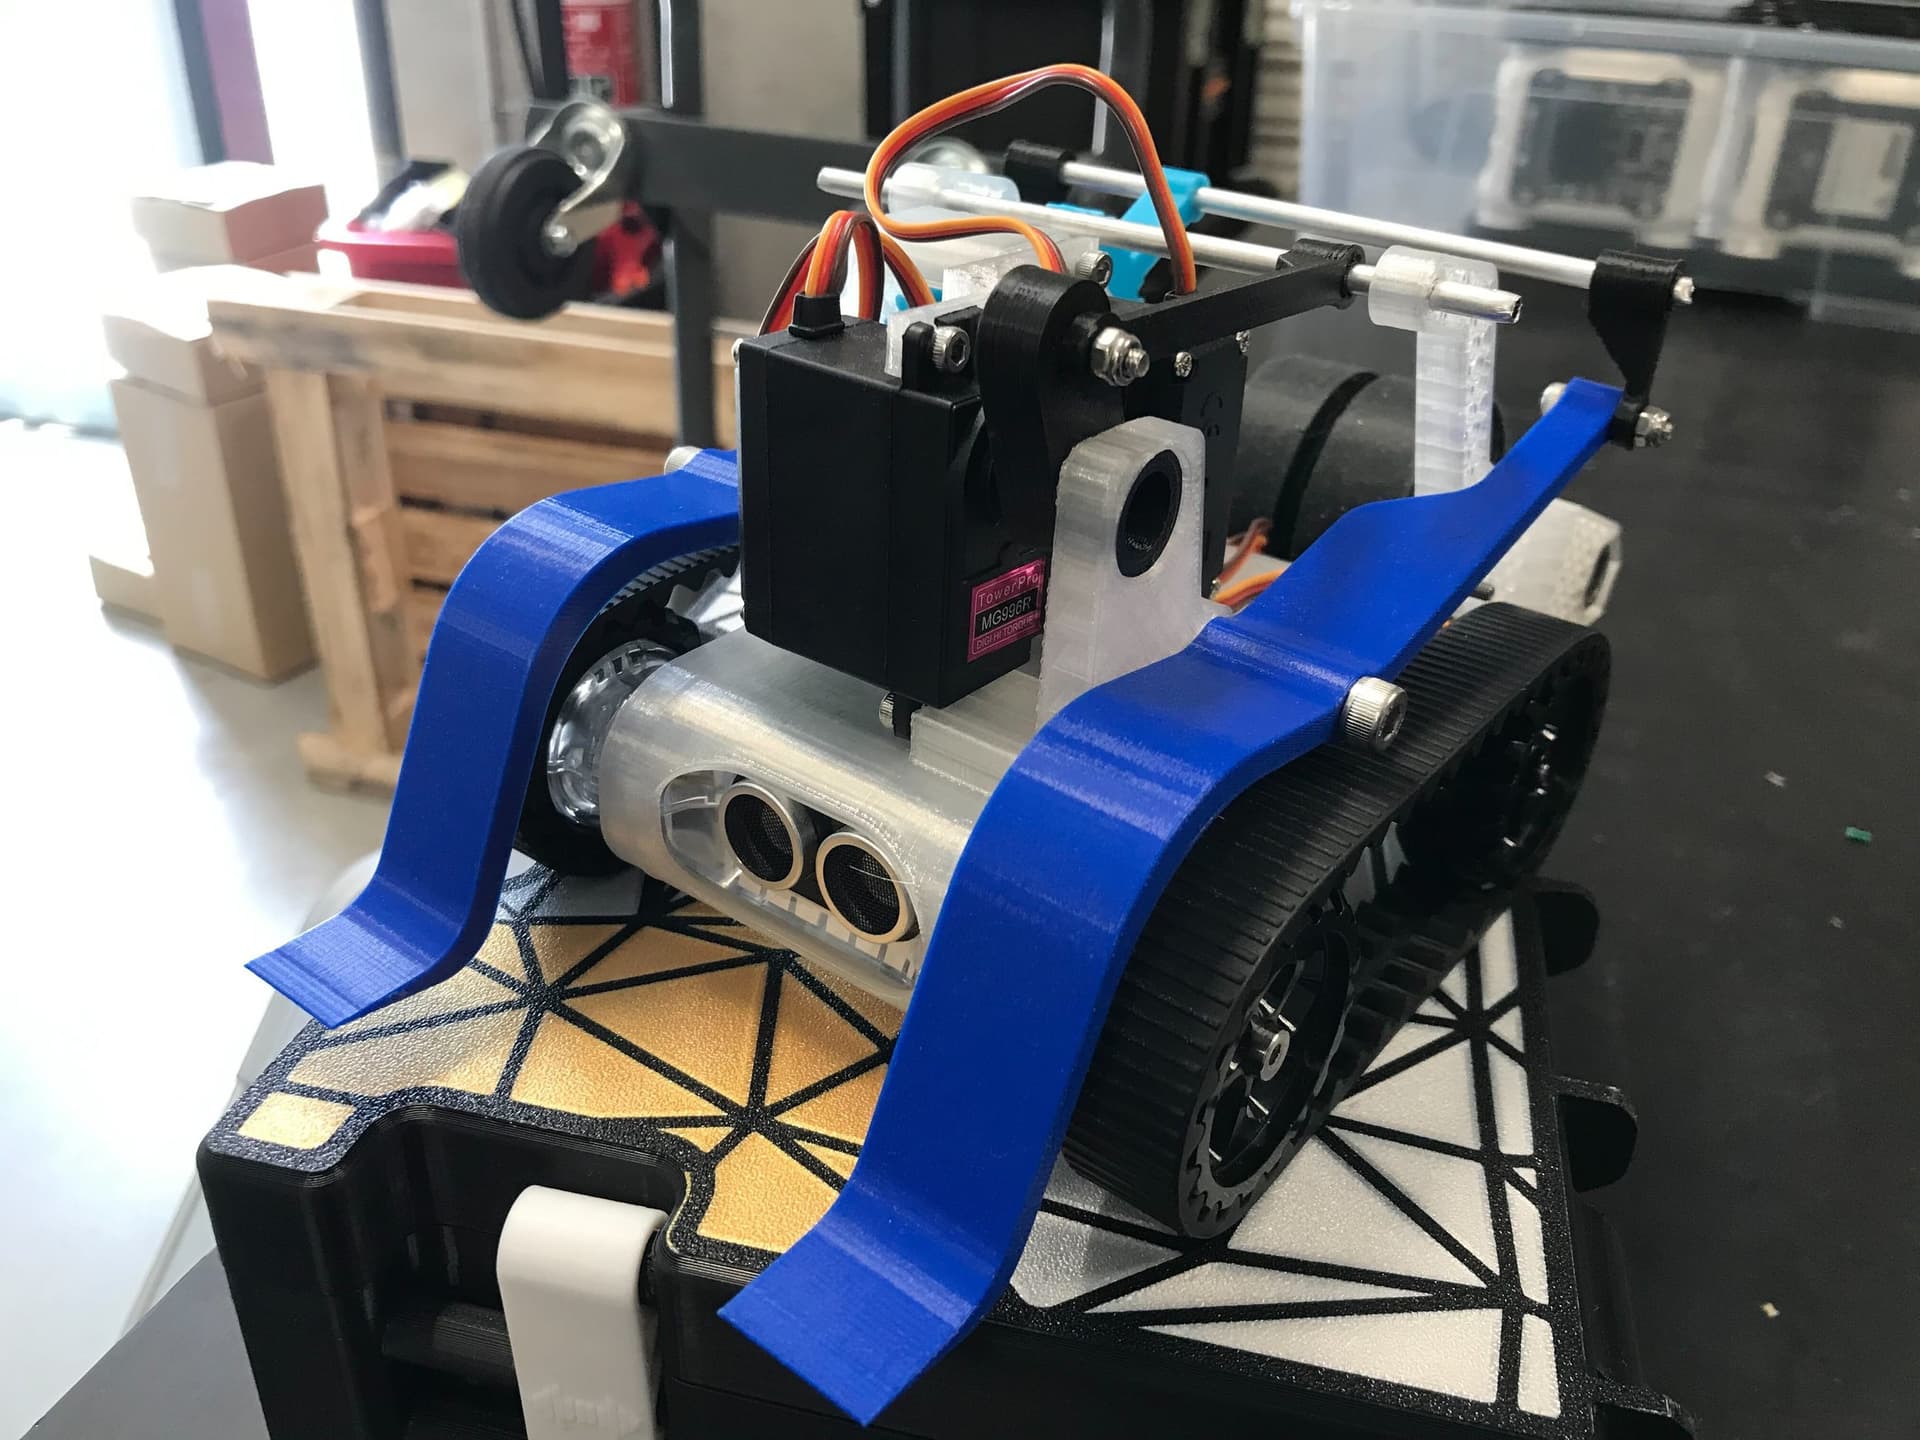
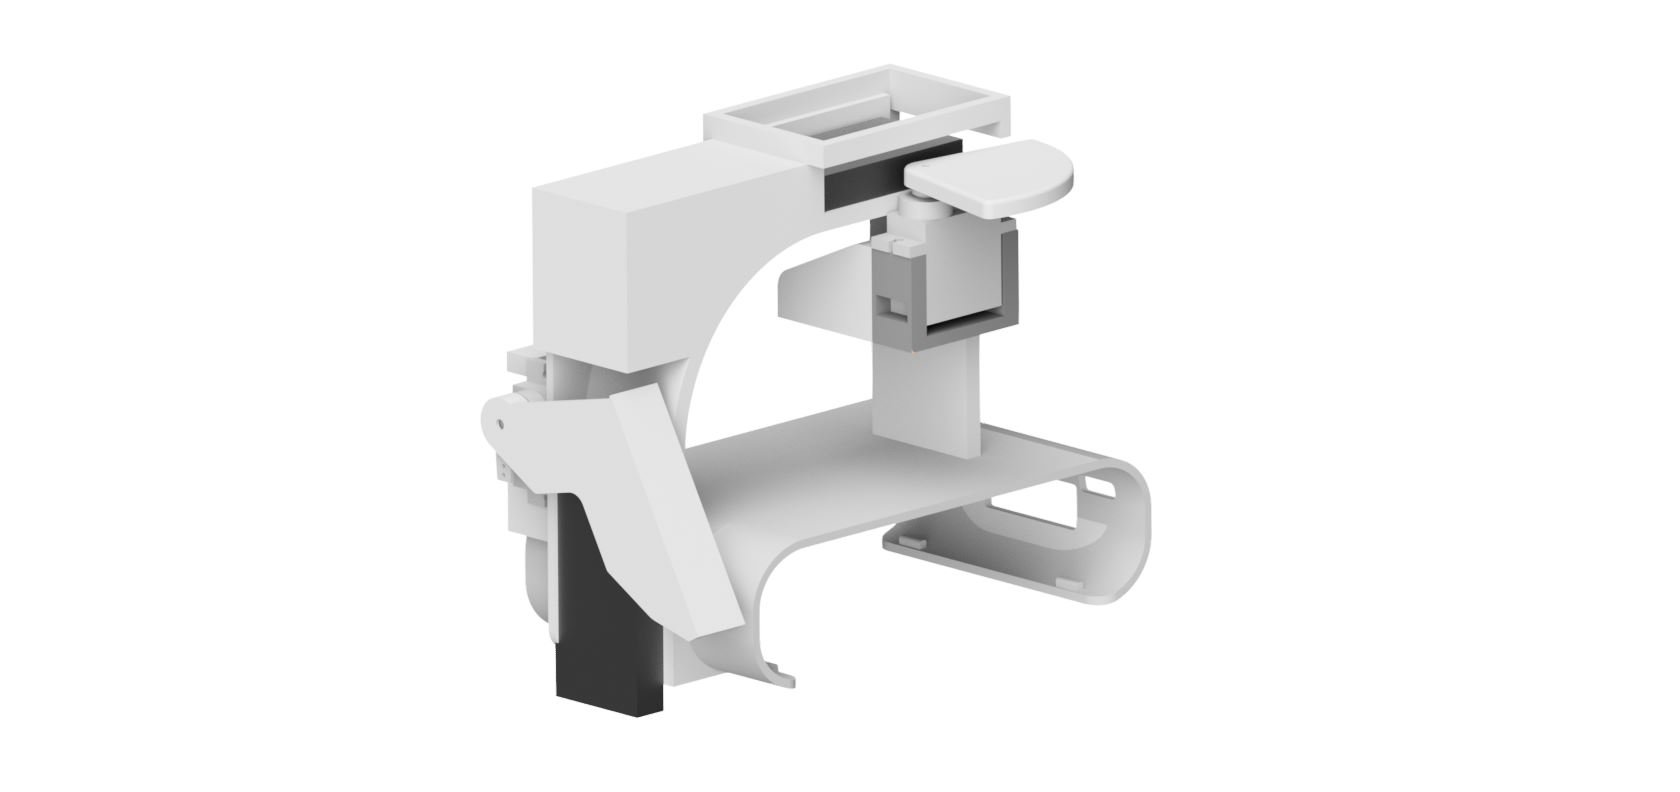
Version 2:
We've added a cut-out in the body to read the screen. Also, the door was changed entirely. It was noticed in the last design that dominoes may still fall over despite the door being closed. This new door can now squeeze a domino against itself to ensure it's standing upright.
Notes to fix for the following design:
-
The screen cut-out works well and the new squeeze door keeps dominoes upright once they reach it.
-
The paddle still misfires, sometimes pushing two dominoes through at once, sometimes none.
-
Spinning the paddle gives each domino a sideways nudge that makes it topple inside the chute before it reaches the door.
-
The paddle servo is constantly working against jams, which drains the battery faster than expected.
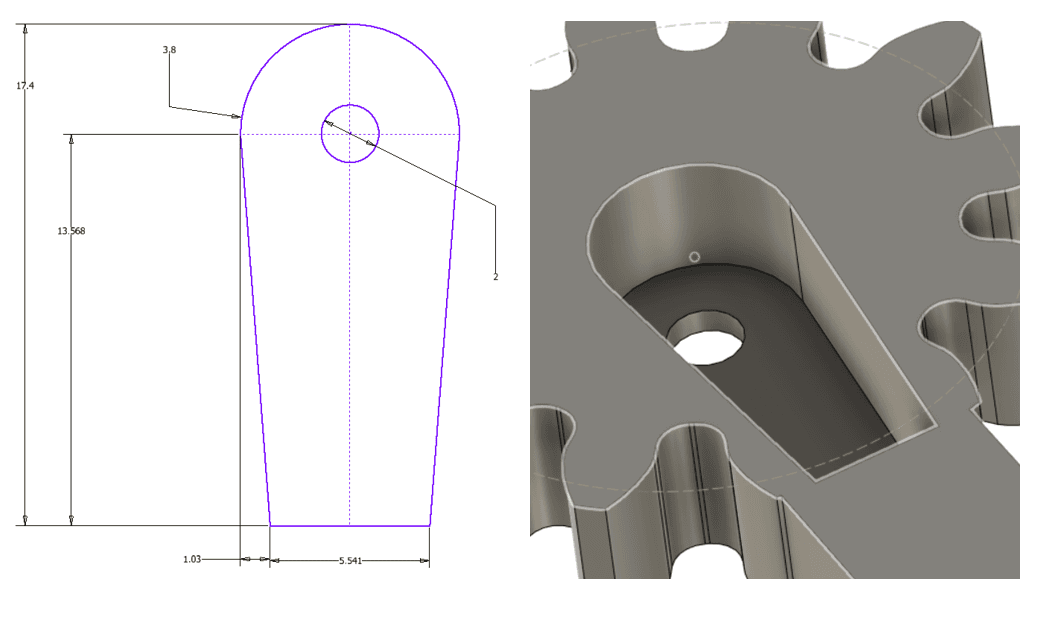
Version 3:
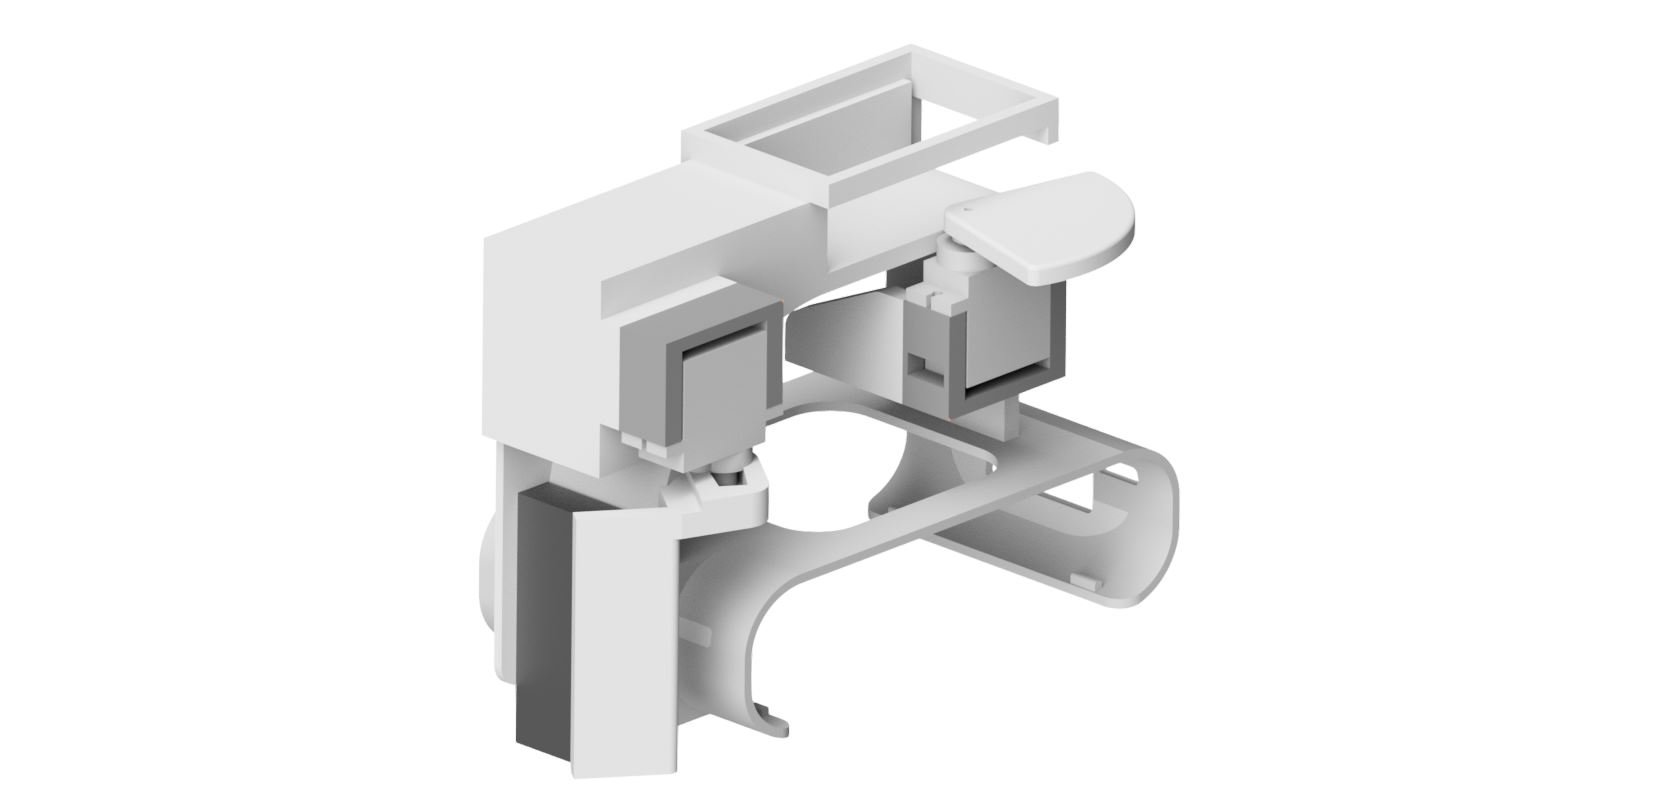
This significant change removed the paddle and replaced it with a sliding mechanism that moved back and forth. When it comes forward, it pushes a domino into the slide. And when it pulls back, the next domino will fall into position.
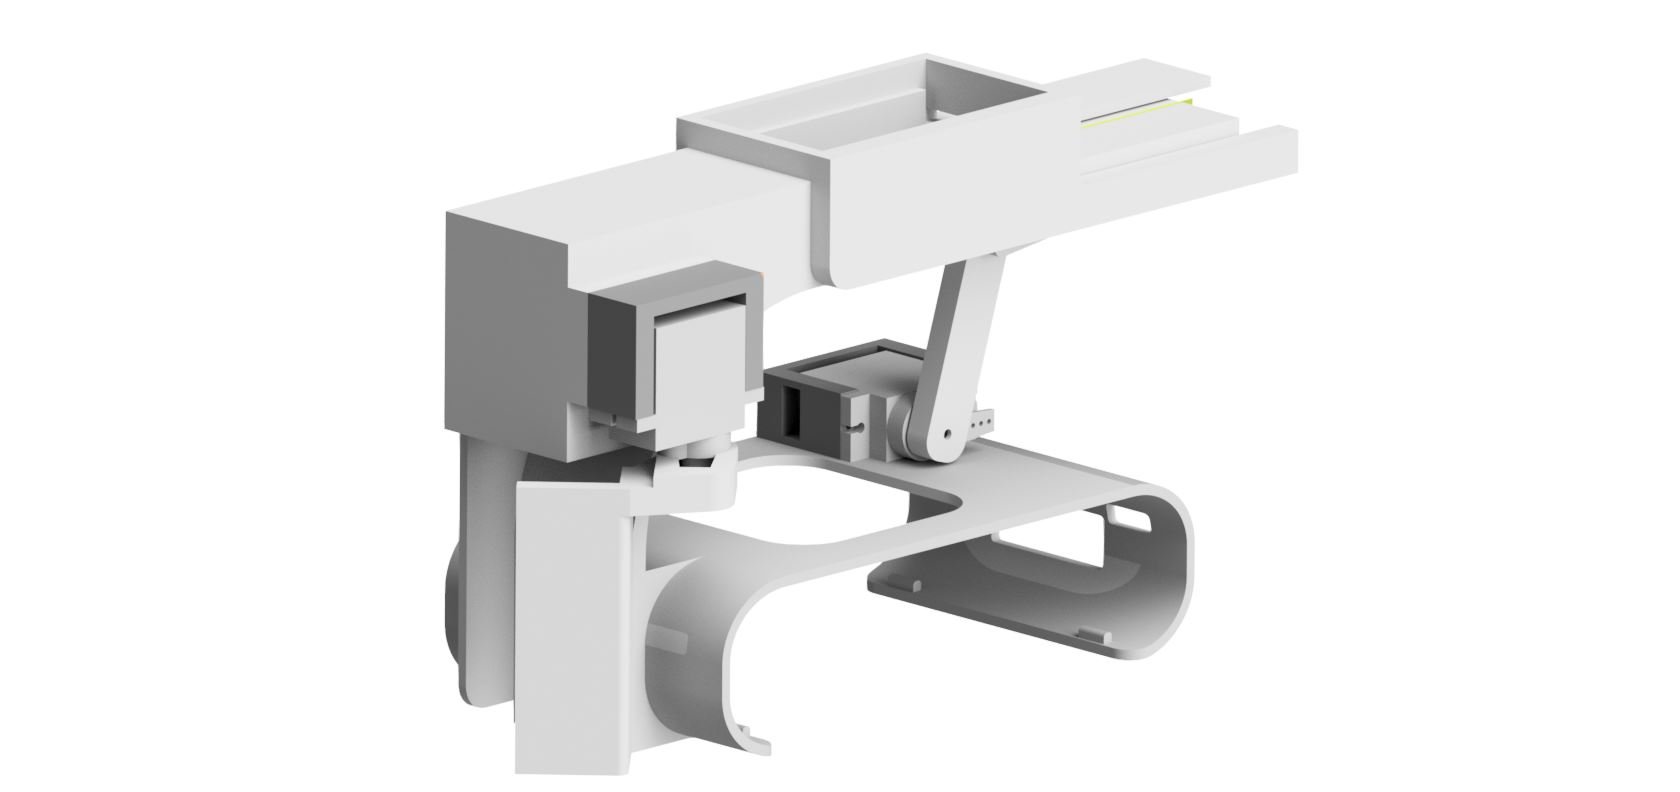
Version 3 CAD with a sliding domino ejector
Final design review:
-
The sliding pusher is far more reliable than the paddle. Dominoes feed one at a time without jamming.
-
Combined with the squeeze door from V2, dominoes land standing up consistently.
-
The print is more compact than the earlier versions and goes together without supports.
-
Future tuning: the rover is currently slow while laying dominoes. Optimising the servo timing should close that gap.
Step 5: Finalise
And finally, after many, many iterations, the design works. Now all that's left is to consider a couple options to make your design perfect in the future. Some considerations could be:
-
Ease of Assembly: How easy is it to put the design together? Maybe screws could hold a part better than glue, or you could add a space near a bolt to easily get a tool into it.
-
Cost: How much material does it use? There may be a way to use less plastic or cardboard. Is there another way to orient the model to make the prints faster?
-
Aesthetic: How does it look? Yes, we also enjoy looking at the finished product and thinking, 'Wow, that looks awesome'. You could change the shape of the design to look more professional. Add a logo? Maybe coordinate the colour of your prints to make the appearance really pop.
Now that you have seen the full design journey, try building the final version yourself.