Introduction
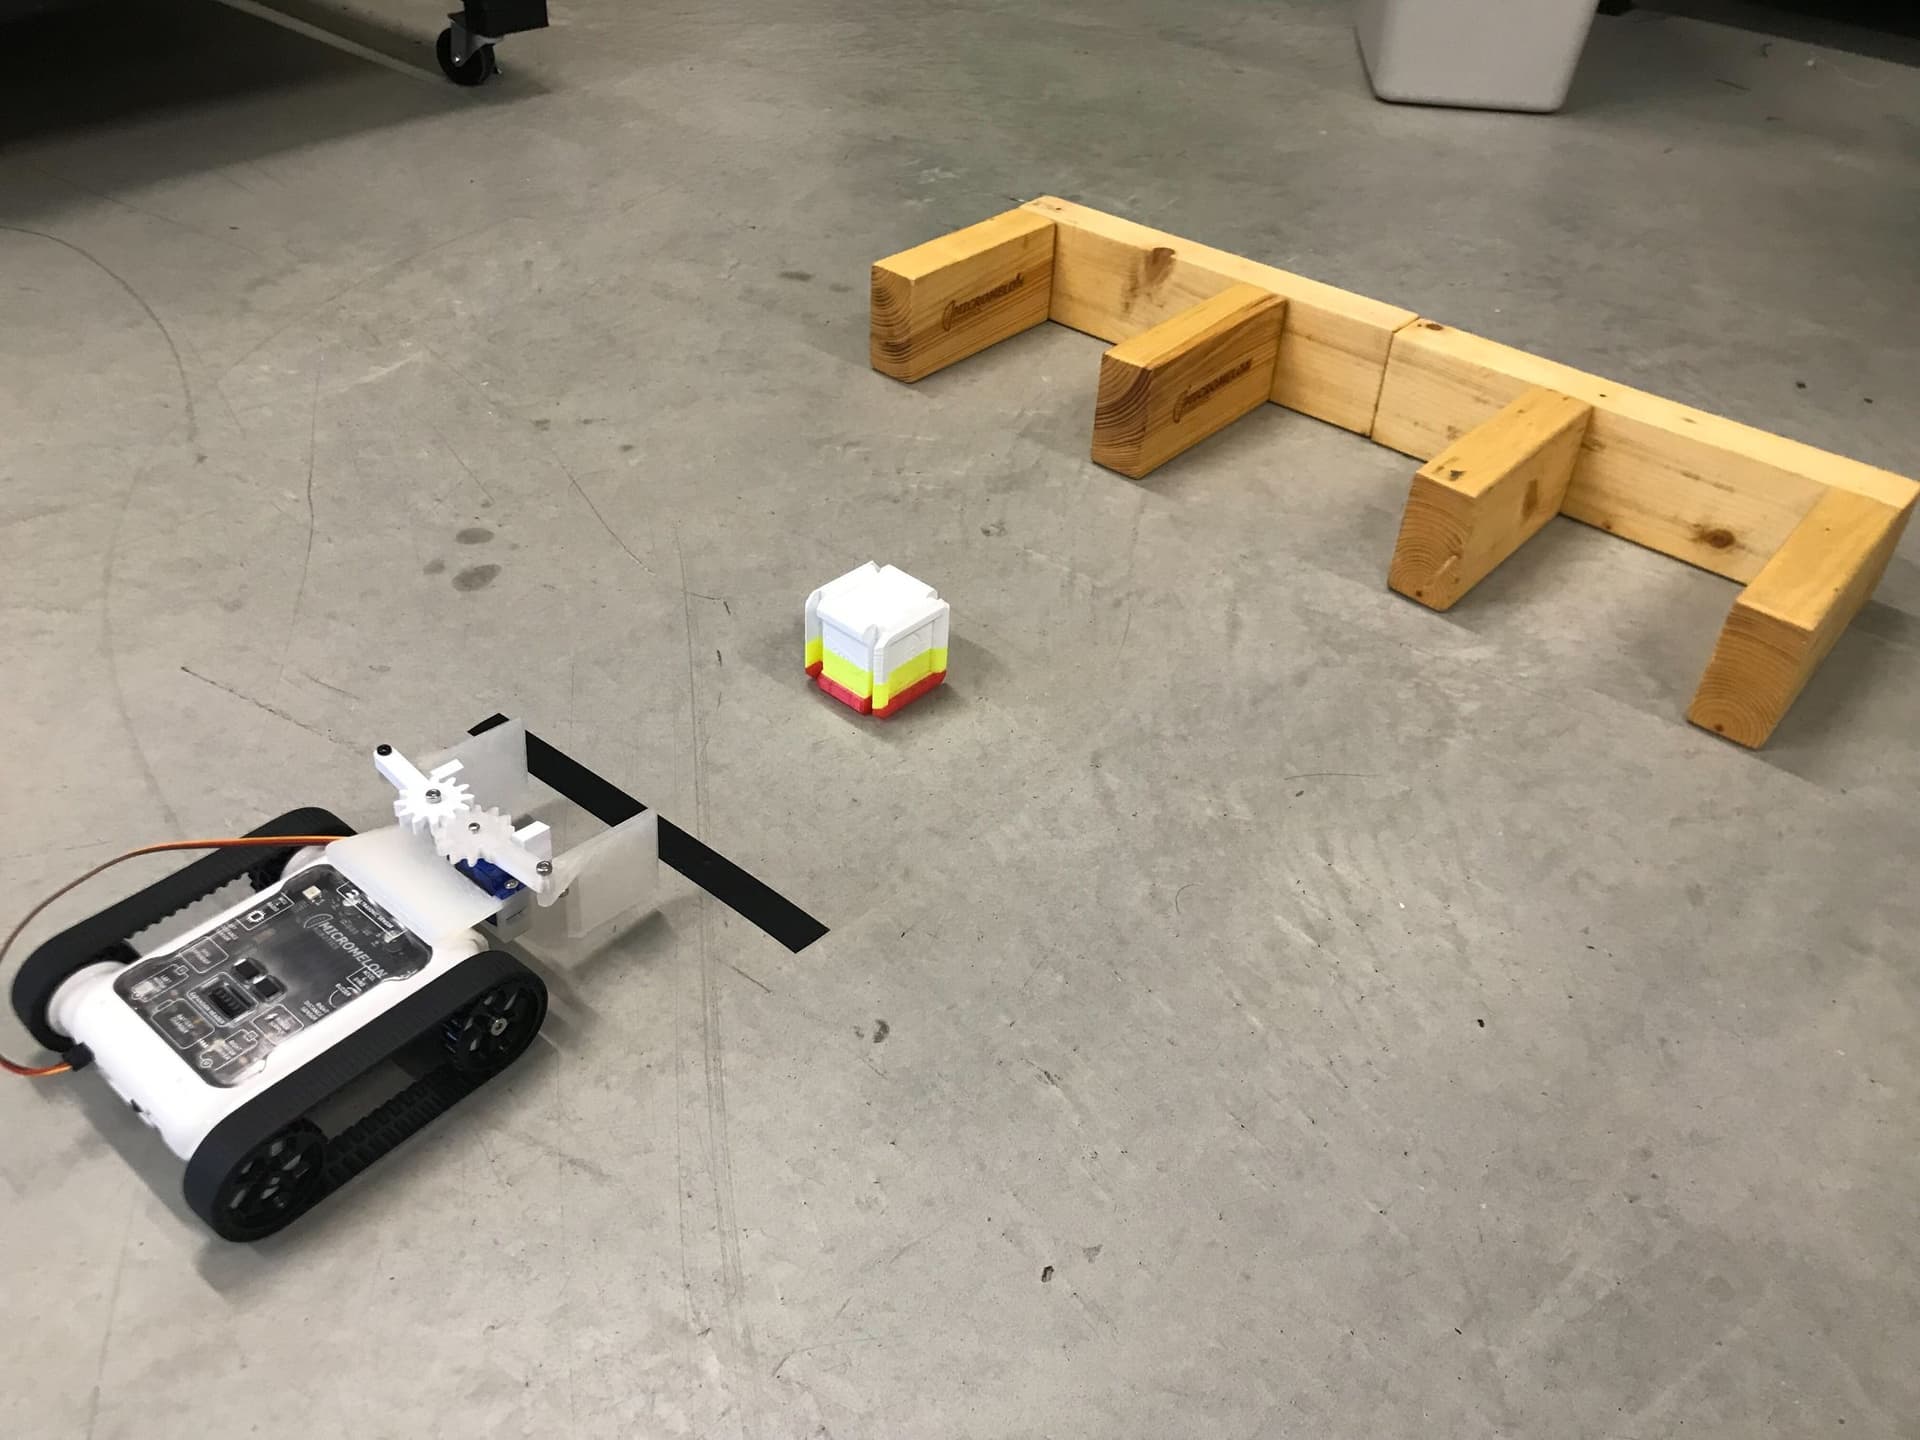
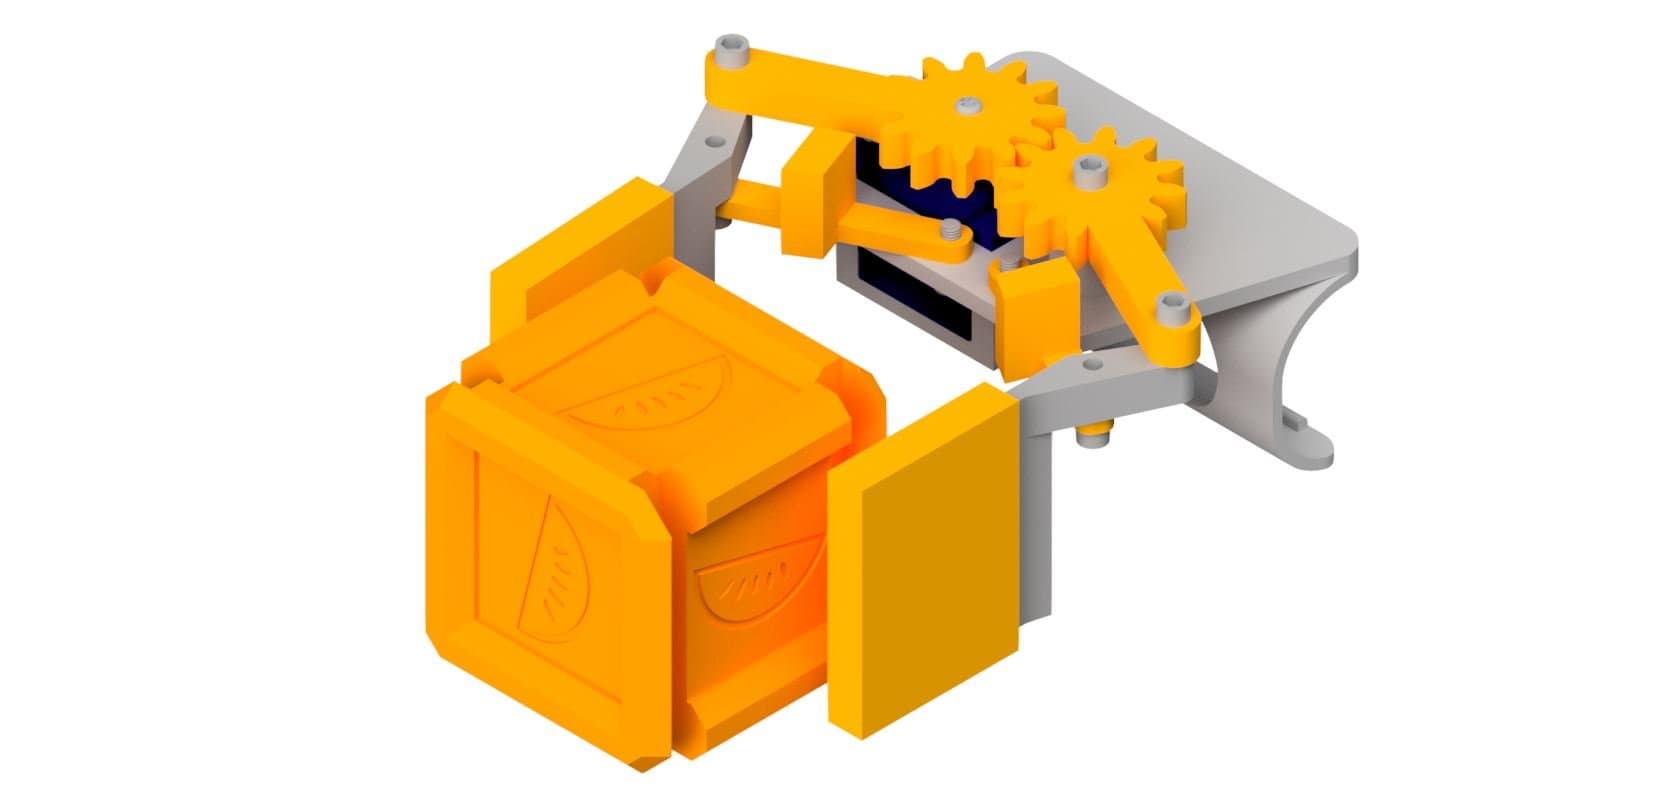
The claw attachment lets your Rover pick up and grab objects using a gear-driven gripper mechanism. It clips onto the front of the Rover and is powered by a micro servo motor. This guide will walk you through printing and assembling the attachment step by step.
AccessoryMelonCubeA small cube for the claw to pick up. Print one to use with the claw activity.


What You'll Need
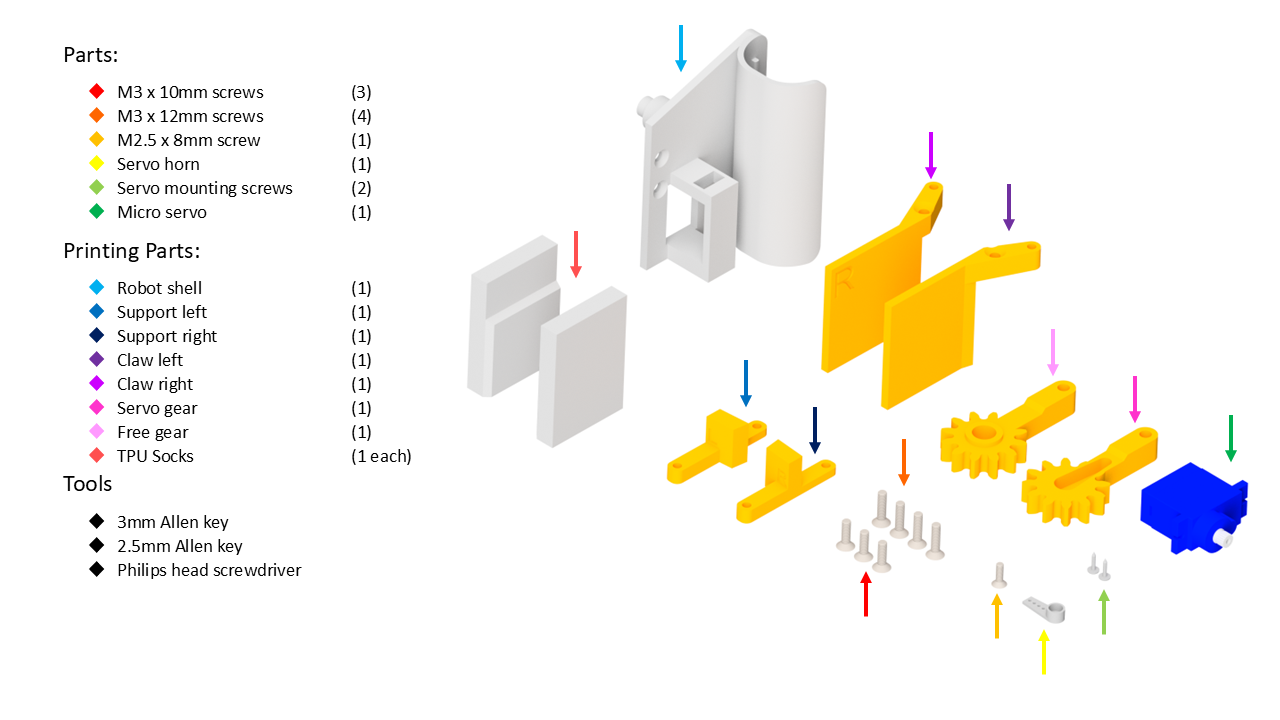
Parts:
- 3x M3 x 10mm Screws
- 4x M3 x 12mm Screws
- 1x M2.5 x 8mm Screw
- 2x Servo Mounting Screws
- 1x Servo Horn
- 1x Micro Servo
Tools:
- 2mm Allen Key
- 2.5mm Allen Key
- Phillips Head Screwdriver
 Makerworld
13D Print Your Parts
- 1x Robot Shell
- 1x Support Left
- 1x Support Right
- 1x Claw Left
- 1x Claw Right
- 1x Servo Gear
- 1x Free Gear
- 2x TPU Socks
2Install the Servo
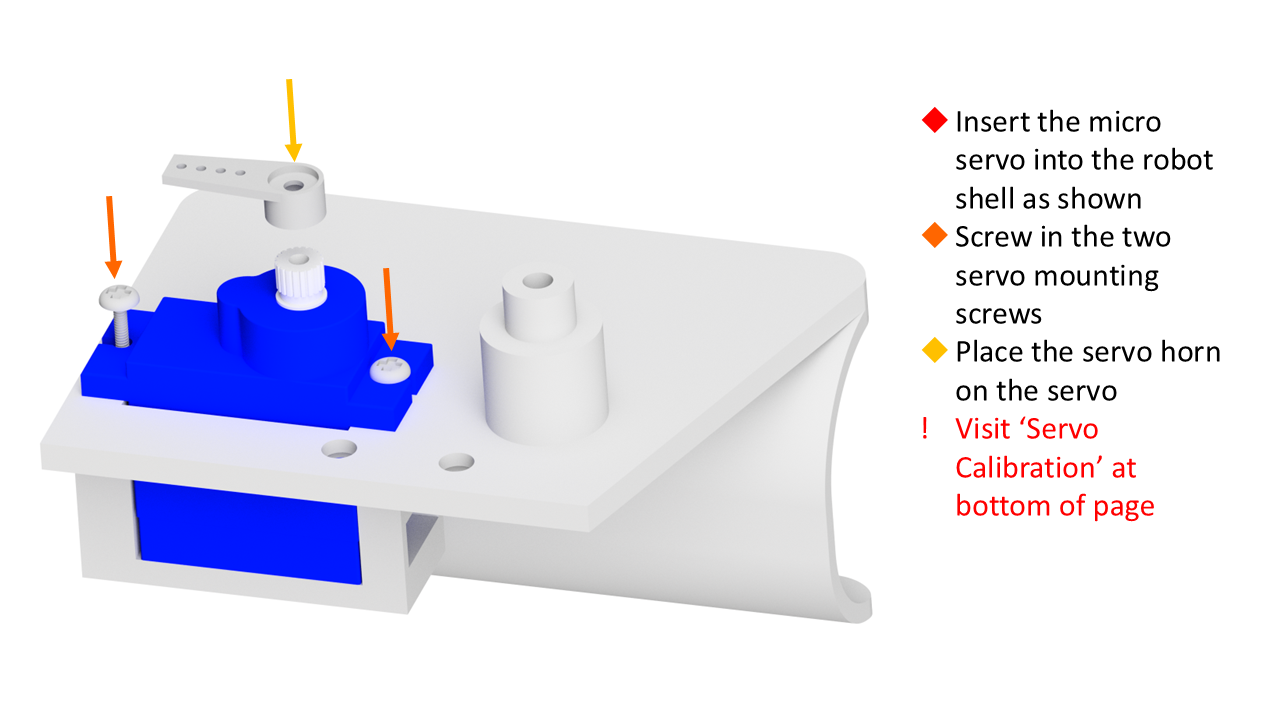
- Insert the micro servo into the robot shell as shown.
- Screw in the two servo mounting screws.
- Calibrate the servo before attaching the horn (see the next step).
3Calibrate the Servo
- Plug the servo into the right port on the Rover.
- Run
Servos.right(0)in the Code Editor to set the servo to 0 degrees. - Without rotating the servo, attach the servo horn so it matches the correct orientation shown in the image.
4Attach the Supports
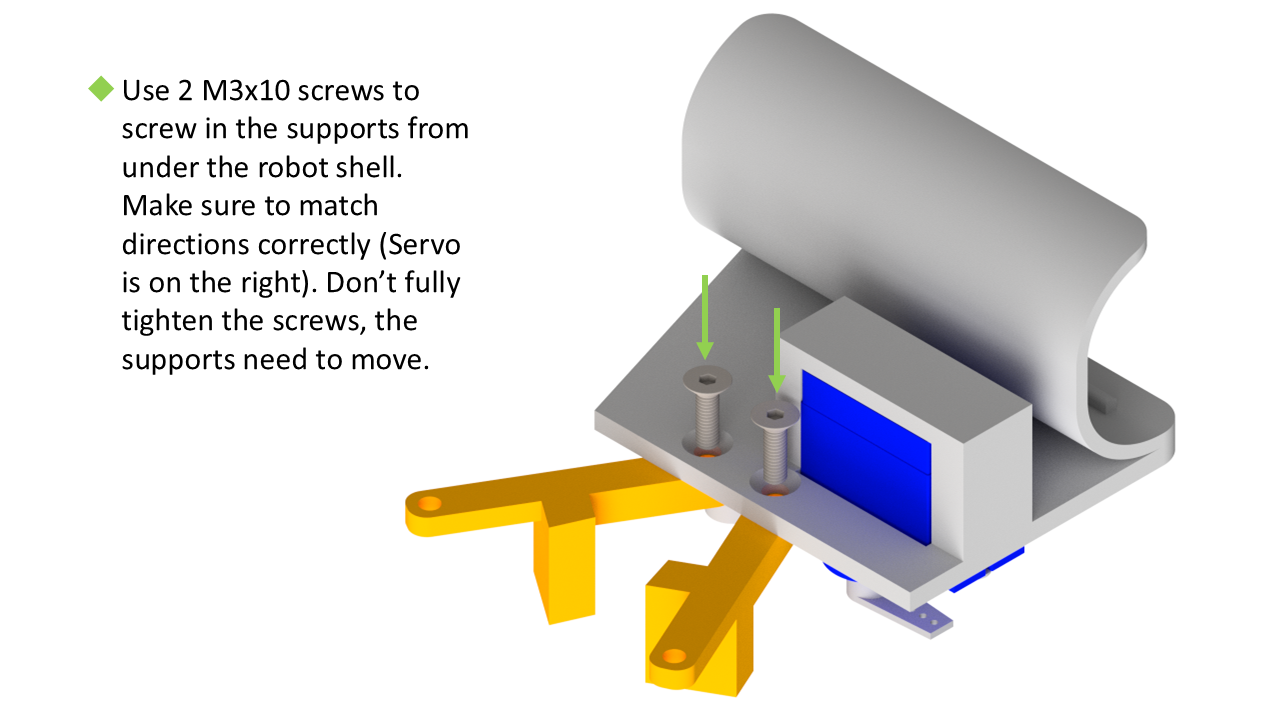
- Use 2x M3 x 10mm screws to screw in the supports from under the robot shell.
- Make sure to match directions correctly (servo is on the right).
- Don't fully tighten the screws, the supports need to be able to move.
5Install the Gears
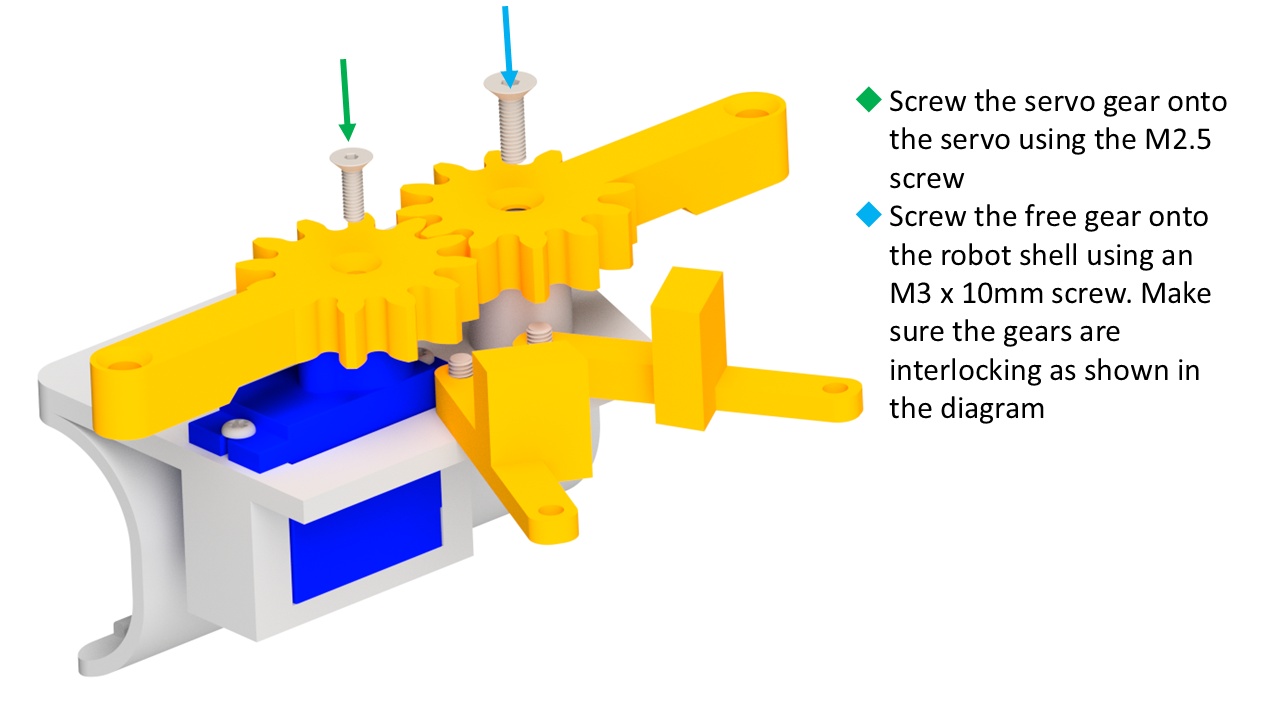
- Screw the servo gear onto the servo using the M2.5 screw.
- Screw the free gear onto the robot shell using an M3 x 10mm screw.
- Make sure the gears are interlocking as shown in the diagram.
6Attach the Claws
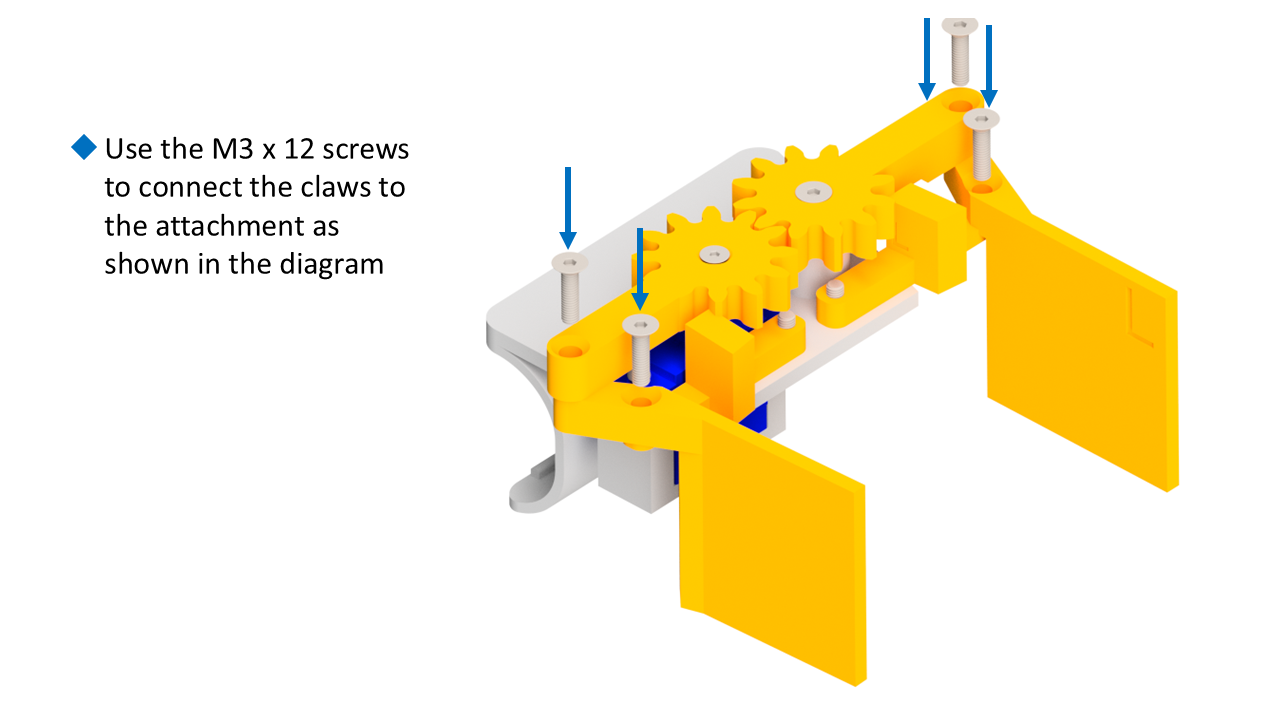
- Use the 4x M3 x 12mm screws to connect the claws to the attachment as shown in the diagram.
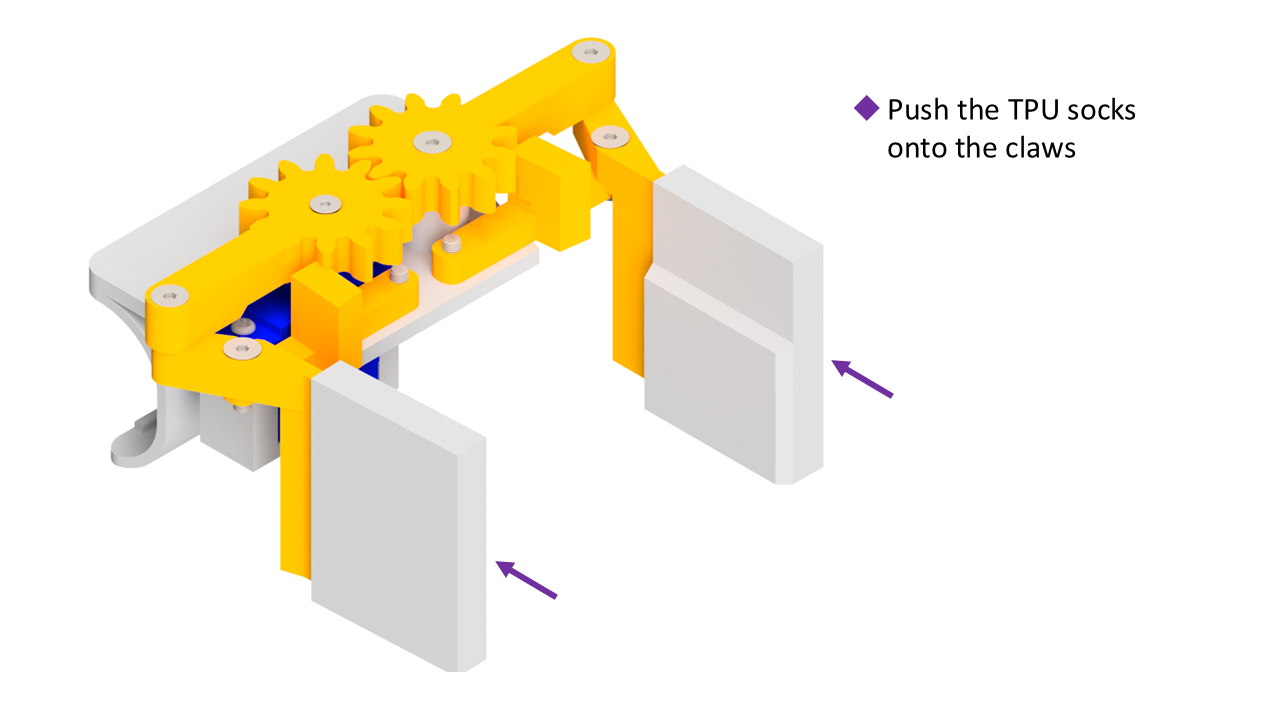
7Add the TPU Socks
- Push the TPU socks onto the claws.
You're Done!
Your claw attachment is fully assembled and ready to clip onto your Micromelon Rover. You can program the servo to open and close the claw using the Code Editor.