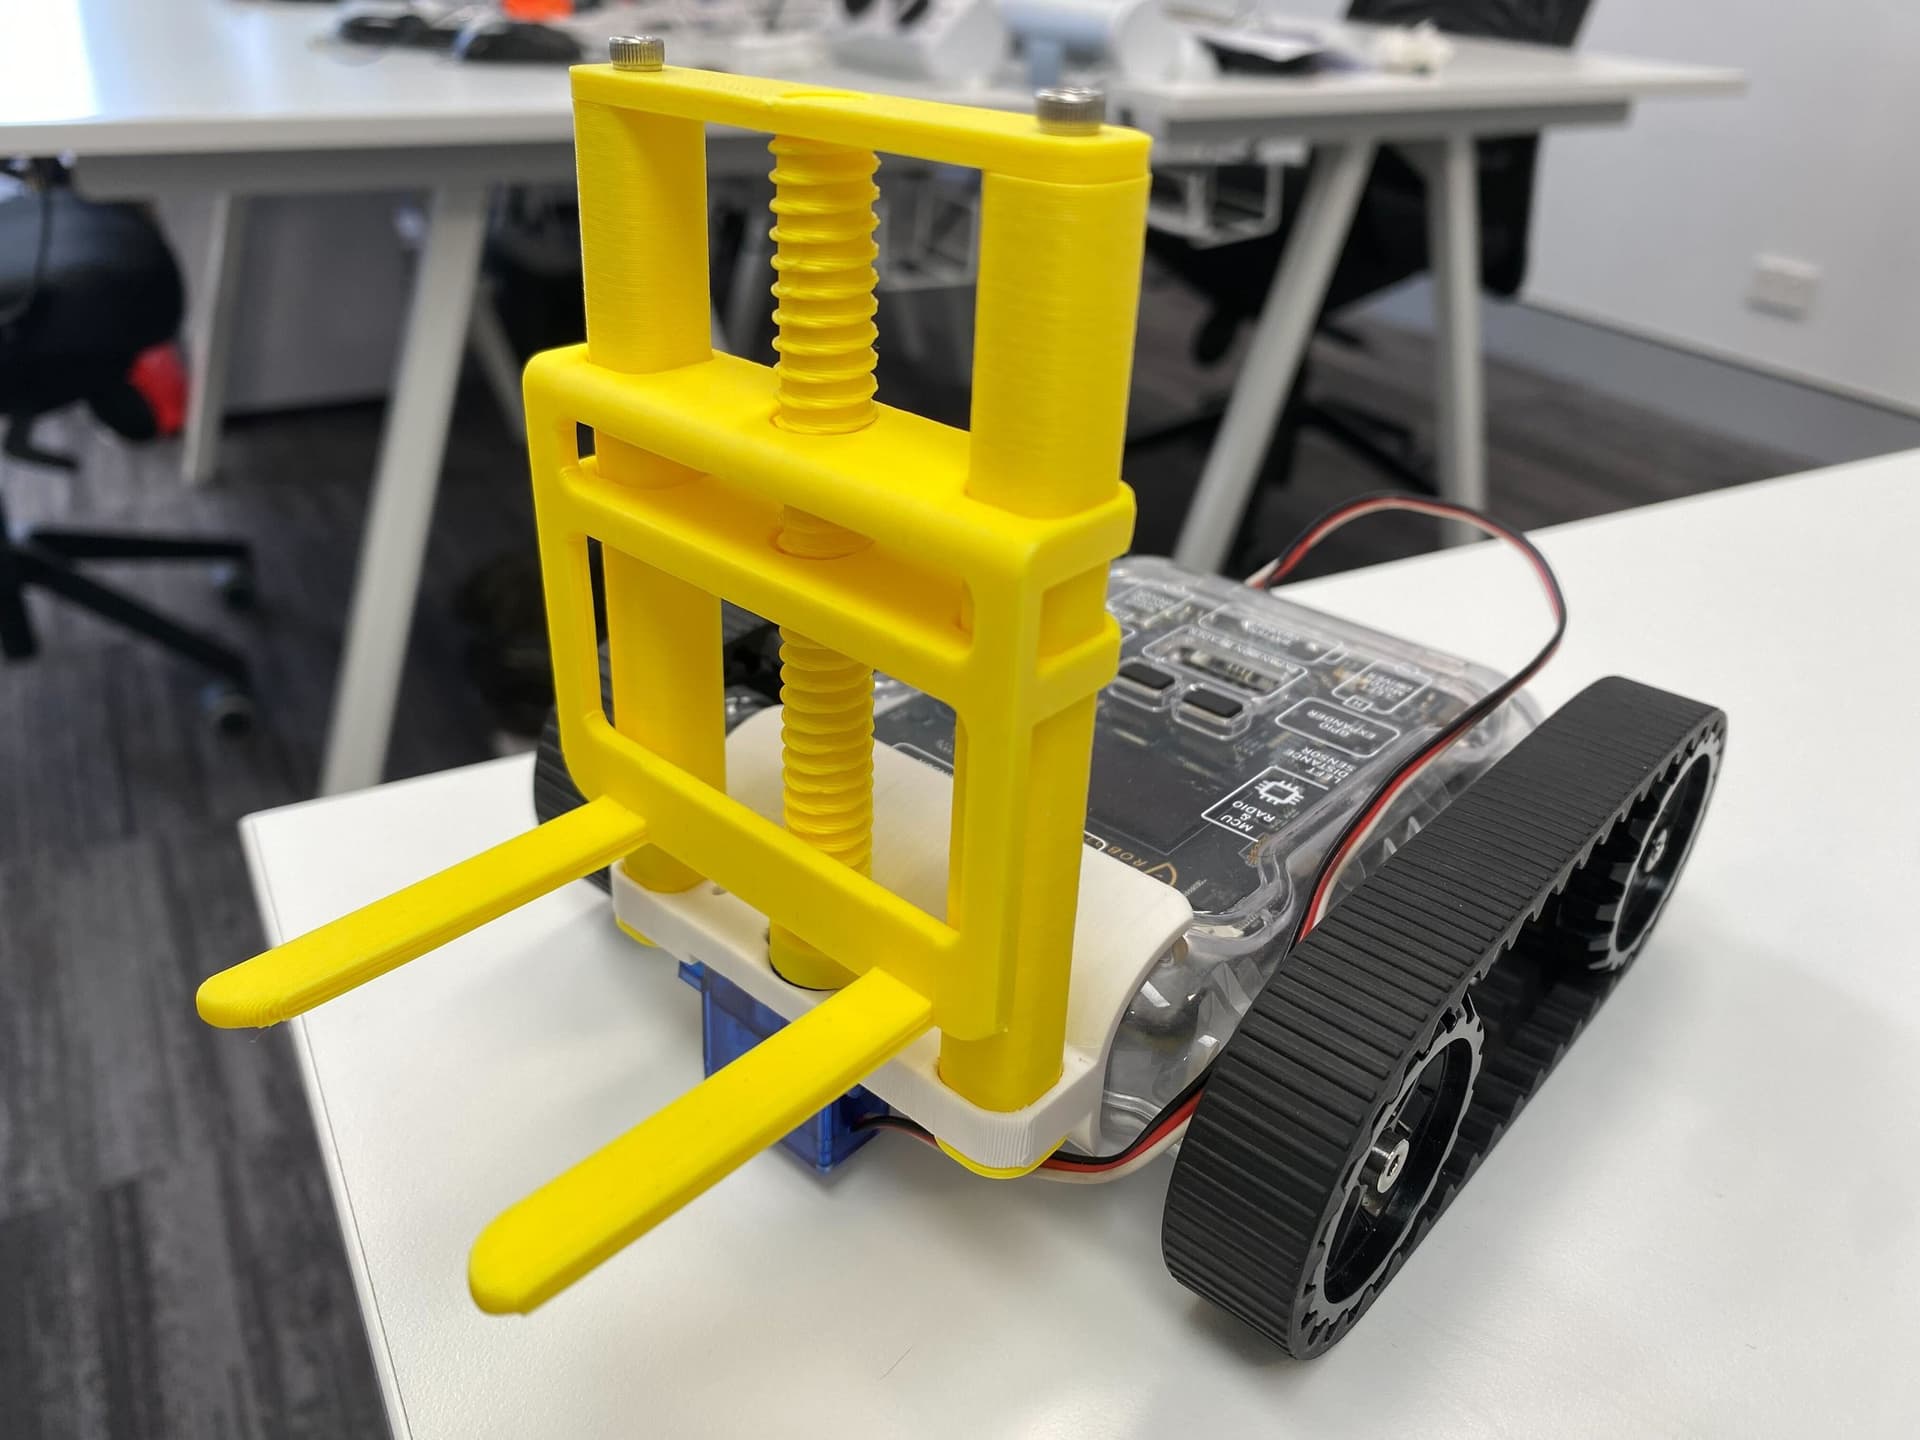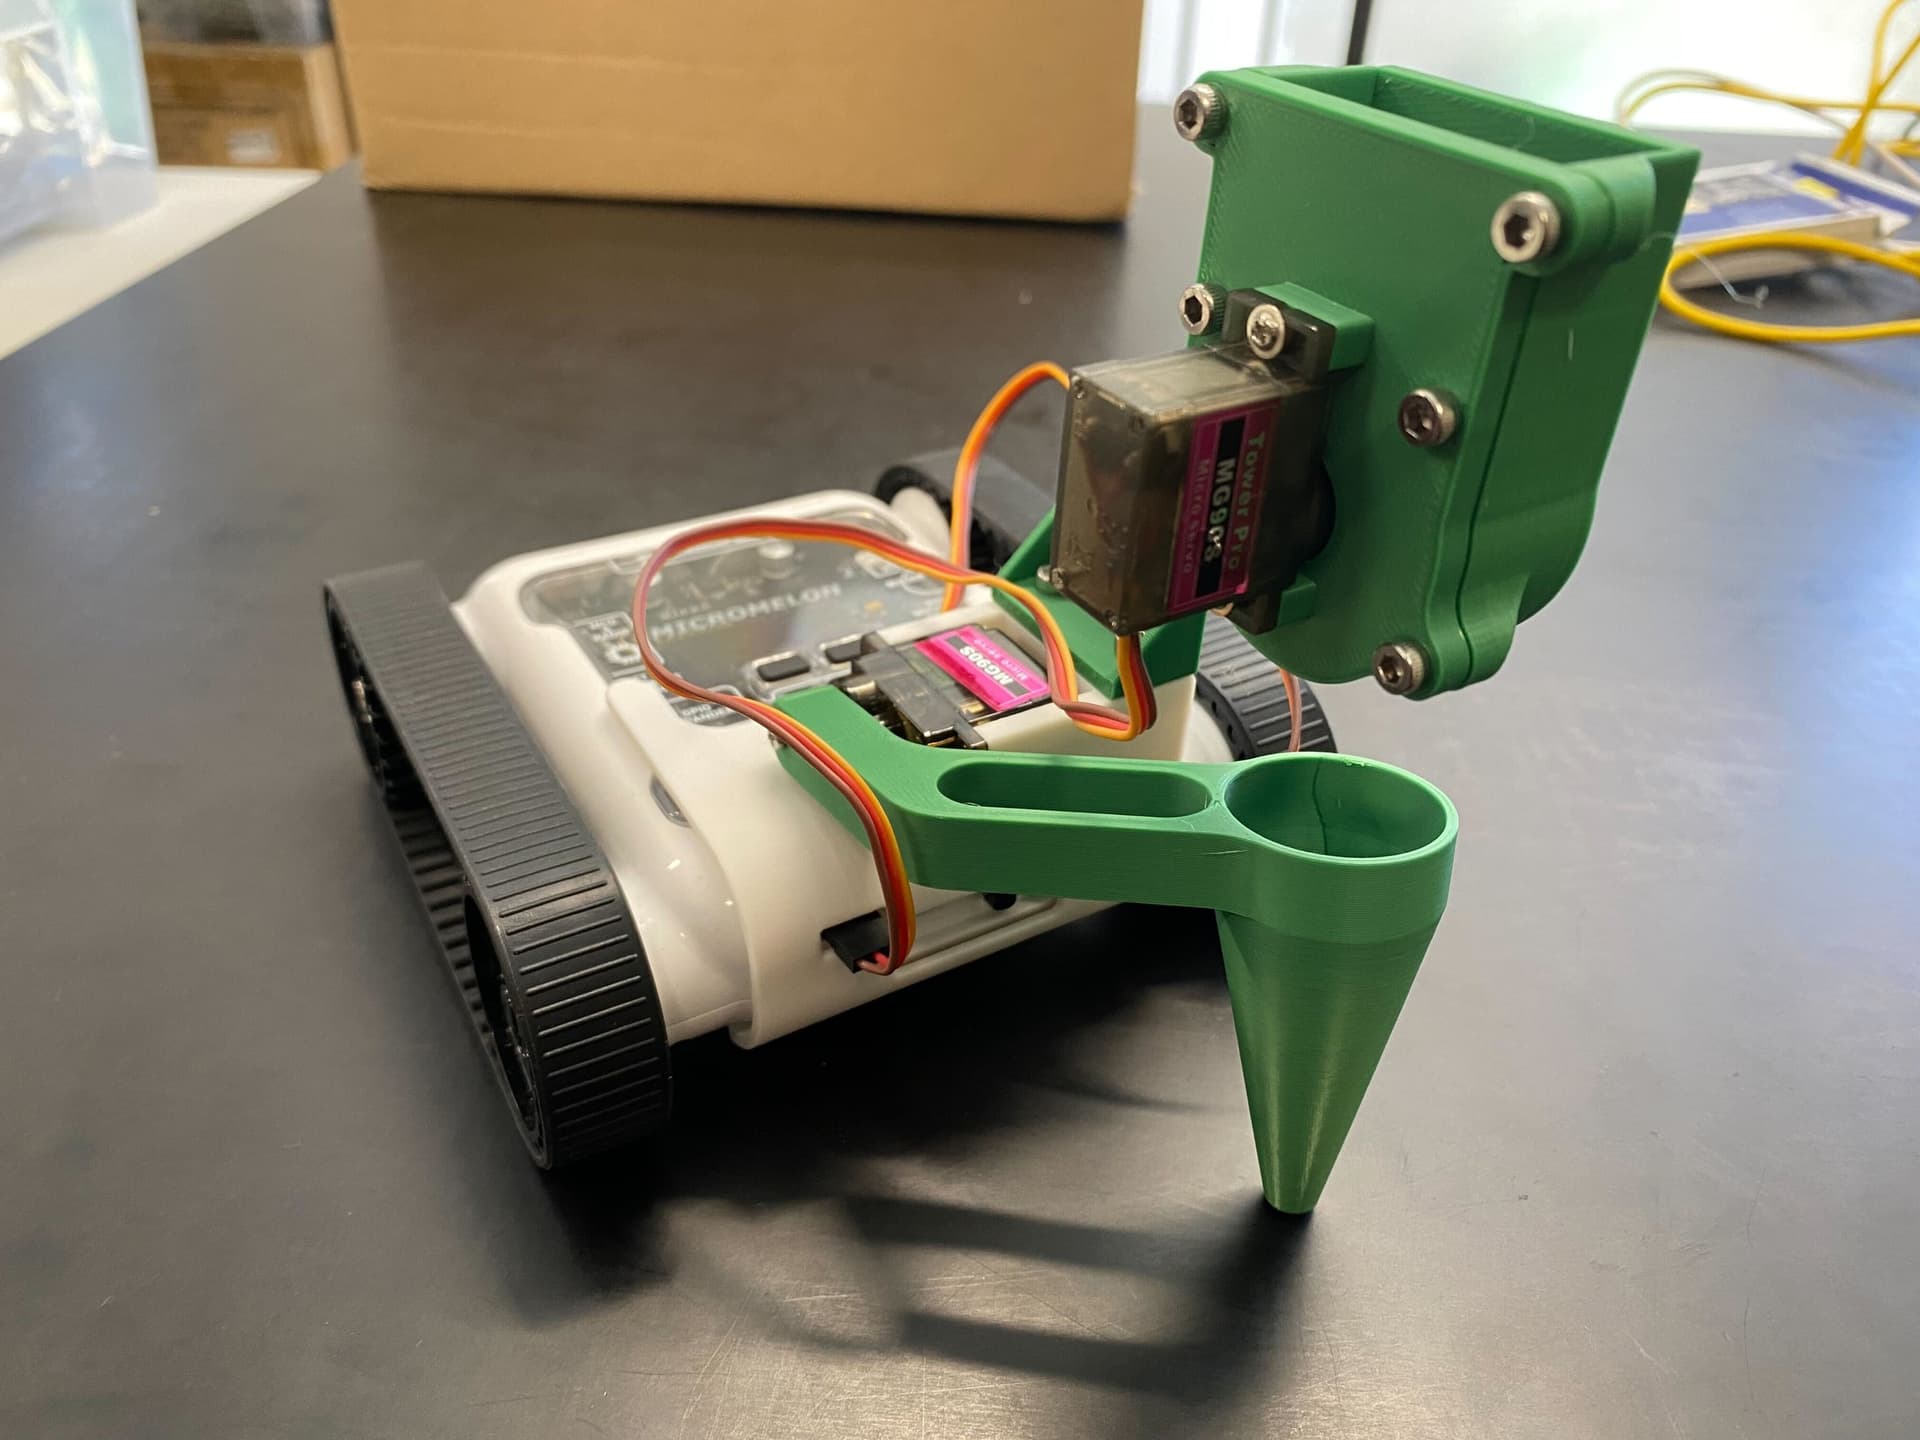
Use the claw to grab the Meloncube and perform delivery tasks in a warehouse scenario. Use the colour sensors on the robot to read colour codes for delivery instructions.
Setup
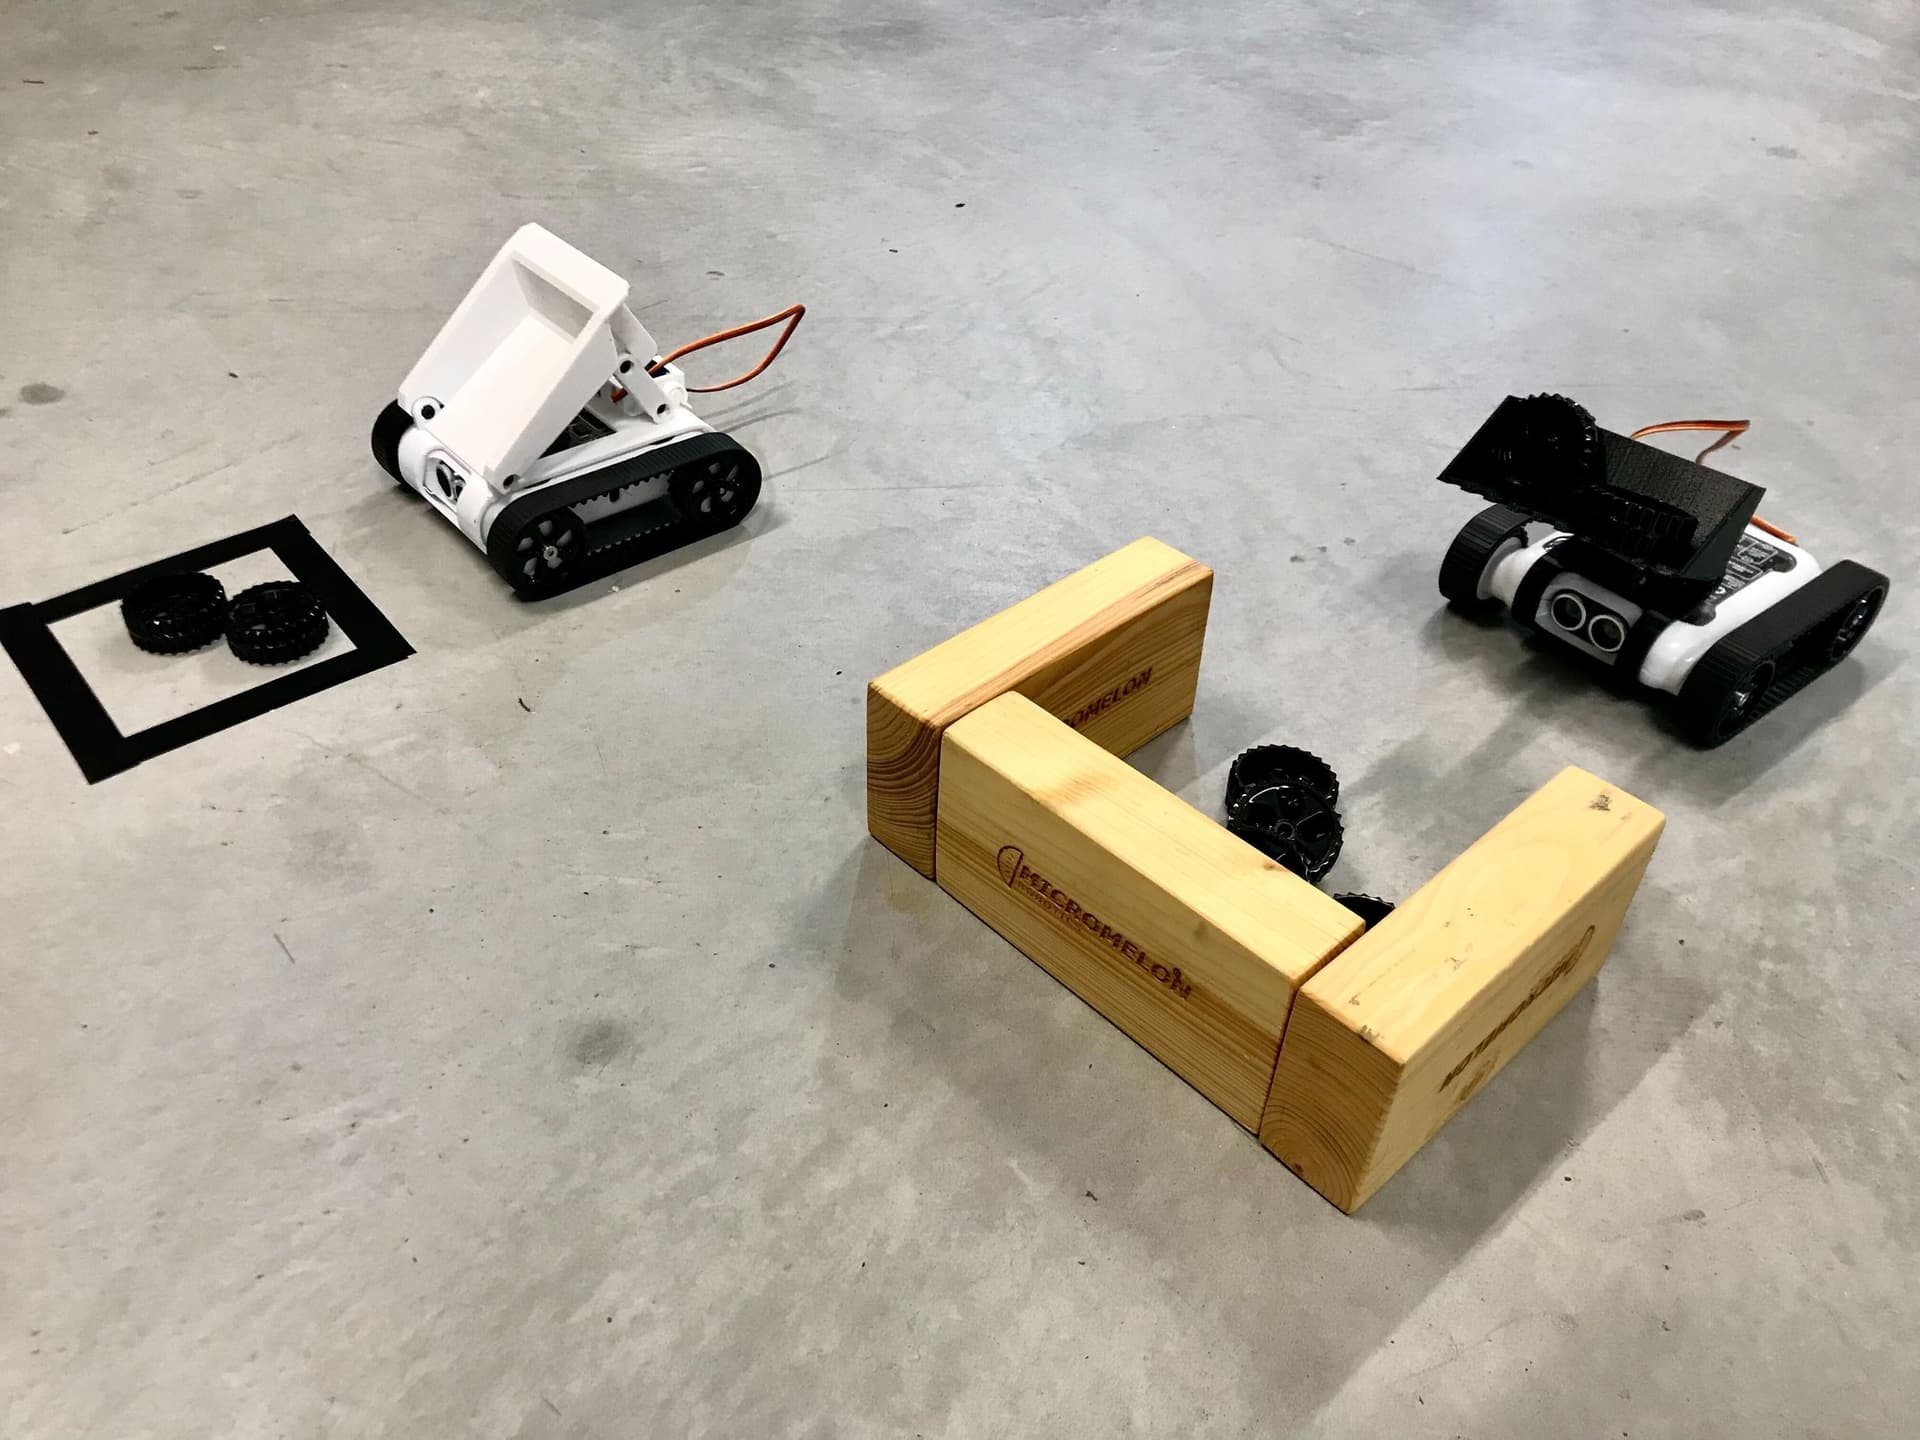
The initial activity can be to have an indicator line on the ground using tape, which the robot starts behind. The Meloncube can be placed 30cm in front of this line, and students can be tasked to grab the cube and bring it back over the line. Depots can then be introduced to create a warehouse scenario.
Any object can be used in place of our Meloncube, however, if you wish to use it you can download the print file below.


Depots are walled square areas for the rover to deposit a Meloncube in. The walls can be constructed from tape on the ground or solid materials in a 20cm x 15cm area. Use the diagrams below as a reference for the layout of the depots. A number can be allocated to each depot, and students can deliver the cube to each depot on demand.
Add coloured tape to the previous challenge to add more complexity. The tape could indicate which depot the cube must be delivered to. The rover can use the colour sensor to detect the colour of the tape and use the appropriate delivery instructions. A final extension challenge is leaving the cube in one of the depots and having the rover retrieve it and put it behind the indicator line.
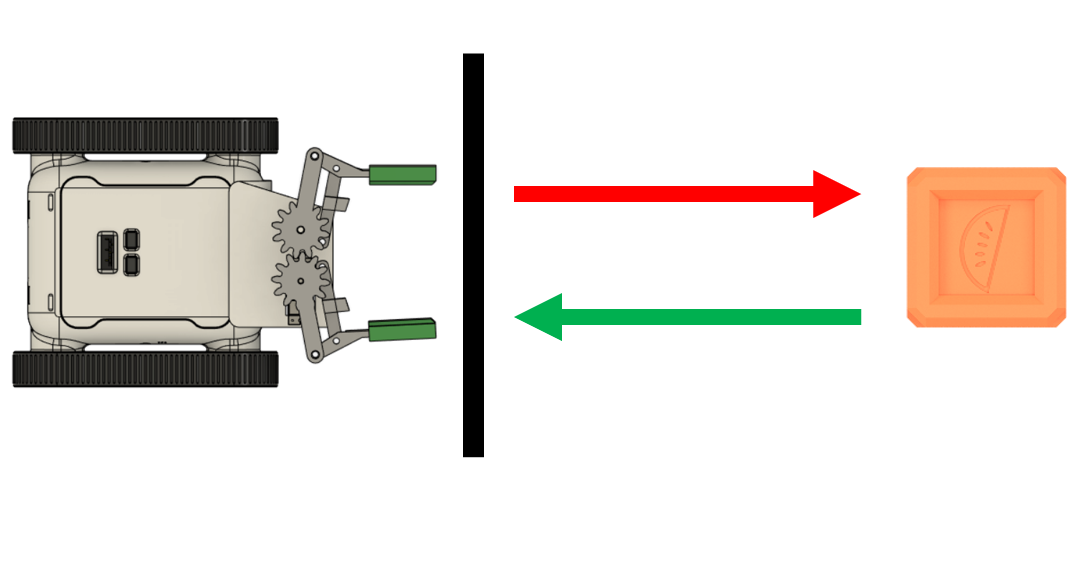
- The rover starts behind the indicator line (black).
- It drives forward to the Meloncube (red arrow), grabs it, then returns behind the line (green arrow).
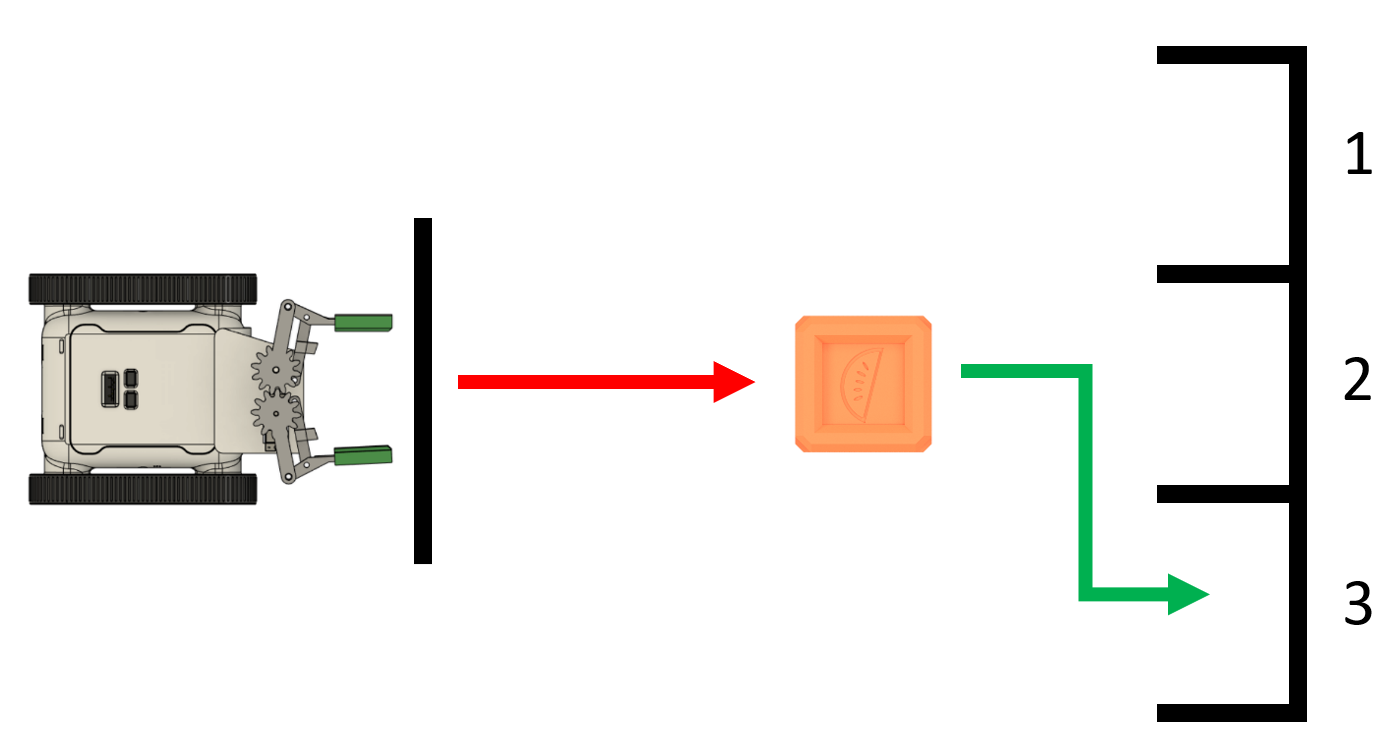
- After grabbing the Meloncube, the rover delivers it to one of three numbered depots.
- The rover receives a depot number and navigates to the correct depot to deposit the cube.
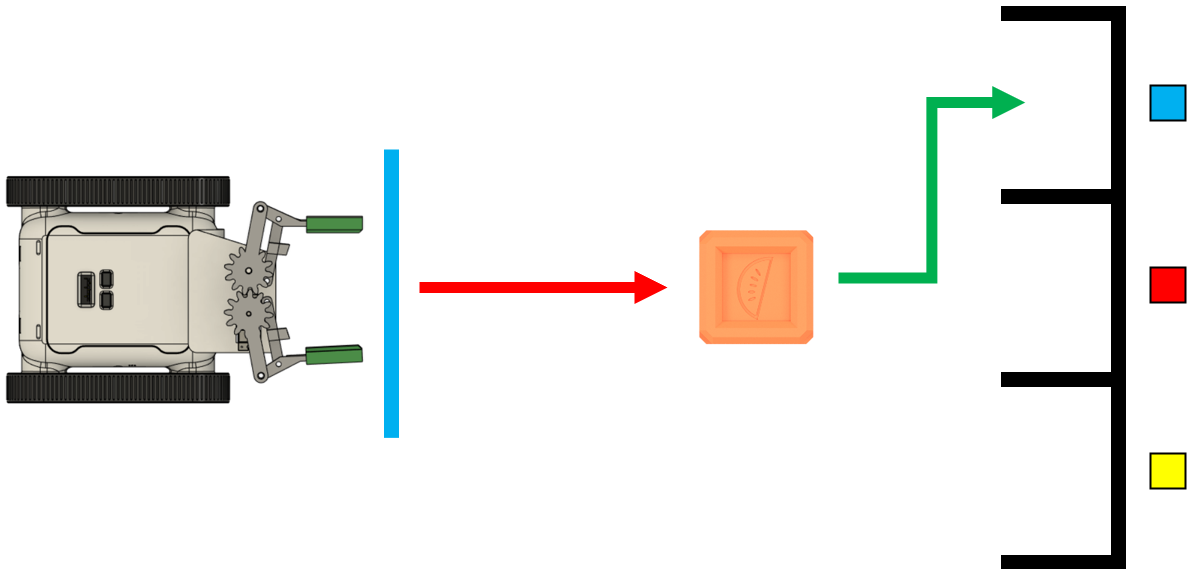
- A coloured indicator line (blue) replaces the black line.
- The rover uses its colour sensor to read the colour and determine which depot to deliver to.
- Each depot is marked with a coloured square (blue, red, or yellow).
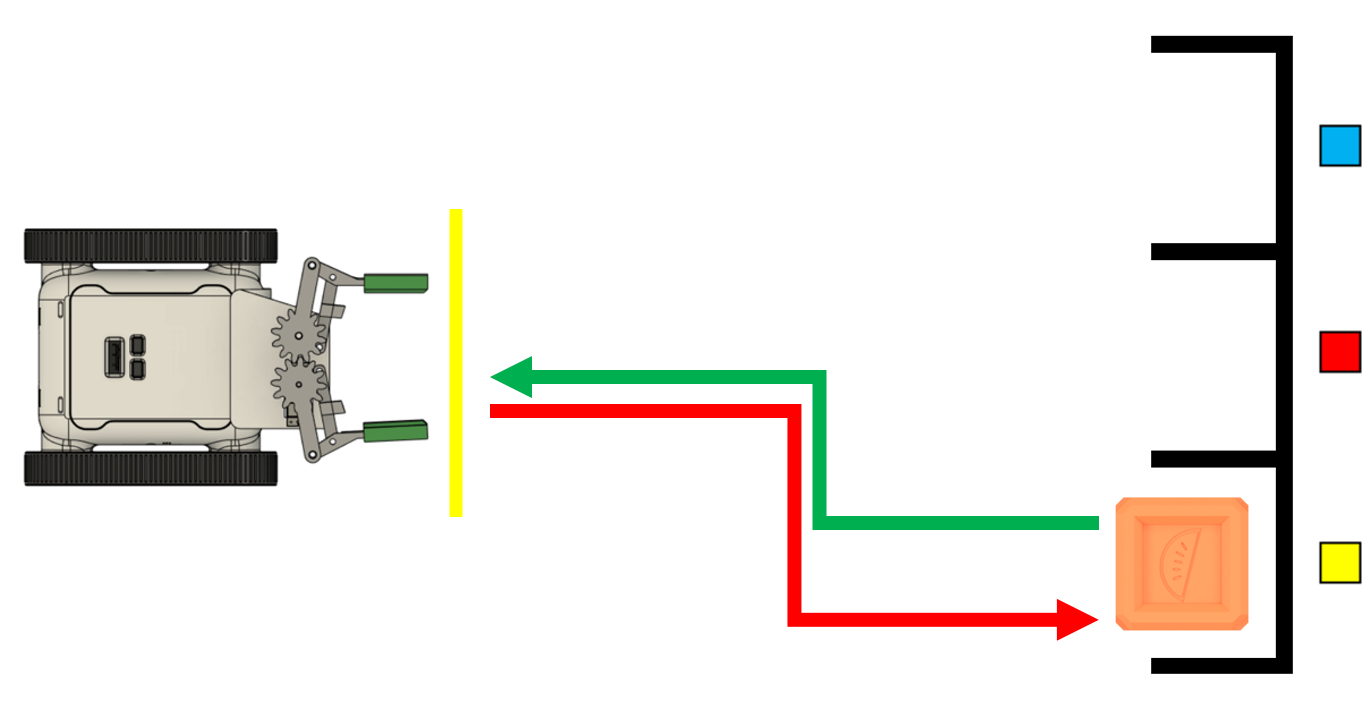
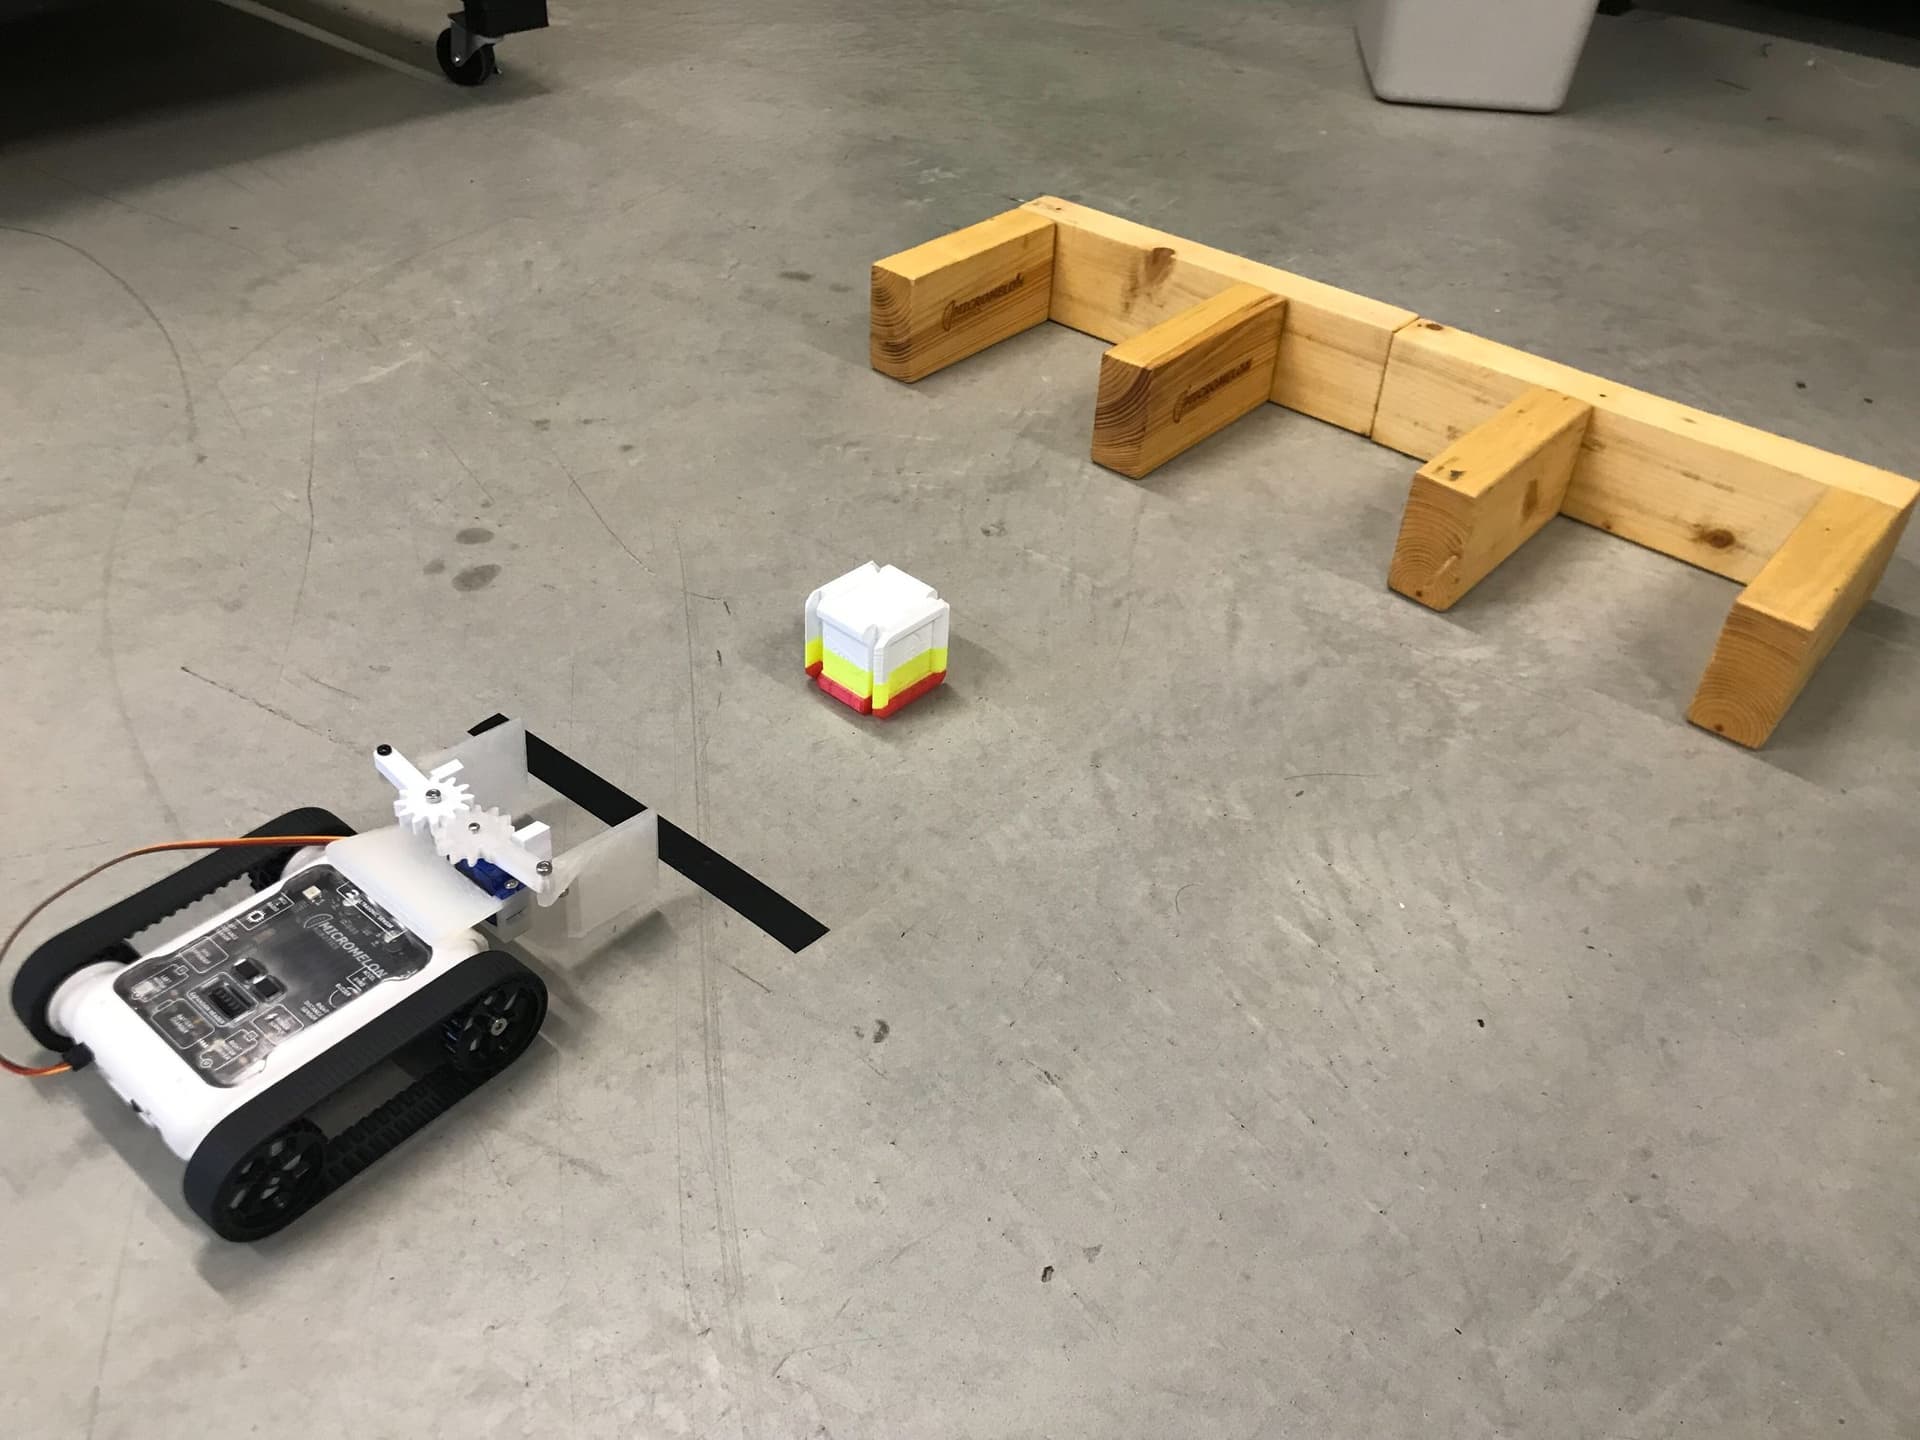
- The Meloncube starts inside one of the depots (yellow depot in this example).
- The rover must navigate to the depot, pick up the cube, and return it behind the indicator line.
- The yellow indicator line shows the starting position for this challenge.
Our Approach
Constant: a variable that never changes while the code is running. In Python, we write these in all capitals with underscores between words.
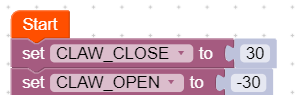
- Define two constants:
CLAW_CLOSE(set to 30) andCLAW_OPEN(set to -30). - Trial and error will have to be used to find the correct settings for your rover.

- Create two functions:
grabmoves the left servo toCLAW_CLOSE, andreleasemoves the left servo toCLAW_OPEN. - While these functions only have the 'Move Servo' block, doing this makes it easier to understand the code.

- In the main code, create a variable named
Inputwhich uses "Request Input with prompt" to ask for the depot number ("Enter Depot Number:"). - If you're using colour indicators instead, the input request can be replaced with an 'if else' statement that detects the colour and sets the input to a depot number.
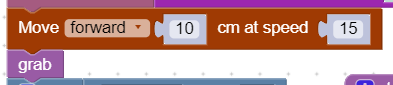
- Once the robot has acquired the delivery instructions, move forward 10cm at speed 15 to approach the cube.
- Then call the
grabfunction to pick up the Meloncube.
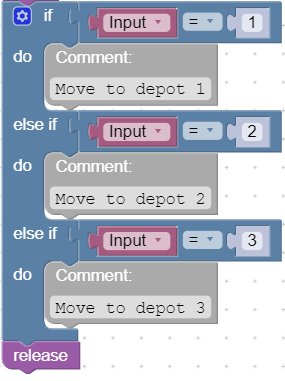
- Use an if/else if chain to check the
Inputvalue (1, 2, or 3) and execute the corresponding movement instructions to navigate to that depot. - Each branch contains a comment block ("Move to depot 1/2/3") where you add your movement blocks.
- Finish off the code by calling
releaseto drop the cube.
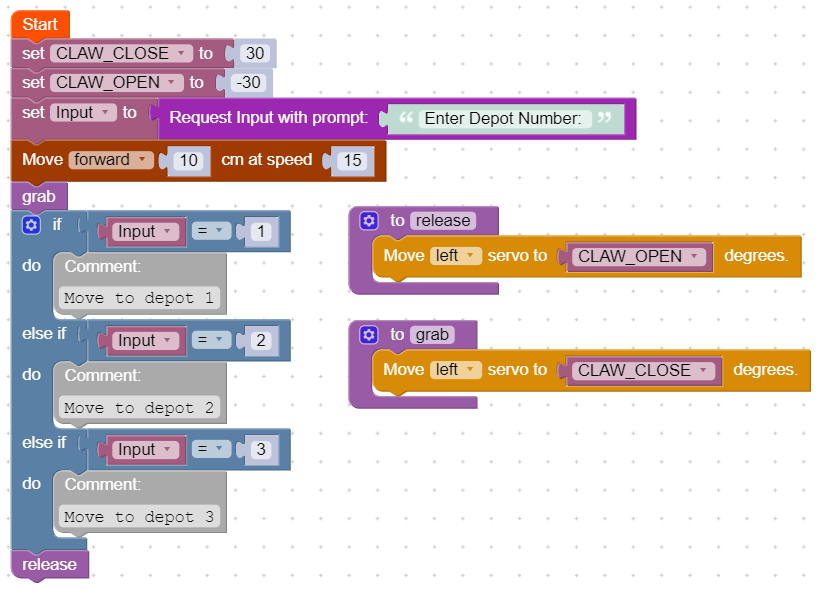
- The full program: set constants, request depot number, move forward and grab, then deliver to the correct depot based on input, and release.
Tip: You can add tracks on the ground for the Rover to line-follow, or create maze walls to allow the use of the IR sensors for navigation.