Introduction
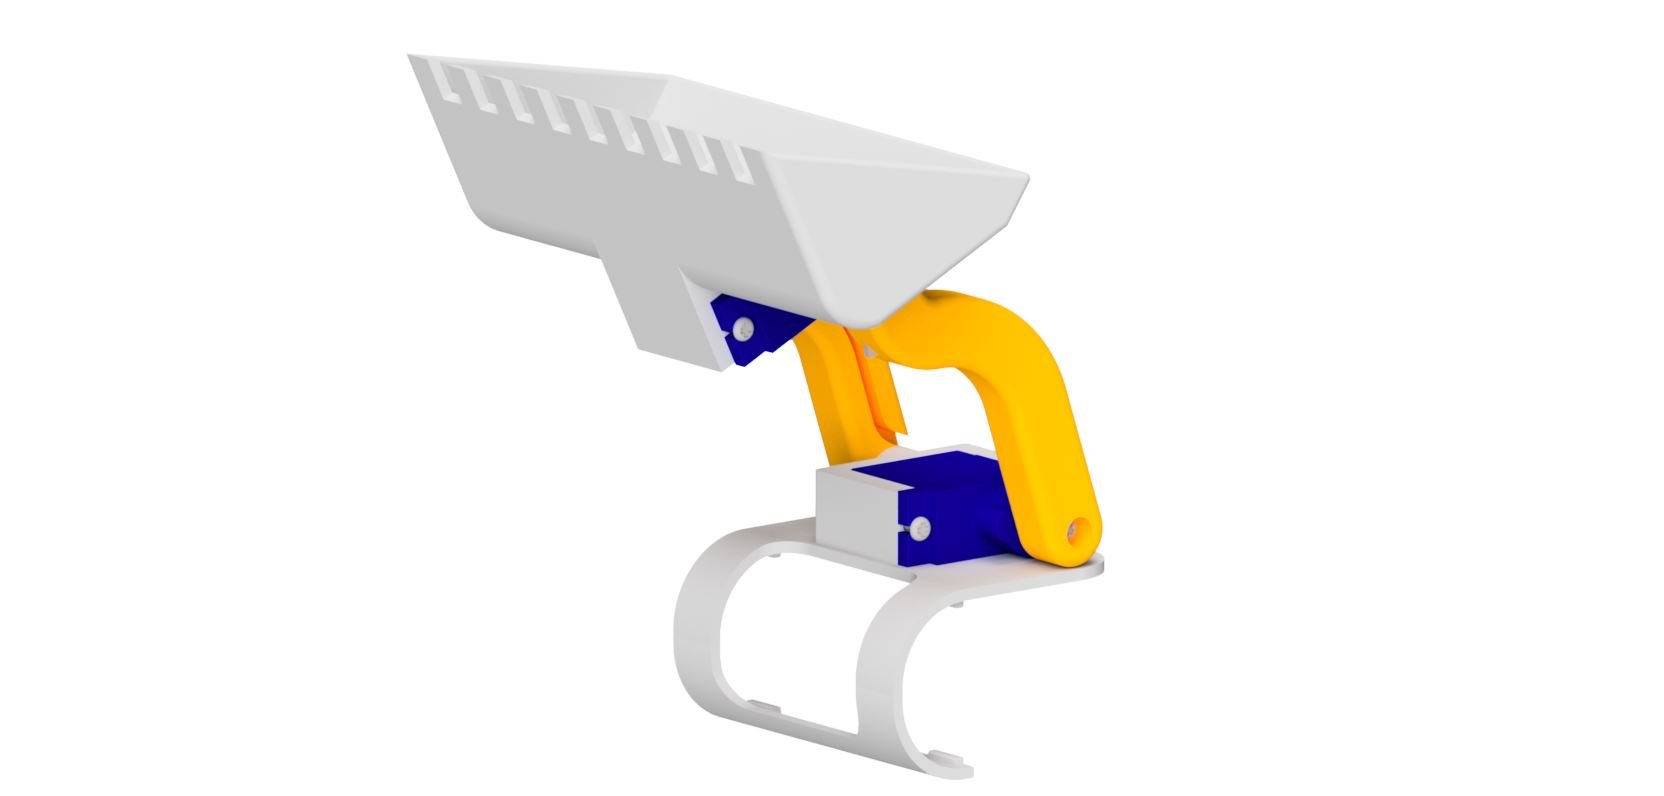
The digger attachment gives your Rover the ability to scoop and lift objects using two servo-powered arms. It clips onto the front of the Rover via the attachment clip and uses two micro servos to control the scoop. This guide will walk you through printing and assembling the attachment step by step.

What You'll Need
Parts:
- 2x Micro Servo
- 2x M3 x 12mm Screws
- 2x M3 Nuts
- 2x Servo Horns
- 4x Servo Mounting Screws
- 2x Servo Horn Screws
Tools:
- 3mm Allen Key
- Phillips Head Screwdriver
 Thingiverse
 Printables
 Makerworld
13D Print Your Parts
- 1x Attachment Clip
- 1x Scoop
- 1x Left Arm
- 1x Right Arm
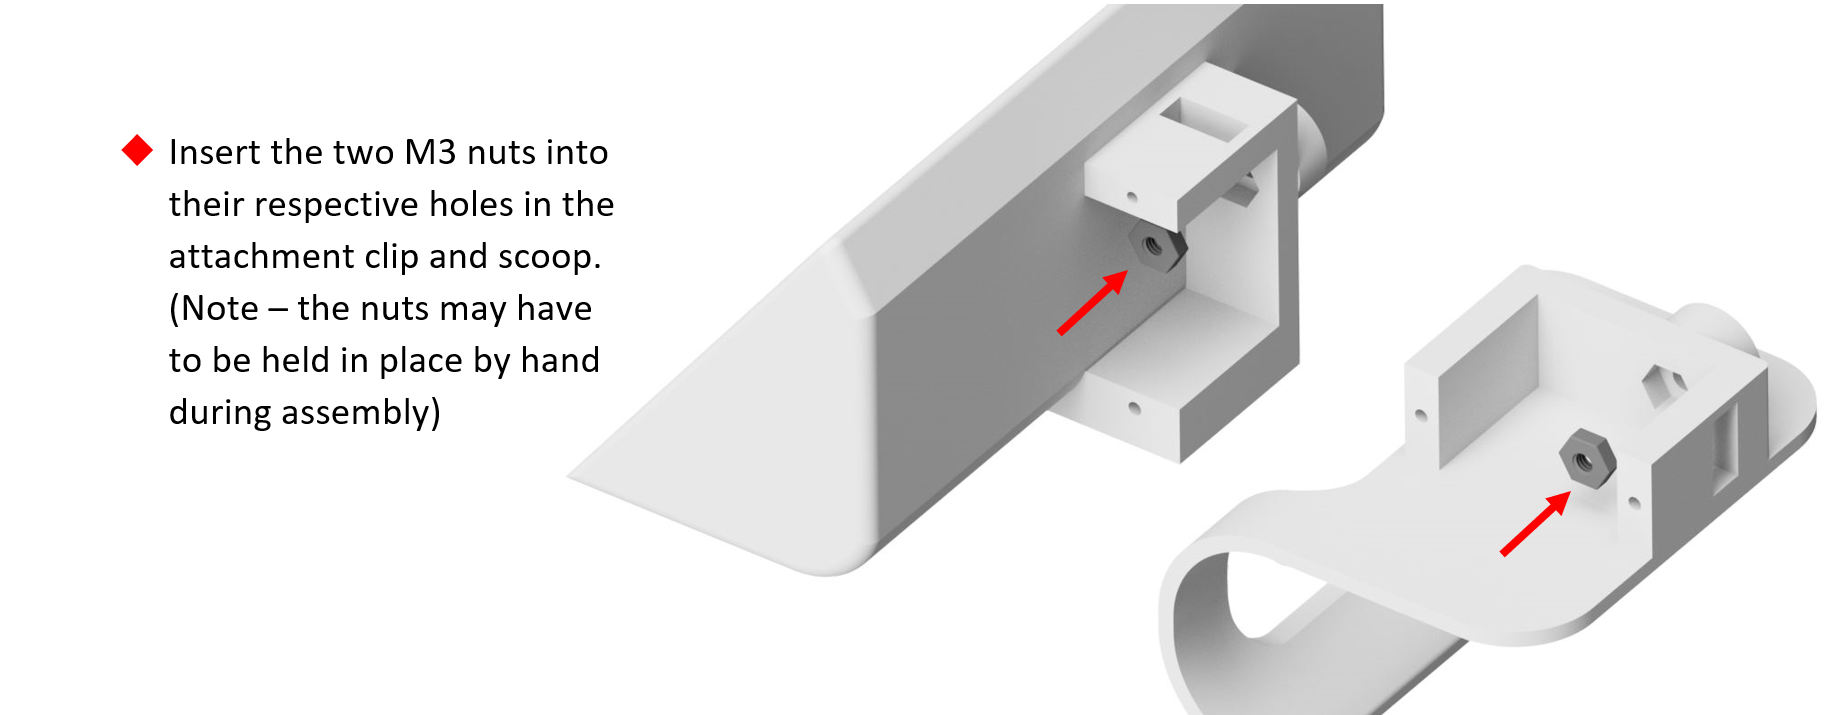
2Insert the Nuts
- Insert the two M3 nuts into their respective holes in the attachment clip and scoop.
- Note: the nuts may have to be held in place by hand during assembly.
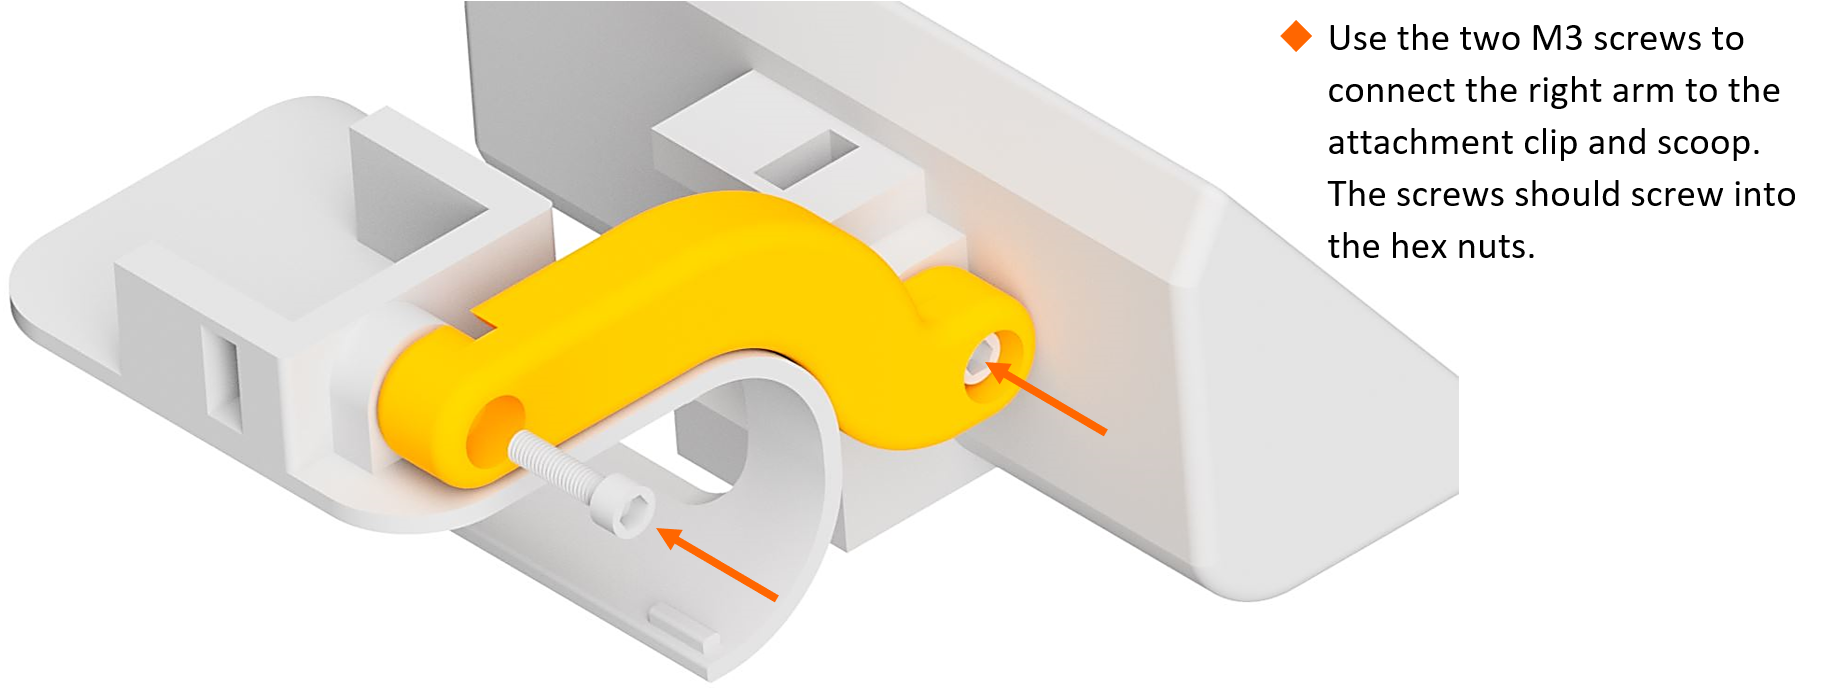
3Attach the Right Arm
- Use the two M3 screws to connect the right arm to the attachment clip and scoop.
- The screws should screw into the hex nuts.
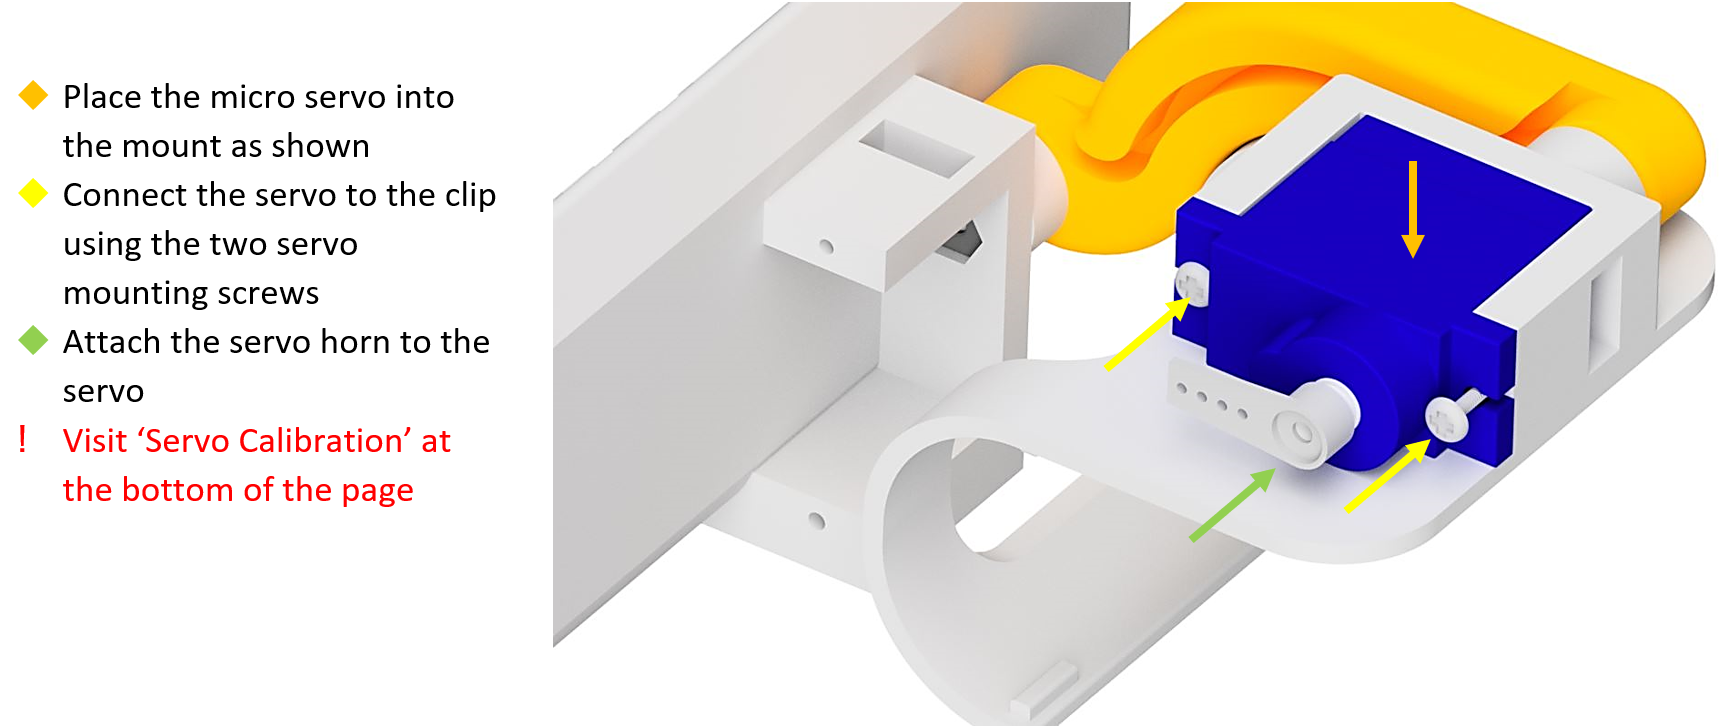
4Install the Right Servo
- Place the micro servo into the mount as shown.
- Connect the servo to the clip using two servo mounting screws.
- Attach the servo horn to the servo.
- Calibrate this servo before attaching the horn (see the next step).
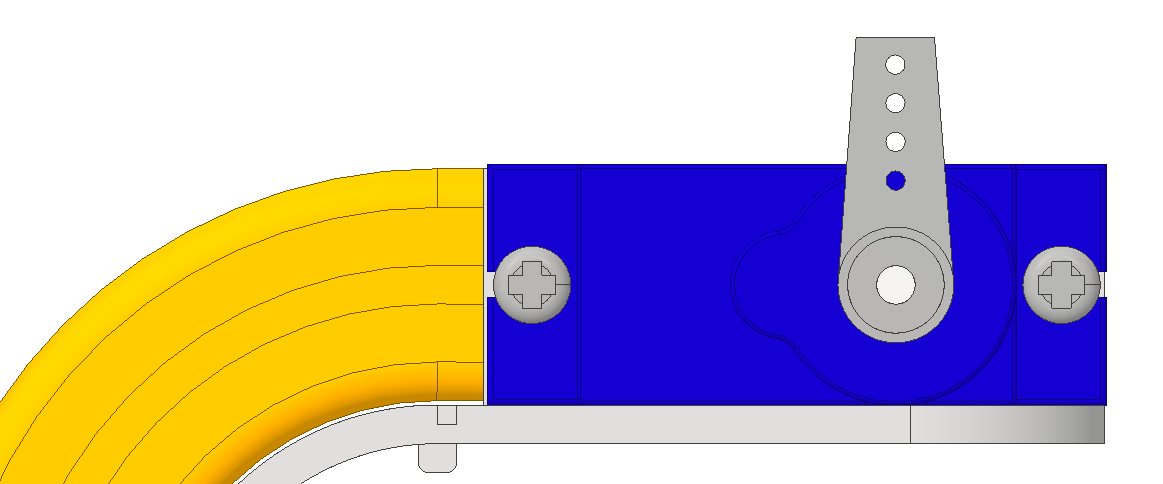
5Calibrate the Right Servo
- Before attaching a servo horn to a servo, we need to make sure that the servo moves in the correct range.
- Once the previous step is completed, plug the servo into the right port and run the following code.
- Upload the code and attach the servo horn to the servo so it's in this position when the servo is at 0.
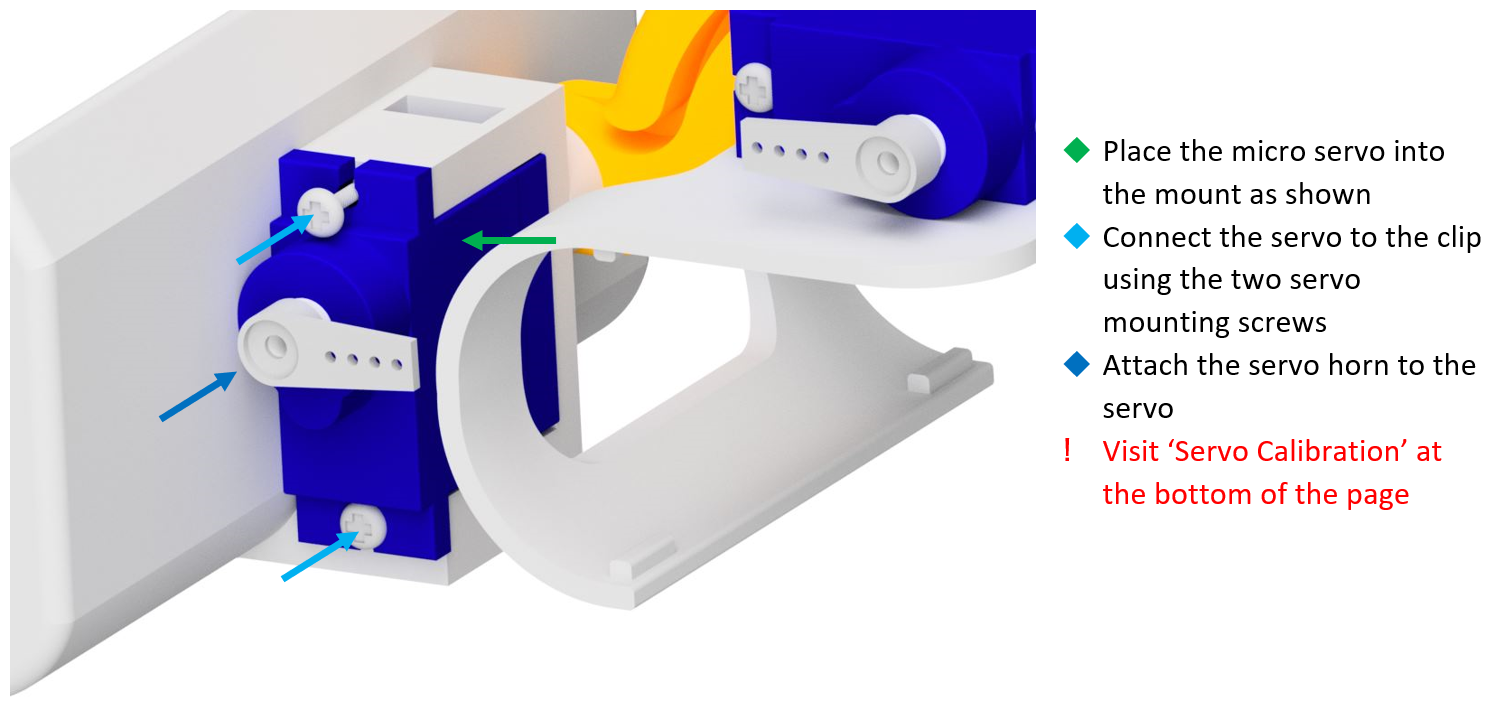
6Install the Left Servo
- Place the second micro servo into the mount as shown.
- Connect the servo to the clip using two servo mounting screws.
- Attach the servo horn to the servo.
- Calibrate this servo before attaching the horn (see the next step).
7Calibrate the Left Servo
- Before attaching a servo horn to a servo, we need to make sure that the servo moves in the correct range.
- Once the previous step is completed, plug the servo into the left port and run the following code.
- Upload the code and attach the servo horn to the servo so it's in this position when the servo is at 0.
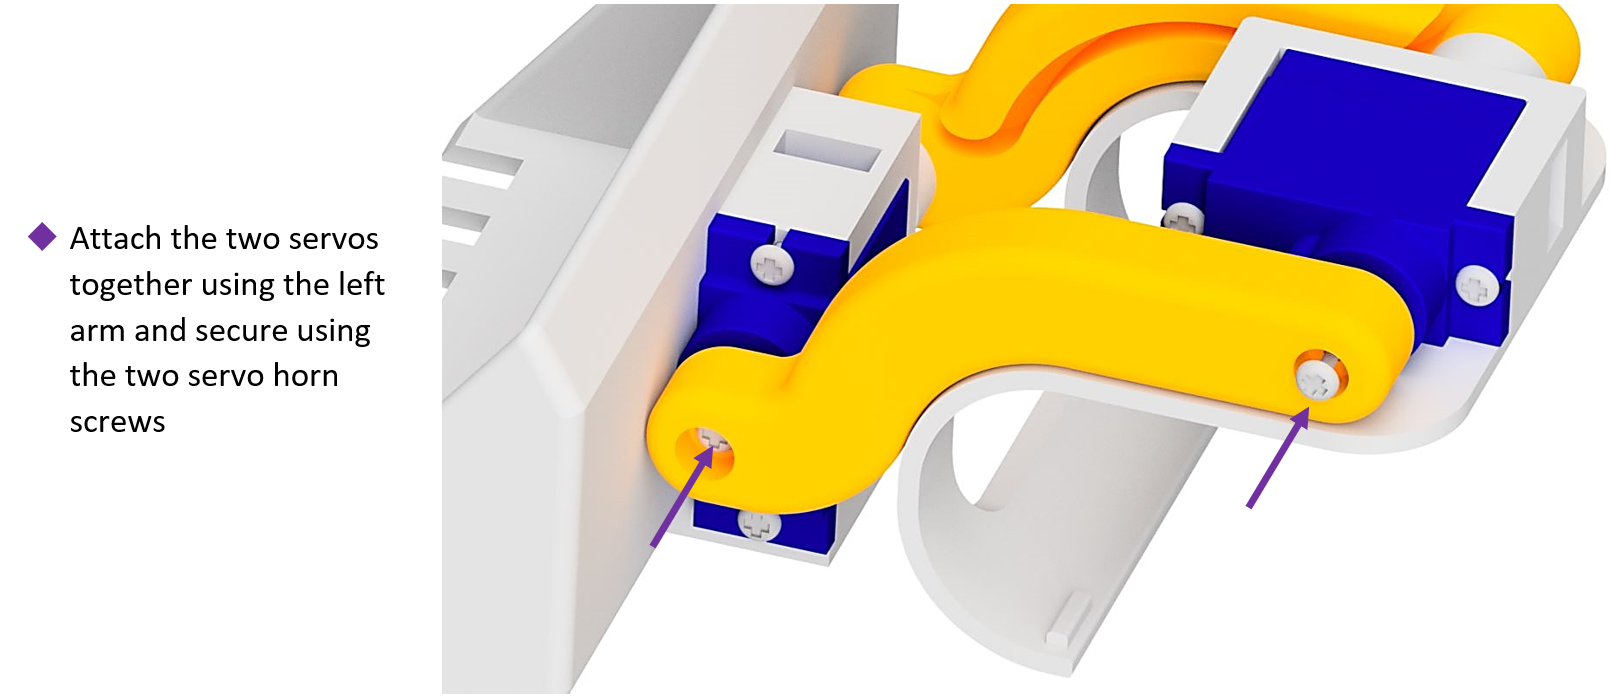
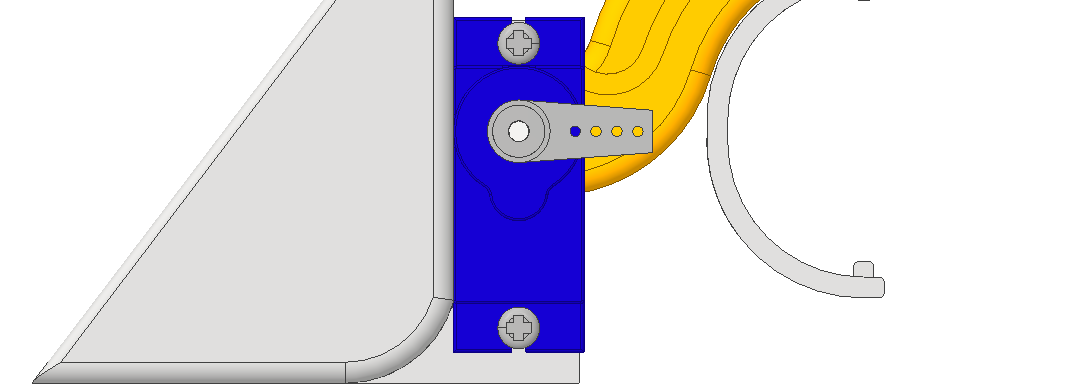
8Attach the Left Arm
- Attach the two servos together using the left arm.
- Secure using the two servo horn screws.
You're Done!
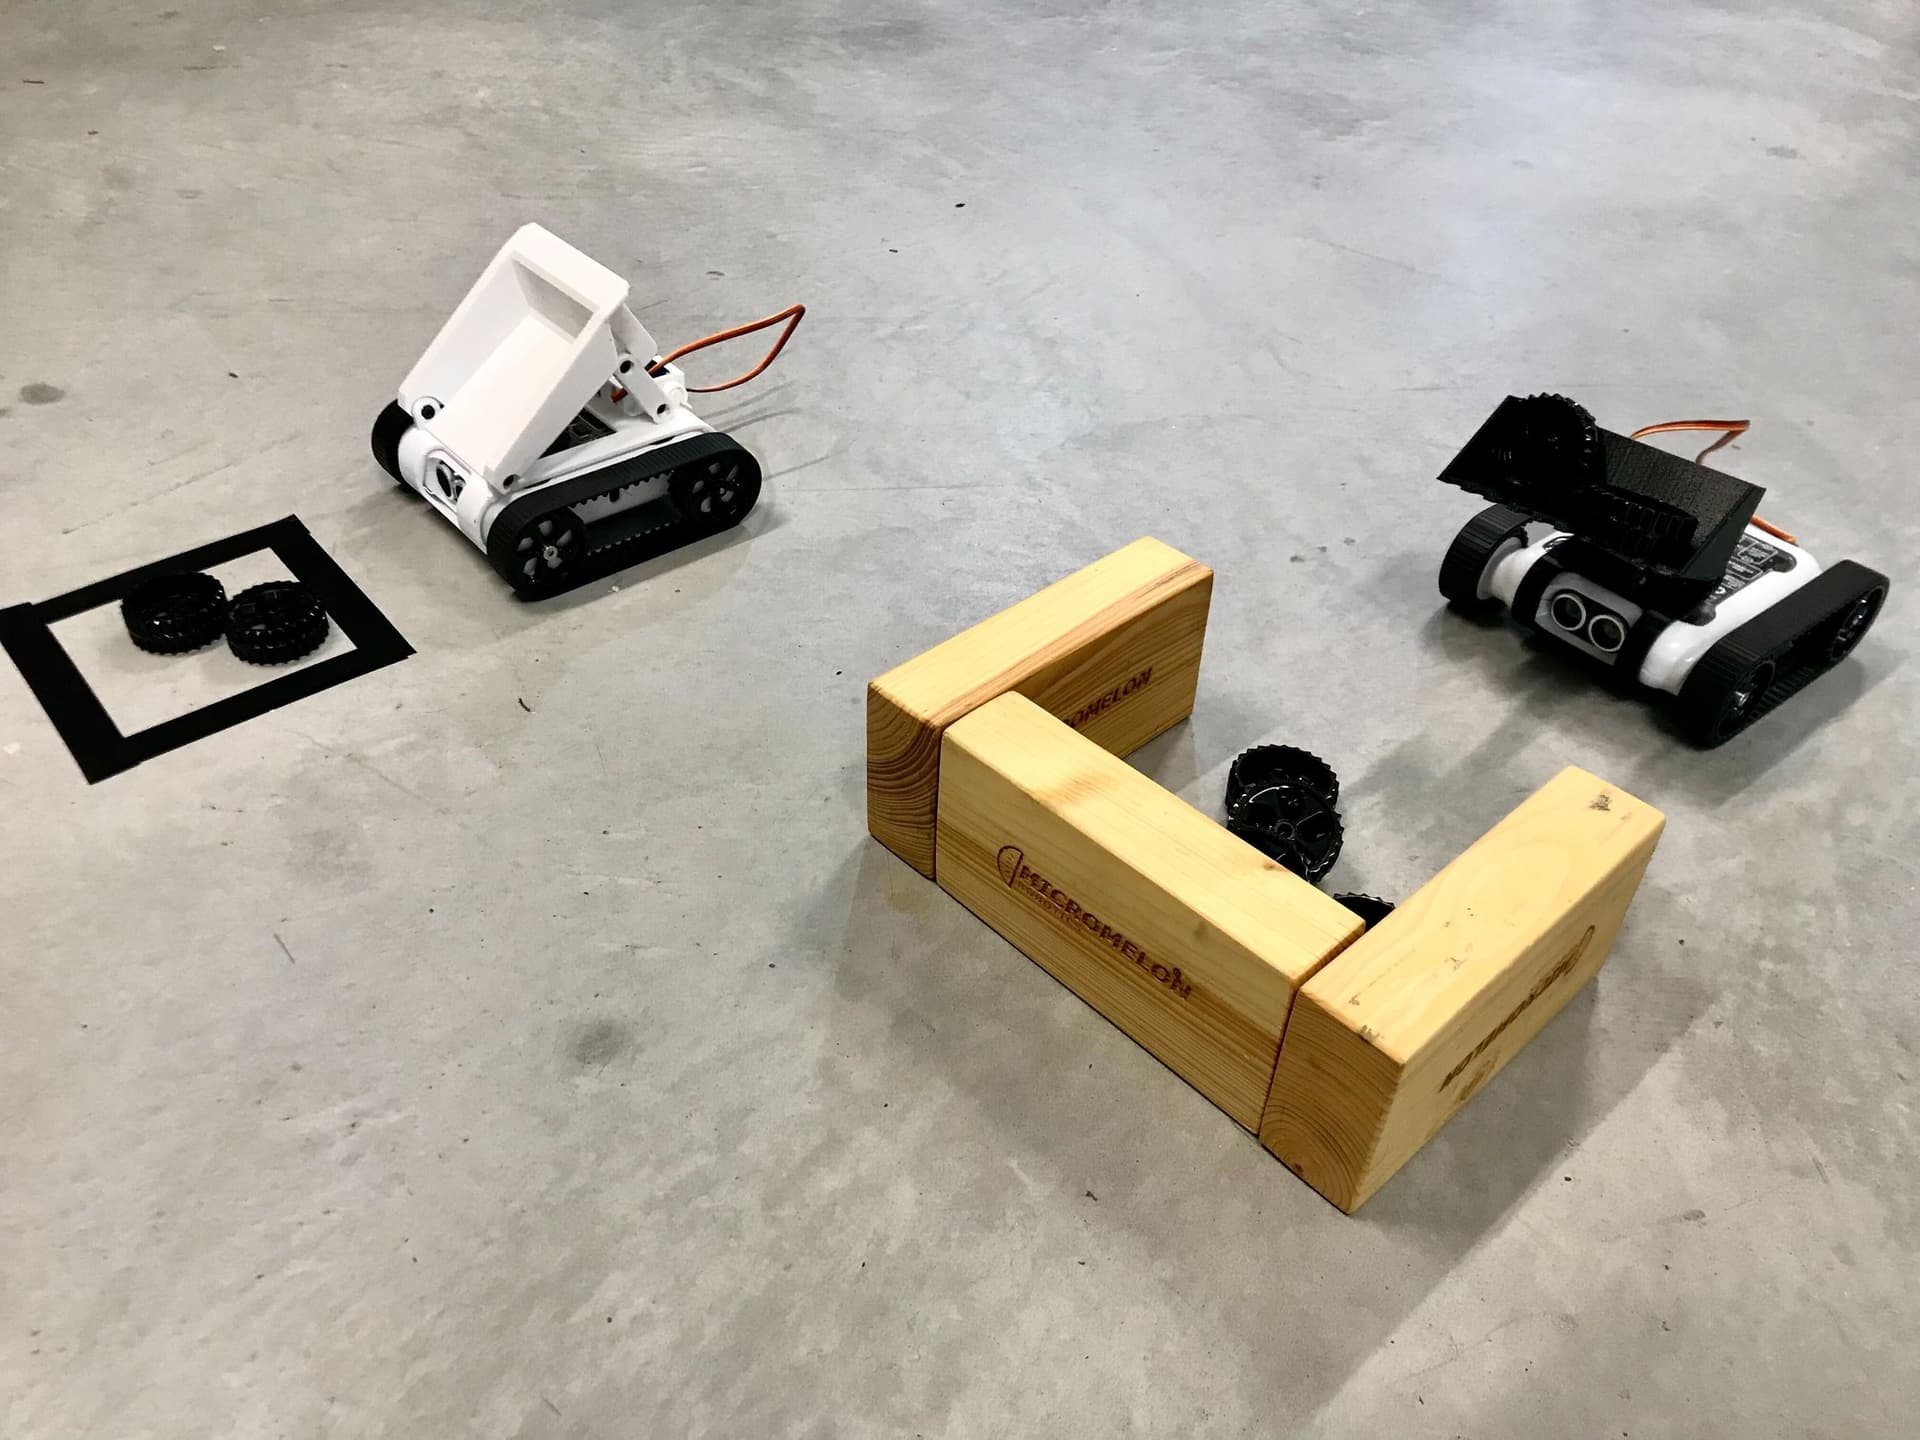
Your digger attachment is fully assembled and ready to clip onto your Micromelon Rover. You can program the servos to raise and lower the scoop using the Code Editor.