Introduction
The whiteboard marker holder attachment lets your Rover draw on whiteboards and paper using a standard marker. It clips onto the front of the Rover and uses a micro servo to raise and lower the pen. This guide will walk you through printing and assembling the attachment step by step.
What You'll Need
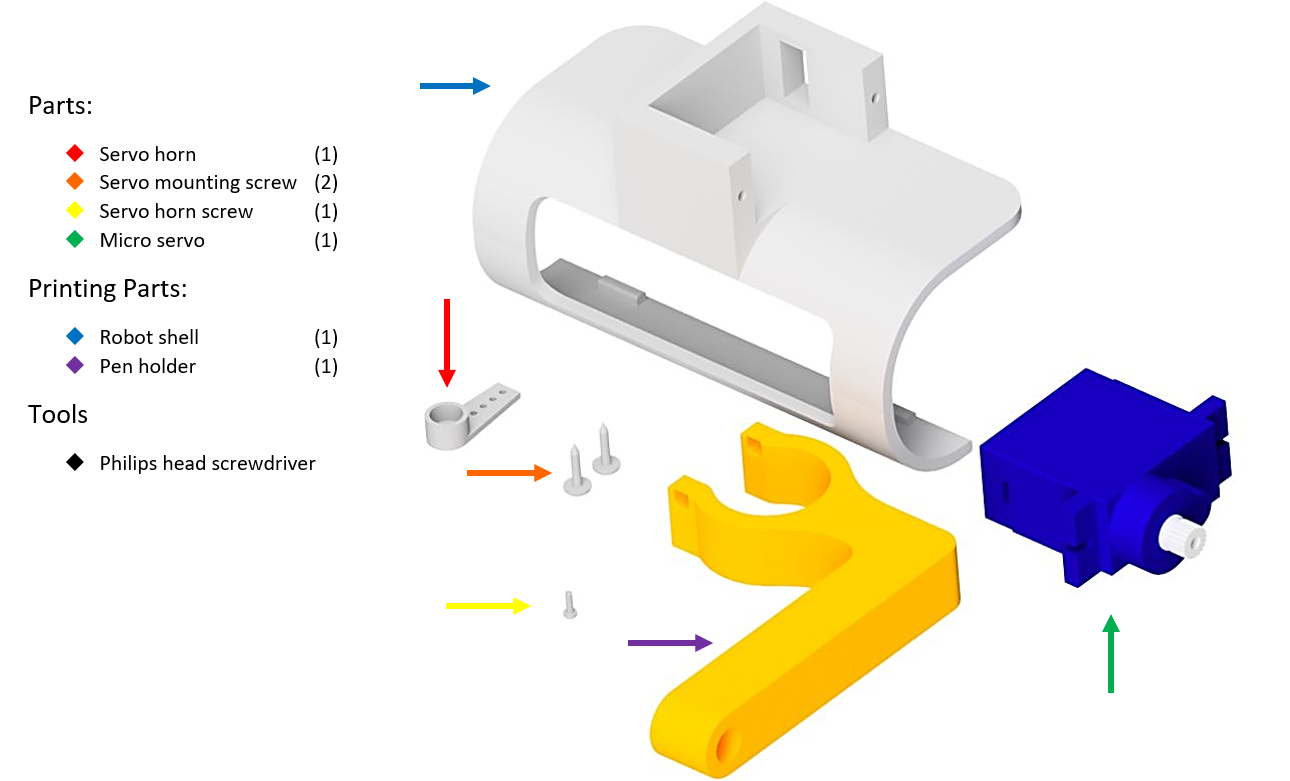
Parts:
- 1x Servo Horn
- 2x Servo Mounting Screws
- 1x Servo Horn Screw
- 1x Micro Servo
Tools:
- Phillips Head Screwdriver
 Thingiverse
 Printables
 Makerworld
13D Print Your Parts
- 1x Robot Shell
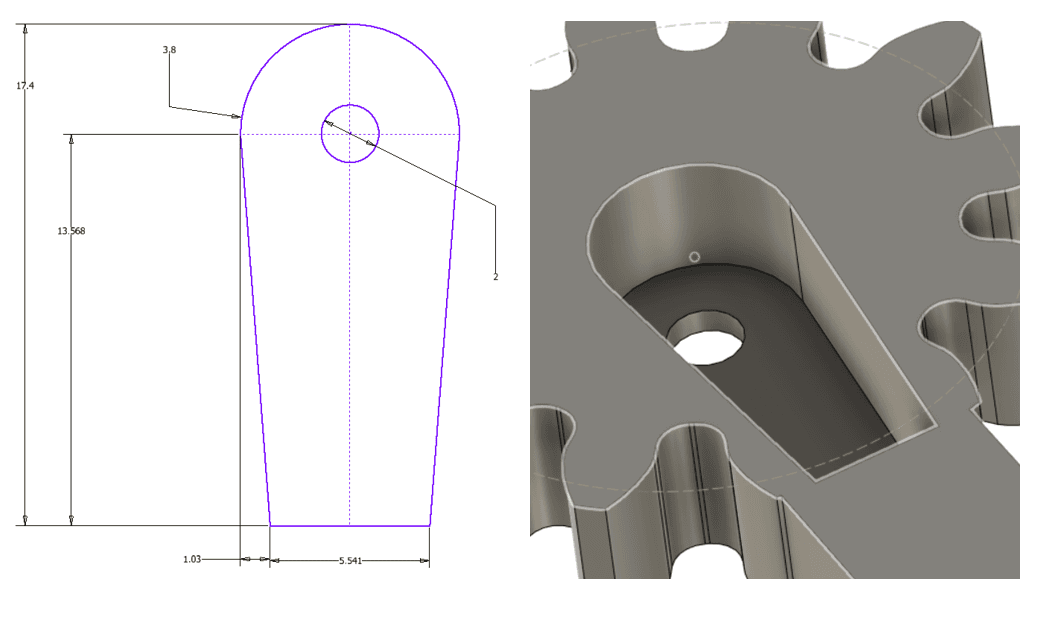
- 1x Pen Holder
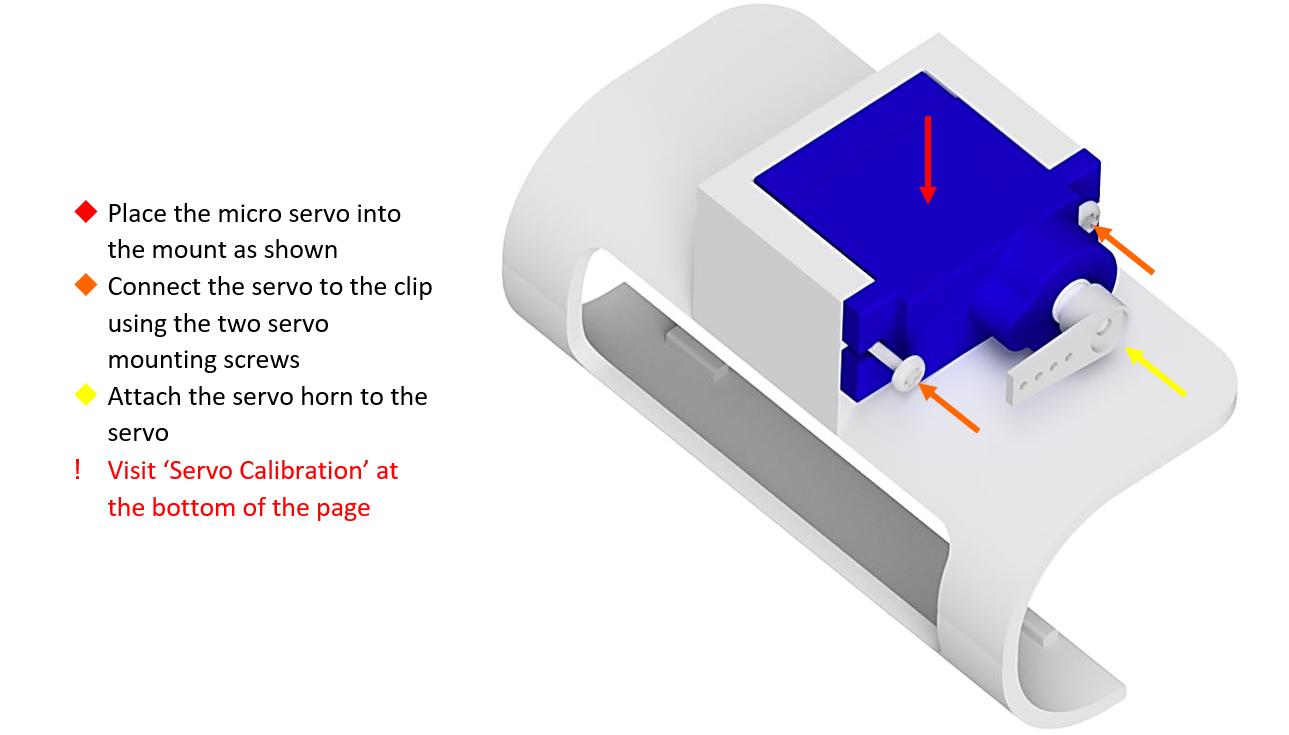
2Install the Servo
- Place the micro servo into the mount as shown.
- Connect the servo to the clip using the two servo mounting screws.
- Attach the servo horn to the servo.
- Calibrate the servo before attaching the servo horn (see the next step).
3Calibrate the Servo
- Before attaching a servo horn to a servo, you need to make sure the servo moves in the correct range.
- Plug the servo into the right port and run the following code.
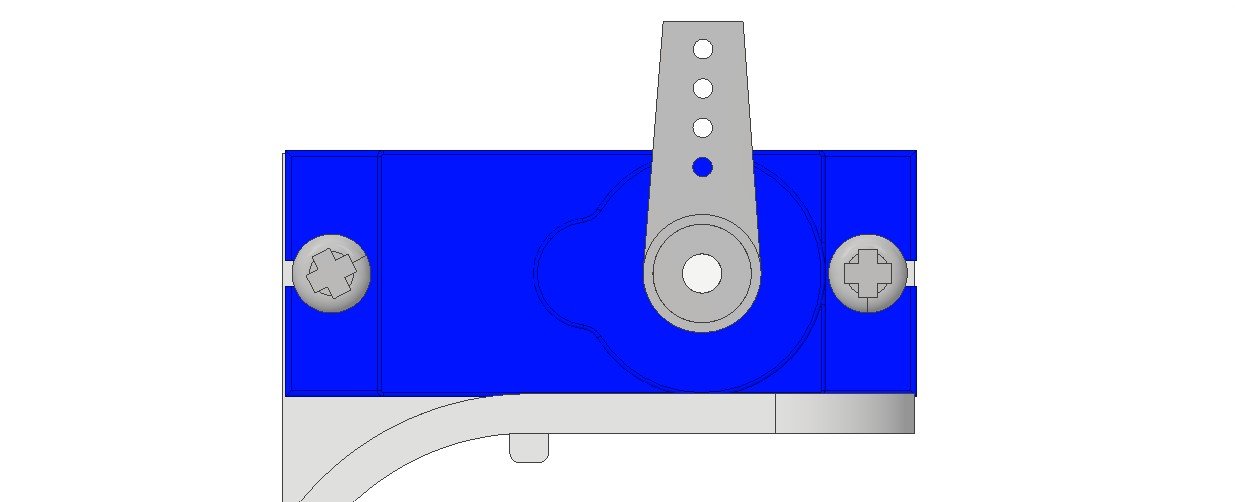
- Upload the code and attach the servo horn to the servo so it is in this position when the servo is at 0.
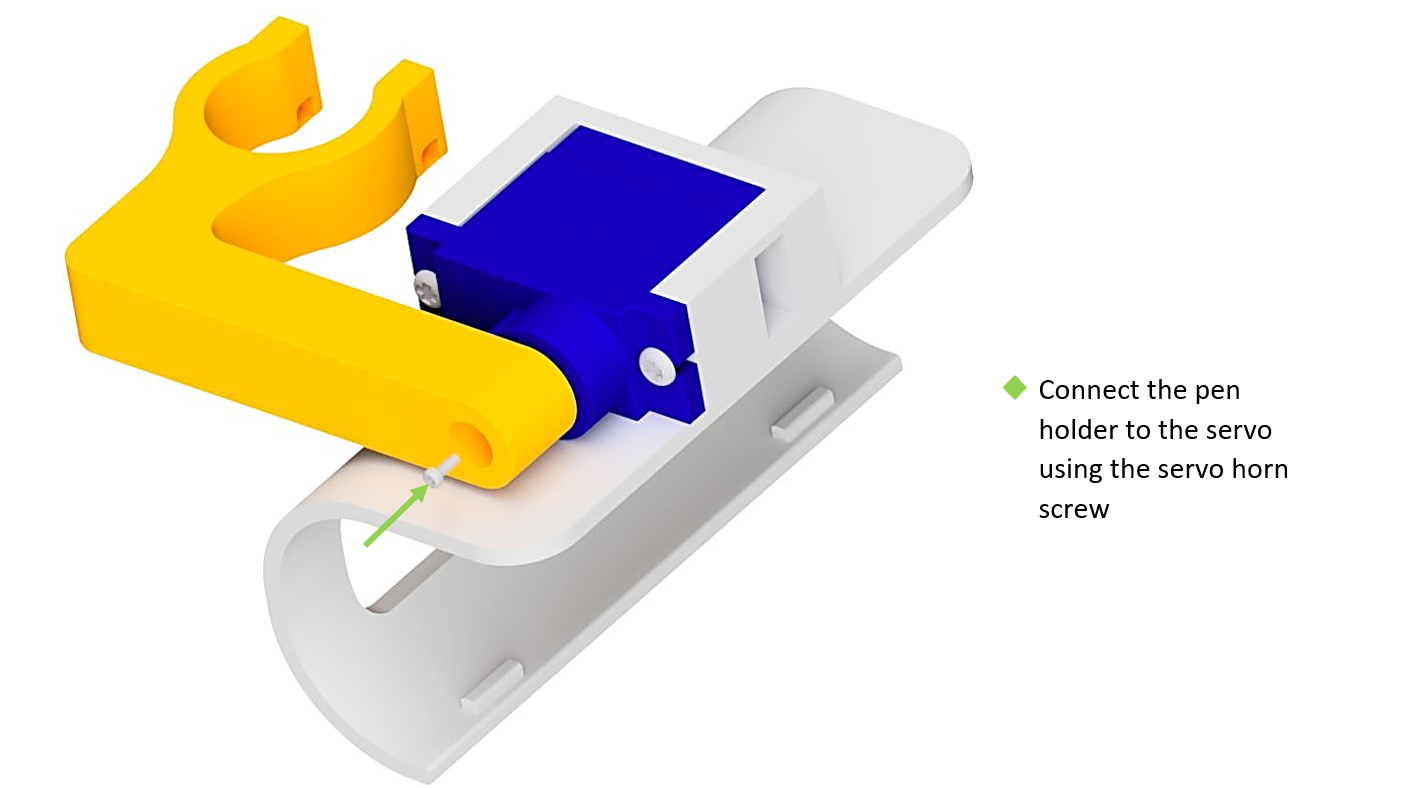
4Attach the Pen Holder
- Connect the pen holder to the servo using the servo horn screw.
You're Done!
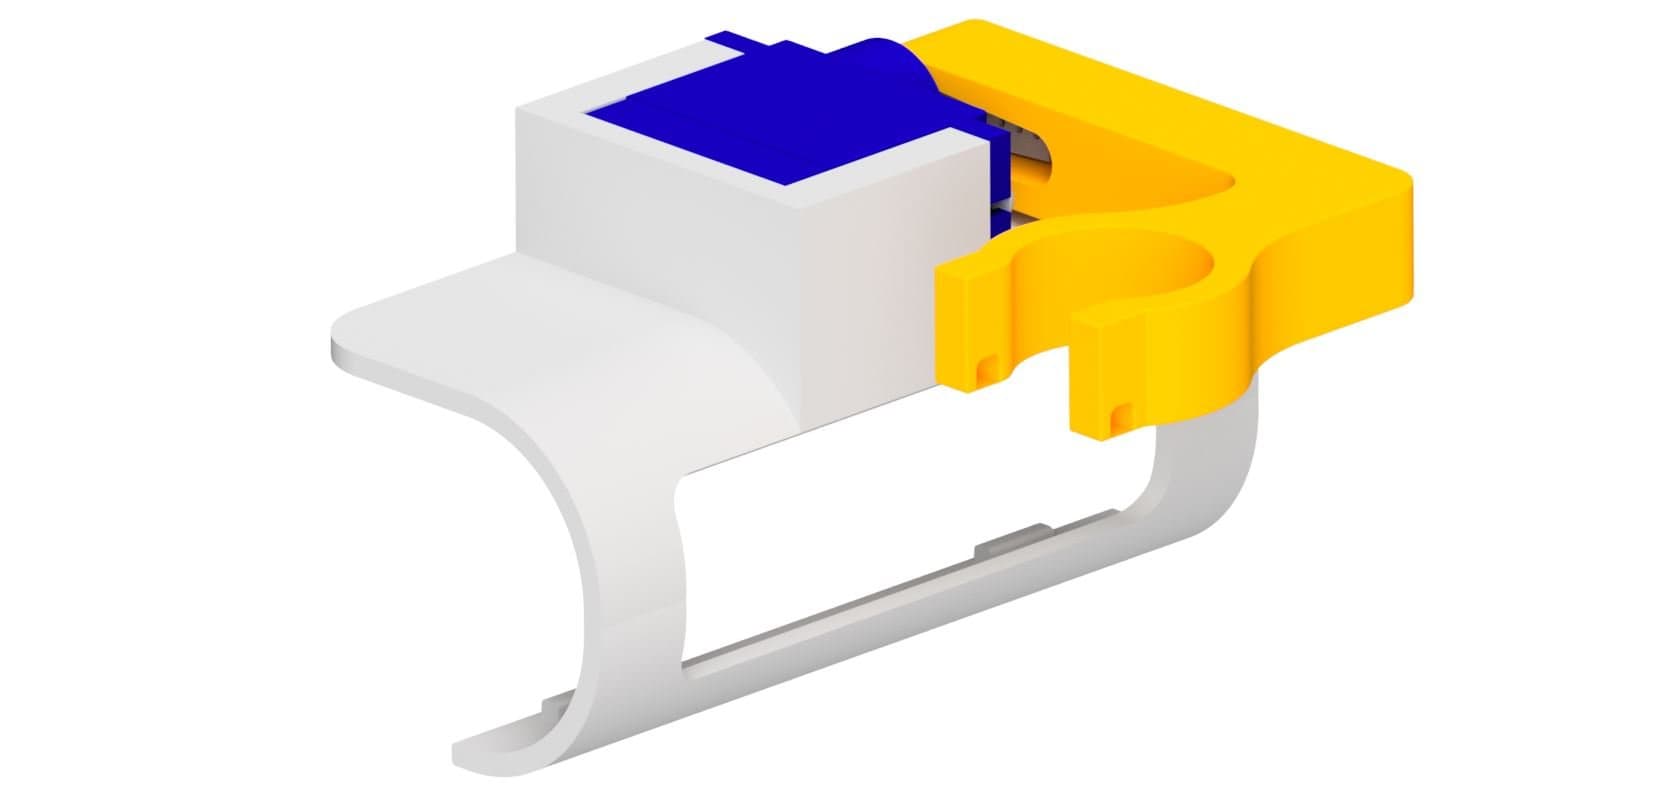
Your whiteboard marker holder is fully assembled and ready to clip onto your Micromelon Rover. Insert a whiteboard marker into the holder and program the servo to raise and lower the pen using the Code Editor.
Continue Learning
 Related resourceActivity: Rover Van GoghGet your art on with the pen attachment!