Introduction
This guide covers everything you need to get up and running with the Micromelon Rover, from powering it on to writing and running your first program. By the end, you will have connected your Rover, written a line of code in both blocks and Python, and run it on your Rover.
Rover Basics
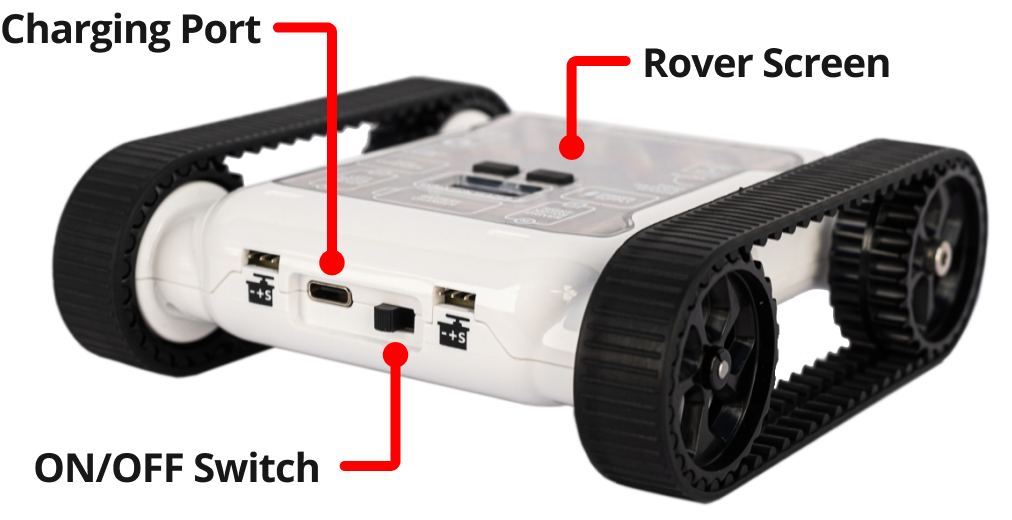
Power switch and charging port
- Flip the ON/OFF switch at the back of the Rover.
- The LEDs will flash, the buzzer will beep, and the screen will show a 4-digit Bot ID and battery level.
- The USB-C charging port is next to the switch. A full charge lasts around 5 hours.
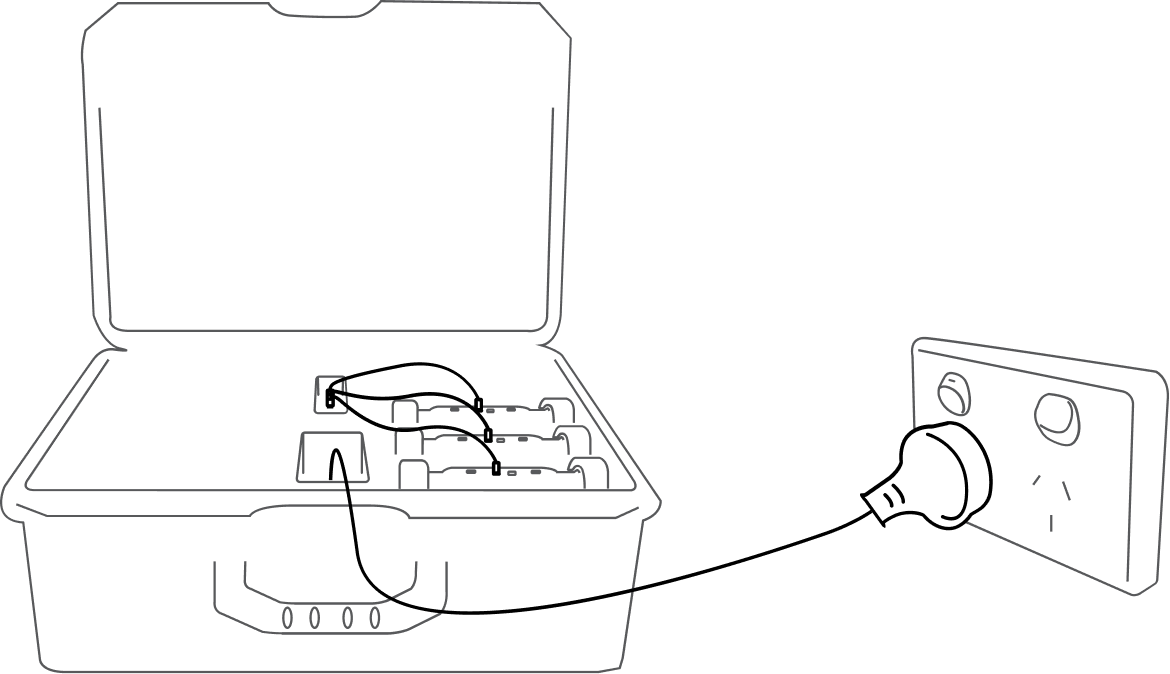
Class set charging dock
- Class sets come with a 10-Rover charging dock. Plug the dock into any wall outlet and connect the Rovers with USB-C cables.
- Individual Rovers can be charged with the included USB-C cable and power adapter, or any USB power source.
- You can still connect to a Rover while it charges, but the motors will be disabled.
Setting Up
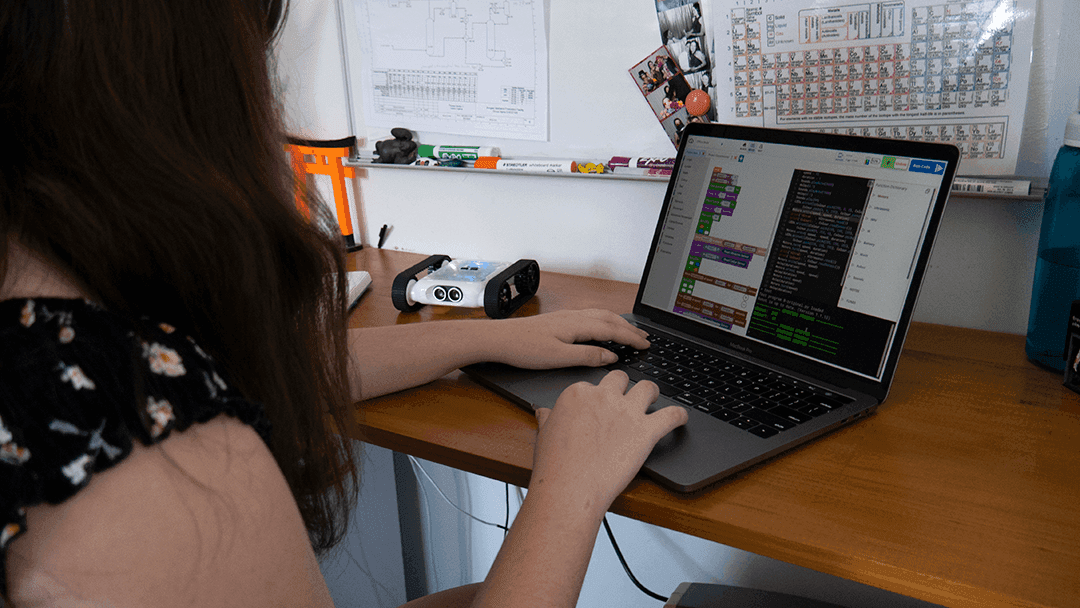
Micromelon Code Editor
- Download the Code Editor from the Downloads page. Available for Windows, macOS, and Linux.
- The Code Editor is the main tool for programming the Rover. It supports drag-and-drop blocks, Python, and a side-by-side view of both.
- School users: Your admin will create accounts for you. Check with your school's Micromelon administrator.
- Personal users: Click "Create Account" and fill in your details.
- You can also use the Code Editor in offline mode, though some features (like the Robot Simulator) require an account.

Connecting to the Rover
- Turn on Bluetooth on your computer and switch on the Rover.
- The 4-digit number on the Rover's screen is its Bot ID.
- Type the Bot ID into the Code Editor and press GO to connect.
- Only one device can connect to a Rover at a time. Press Unlink or turn off the Rover to disconnect.
Writing Your First Program

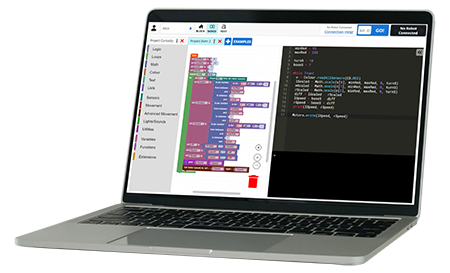
Code Editor layout
- The Block Editor (left) is where you drag and drop code blocks.
- The Text Editor (right) shows the Python equivalent of your blocks in real time.
- The Block Catalogue contains all available blocks, organised by category.
- The Function Dictionary explains each Python function.
- Press Run Code to send your program to the Rover.
Dragging a block into the editor
- Open the Movement category in the Block Catalogue.
- Drag the Move Forward 10 cm block into the editor and attach it to the orange Start block.
- Any blocks not attached to the Start block will not run.
Editing the Python code
- Look at the Text Editor on the right. You should see
Motors.moveDistance(10). - This is the Python version of the block you just added. Changes to blocks update the Python and vice versa.
- Change the
10to20. Your Rover will now move 20 cm instead of 10 cm.
Running the code
- Press the Run Code button in the top right. Your program will be sent to the Rover and it will move forward 20 cm.
- Make sure the Rover has enough space in front of it before running.
- To stop a running program, press the Stop button in the Code Editor or press a button on the Rover.
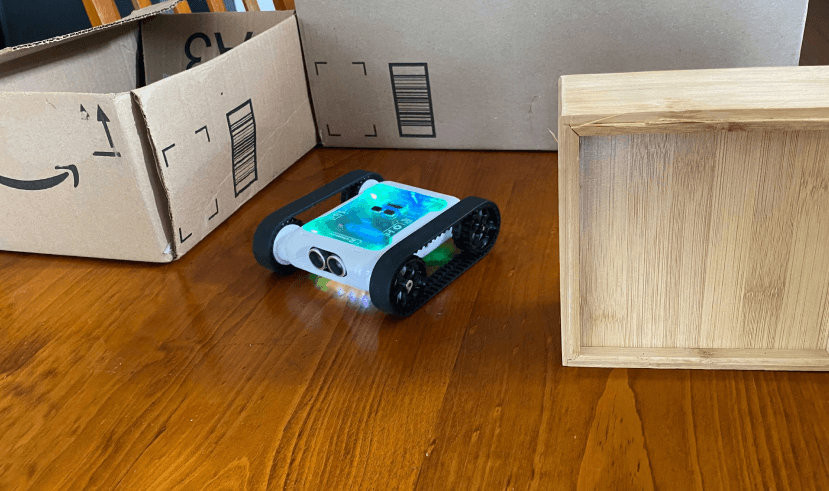
What Can the Rover Do?
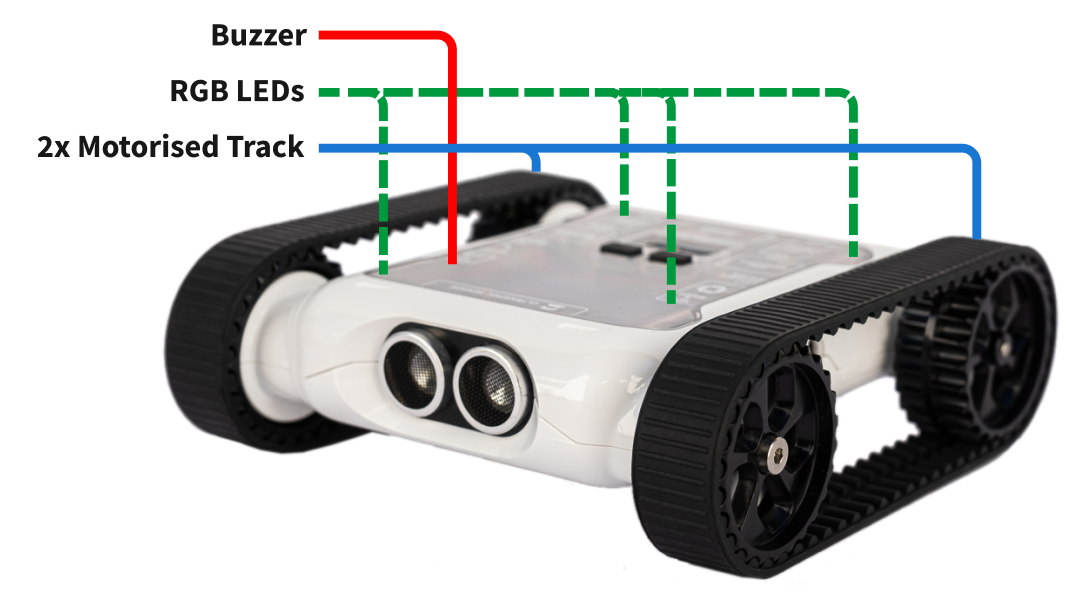
Rover actuators
- Motorised Tracks control movement and speed independently on each side. Found in the Movement category.
- Buzzer plays sounds and tones for audio feedback. Found in Lights/Sounds.
- 8 RGB LEDs can display any colour. Found in Lights/Sounds.
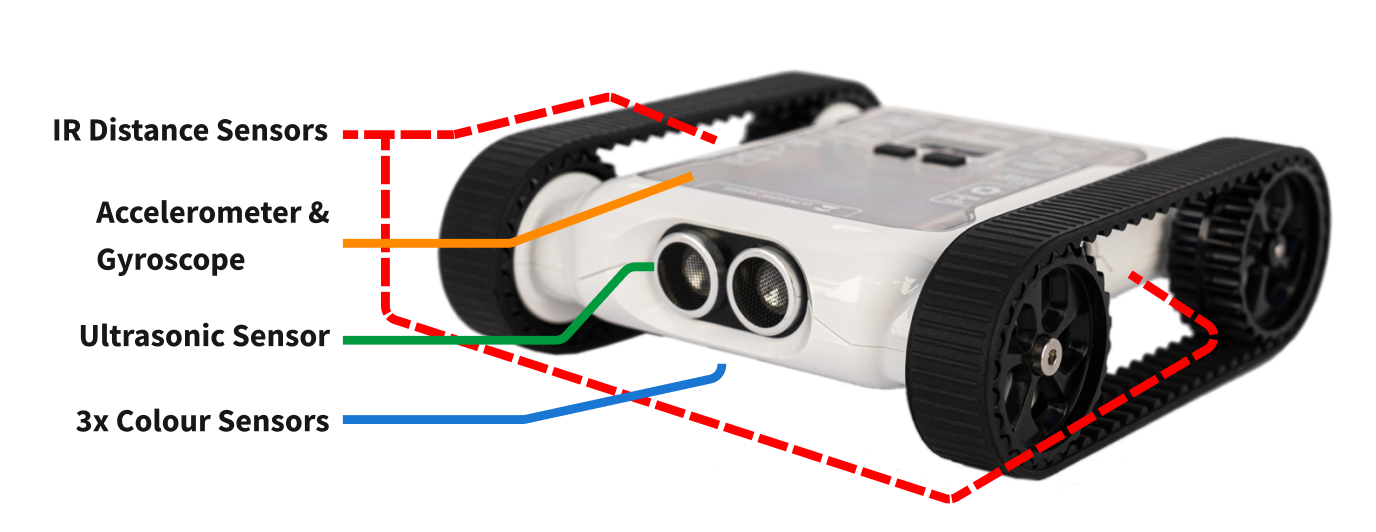
Rover sensors
- Ultrasonic & IR Distance Sensors on the front and sides measure distance to nearby objects.
- Colour Sensors on the underside detect the colour of the surface below.
- Accelerometer & Gyroscope track the Rover's orientation and rotation.
- All found in the Sensors category.
Opening sensor view
- Click the Rover icon next to the Bot ID to open a live view of every sensor reading.
- Useful for testing and debugging your code.
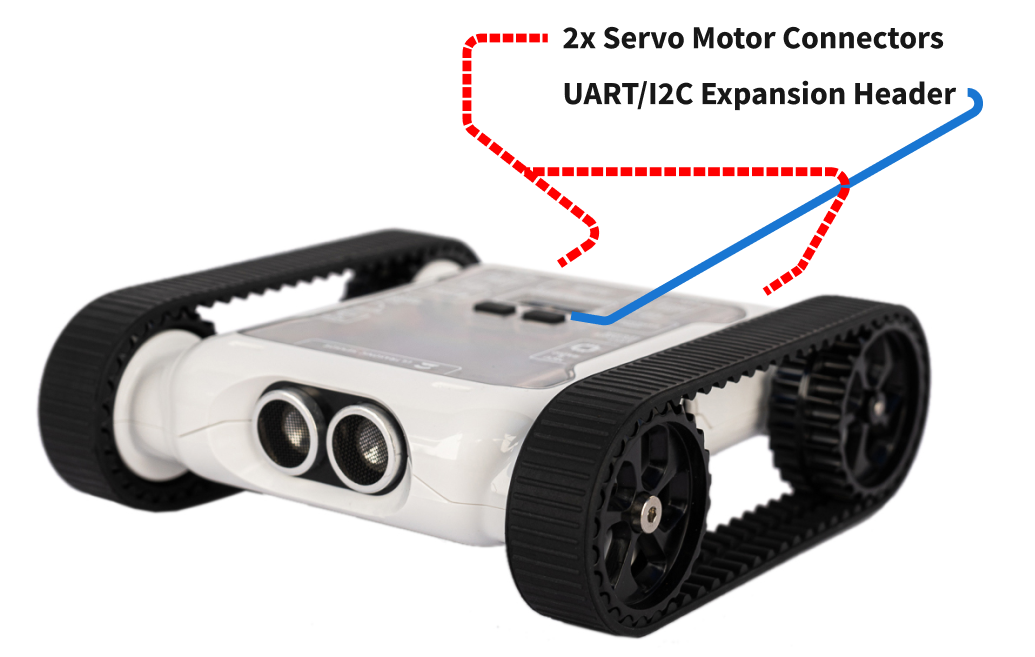
Expansion header
- Connect servo motors for 3D-printed attachments like claws, forklifts, and bulldozers.
- The UART/I2C header lets you connect external devices like Arduino boards or additional sensors.
- Found in the Expansion category.
You are ready to go. Pick an activity below to start building on what you have learned.
Continue Learning
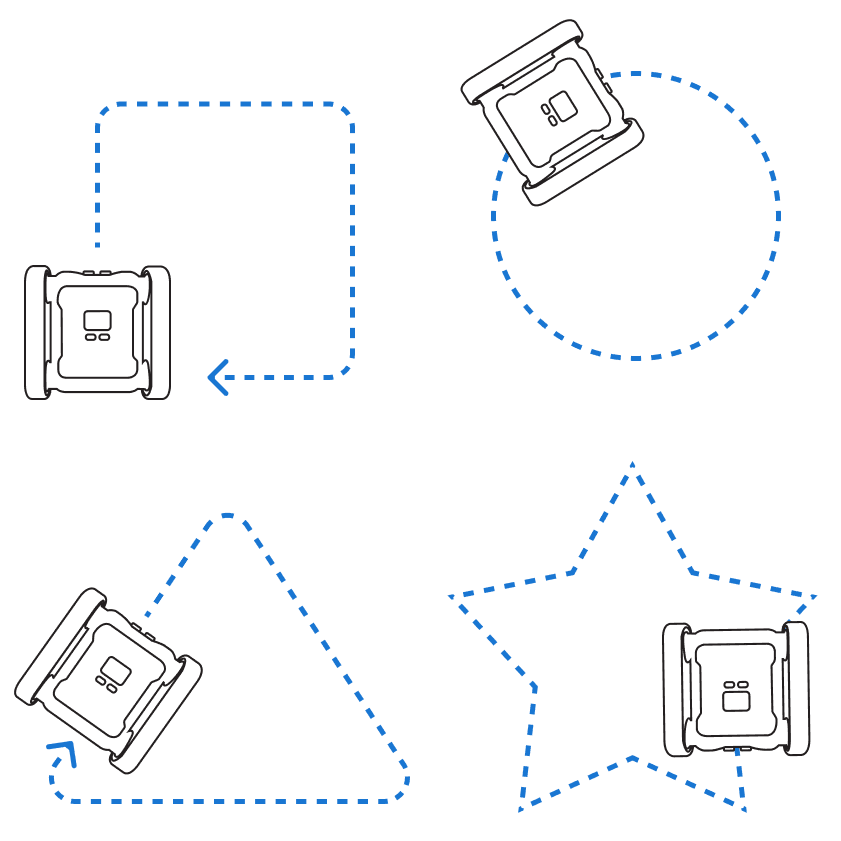 Related resourceActivity: Driving ShapesLearn iteration and how to control the Rover’s motors.
 Related resourceActivity: Roaming RoverLearn to avoid obstacles with the ultrasonic sensor.
