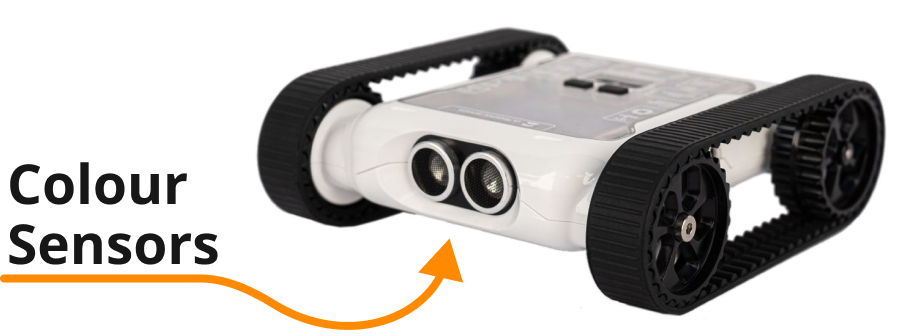
The colour sensors are one of the five sensor types on the Micromelon Rover. They’re located on the underside of the Rover, directly under the ultrasonic sensor, and there are three identical colour sensors. The Rover is designed with three sensors so it can attempt more difficult challenges. Line-following challenges can be completed with a single colour sensor, but using multiple sensors allows for a more comprehensive solution.
What Do They Do
The colour sensors detect what colour they’re currently facing. They’re located on the underside of the Rover so we can determine the colour of the surface the Rover is driving over.
Top of the Rover
What Exactly is Light and Colour?
Before we dive into how the colour sensors work, let’s look at what colour actually is. Colour as we see it on things around us, green in grass, brown in wood, is produced by light. Visible light emitted by the sun or a light bulb reflects off objects, which makes it possible for us to see what colour they are.
Light is made up of electromagnetic waves. The science behind those is complicated; for now all we need to know is they’re a type of light. Electromagnetic waves vary in length, similar to how there are big waves and small waves at the beach. The size of the wave determines what colour the light will be. All visible light ranges from about 380 nm to 750 nm (nanometres).

The visible light spectrum, from violet (~380 nm) to red (~750 nm)
Violets and blues are shorter waves at around 380–485 nm; oranges and reds have longer wavelengths at around 590–750 nm.
Where is White?
White is a colour, but it isn’t on the colour spectrum. That’s because white light is what we see when all coloured light is combined, it’s the kind of light emitted by the sun.
White Light Becomes the Colour We See
When white light hits an object, some is absorbed and some is reflected. The reflected light is the coloured light we see from objects. A red object is red because it reflects red light and absorbs the rest.
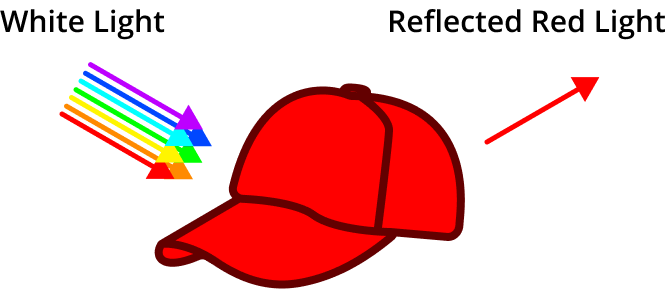
White light hitting a red surface, only the red wavelengths are reflected back
How Does the Colour Sensor Work?
To detect what colour the colour sensor is facing, all it has to do is detect what coloured light is being reflected off the surface. Each colour sensor has 4 LEDs and a light detector. Here’s how those components work together to detect surface colour:
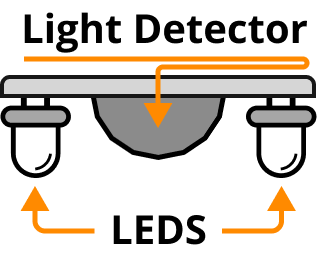
Components of the Rover’s colour sensor
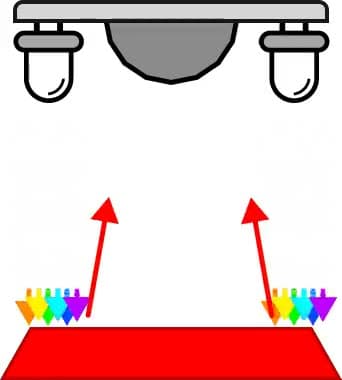
- The colour sensor LEDs illuminate with white light (white light contains all coloured light from the visible spectrum).
- The white light travels down and hits the surface, some is absorbed, some is reflected.
- The reflected light travels back up.
- The sensor detects the returning reflected coloured light.
The colour sensor determines what colour it is facing by detecting which coloured light is reflected off the surface.
Limitations and Common Problems
Light Pollution and Shadow
You may receive a different value on each sensor from the same surface. This can be caused by shadows moving over the surface, or by alternative light sources illuminating parts of the surface with a higher intensity of reflected light. Light pollution is unavoidable when programming a real colour sensor, you should always adjust and calibrate the light values you use for the environment your Rover is in.
Range Is Short
The colour sensors work most effectively when the target surface is within 1–1.5 cm of the sensor, about the height of the sensors when the Rover is sitting flat on the ground. Within that distance, the majority of detected light will have reflected off the target surface. Further away, light from outside sources is more likely to pollute the readings, leading to inaccurate colour values.
Detection Accuracy
The colour sensors are powerful but not as accurate as human eyes. Where humans have little trouble differentiating shades of green (e.g. dark green vs light green), the Rover may identify them both as green. The same is true for similar colours like a lighter shade of red and orange, they may be mistaken for each other. When designing colour-based activities, use coloured components with clear contrast. This is why typical line-following challenges have a white background and a black line.
Programming the Colour Sensor
Open the Code Editor, connect to a Micromelon Rover, and open Sensor View. Click the ROVER button next to your Rover’s name to open it. For a refresher on the Code Editor, see the getting started guide.
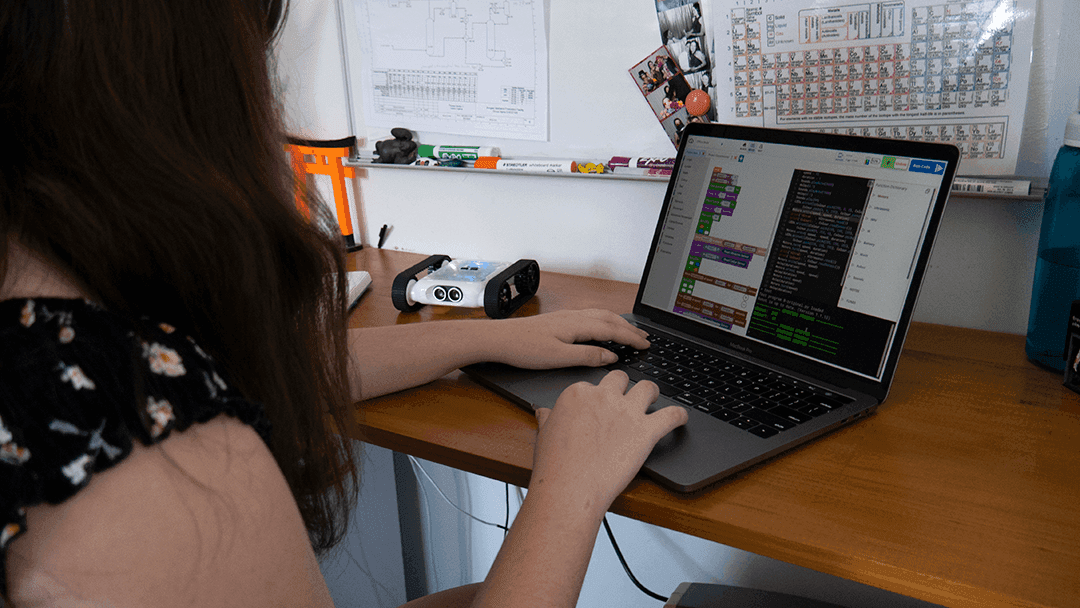
In the Sensor View dialog, the colour sensor values are in the top-right table. The top row contains the approximated colour each Rover colour sensor sees.
Opening Sensor View in the Code Editor
Understanding the Values
Unlike the ultrasonic or IR sensors that have one default value, the colour sensors return a range of values for different scenarios. The left, middle, and right sensors all return the same data. Each sensor produces hue, red, green, blue, and brightness values.
Hue
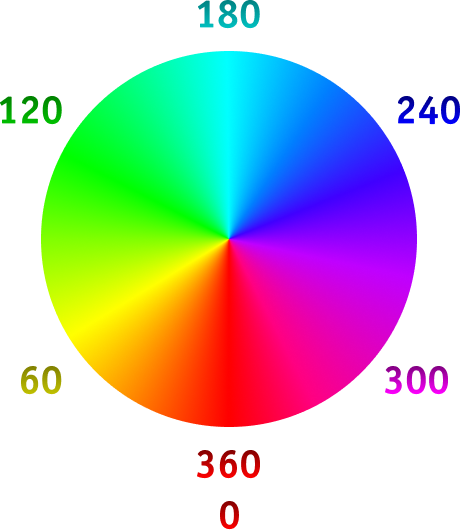
The hue colour wheel, 0° to 360°
Hue defines colour based on a 360-step wheel. All colours that humans perceive are represented on a degree of the wheel. Hue is one component of the HSV (hue, saturation, value) colour model. The Rover only communicates hue, not saturation or value.
Red, Green, and Blue (RGB)
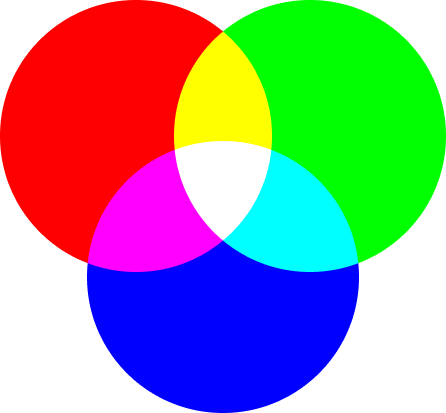
RGB colour model, combining red, green, and blue light
The red, green, and blue values are in the range 0–255. Each value represents the amount of that coloured light the sensor is detecting. A sensor facing a pure red surface will show a high red value and low green/blue values. A sensor facing a pure yellow surface will show high red and green values but a low blue value, since red + green = yellow in the RGB model.
Brightness
Brightness is in the range 0–255 and shows how much white light the sensor is detecting. White light isn’t the same as red, green, or blue light, it’s all coloured light combined. A high brightness value indicates the sensor is detecting a wide range of coloured light. A pure white surface will always produce a large brightness value.
Using the Colour Values in Code
Let’s write a simple program to make our Rover set its LED colour to whatever colour the middle colour sensor currently sees.
Building the colour-matching LED program
- Start with a While True loop, the program needs to repeat to keep gathering data.
- Add a Set All LEDs block from the Lights/Sounds category. It takes a colour block.
- From the Colour category, place a Hue Colour block inside Set All LEDs. This translates a hue value into a colour.
- From the Sensors category, attach a Read Hue From Middle Colour Sensor block to the Hue Colour block.
- Press Play.
While the code is running, the Rover’s LEDs will match the colour it’s detecting from the middle colour sensor.
Wrapping Up
Now that you’re familiar with the colour sensor, how it works, and how to program it, try one of the activities below.
Continue Learning
 Related resourceActivity: Rover Van GoghGet your art on with the pen attachment!