Maze challenges are great cumulative activities for Digital Technologies classes. Maze-solving algorithms incorporate branching and iteration and require students to understand sensor data. This post will cover:
- The Digital Technology learning objectives that maze algorithms cover.
- Different maze complexities and how to make a maze the right level for your students.
- Assessing student work and the achievement standard.
- How to build students’ knowledge throughout the term so they’re ready to attempt a maze assessment.
What Skill Level Are Mazes Appropriate For?
Mazes can be a great challenge for students of all skill levels. Maze complexity can be adjusted easily by changing the layout or adding optional challenges. As the maze becomes more complex, the algorithm students create will become more sophisticated. You can tailor a maze to meet the desired learning objectives for your students’ skill level.
Possible Maze Unit Learning Objectives
Branching, Iteration, and Algorithm Design
To complete a maze, students design an algorithm for their Rover that handles path formations and challenges. Successful maze algorithms require a comprehensive understanding of branching and iteration. The more complex the maze, the more sophisticated the algorithm needs to be. Maze algorithms typically use IF / Else / Else If blocks with conditional operators (>, <, ==, !=), repeated using a variety of Loops.
Understanding and Analysing Sensor Data
Depending on maze complexity, there are a range of sensors students can use to solve challenges and optimise their algorithm. Most mazes will require the ultrasonic, IR, and colour sensors. The ultrasonic and IR sensors detect maze walls; the colour sensors detect floor-colour changes (e.g. the finish point or an obstacle). More complex solutions may also use the gyroscope.
You can create criteria that test students’ ability to understand how the sensors generate their data and then organise and analyse it. For example, an auxiliary objective might be for students to correctly determine how many left and right turns the Rover made while solving the maze, based on gyroscope data. To do this, they need to understand how the gyroscope collects its data, what type of data that is, and how to translate it into useful information.
Team Management and Planning
Mazes can be quite complex. It’s common for students to work in pairs or small groups on their algorithm collaboratively. One way to organise group coding is to delegate a specific challenge in the maze to each student to program, once each student has their individual piece, the team has to merge them together. This approach is often slow, but it forces students to practise explaining their thought process and code to their peers. Successfully explaining code to others is a strong indicator of communication skills.
Designing A Maze and Adjusting Complexity
Different maze configurations offer different opportunities for students to engage Digital Technologies knowledge. The right complexity also lets students demonstrate the achievement standard for their year level. Below are three example mazes of varying complexity.
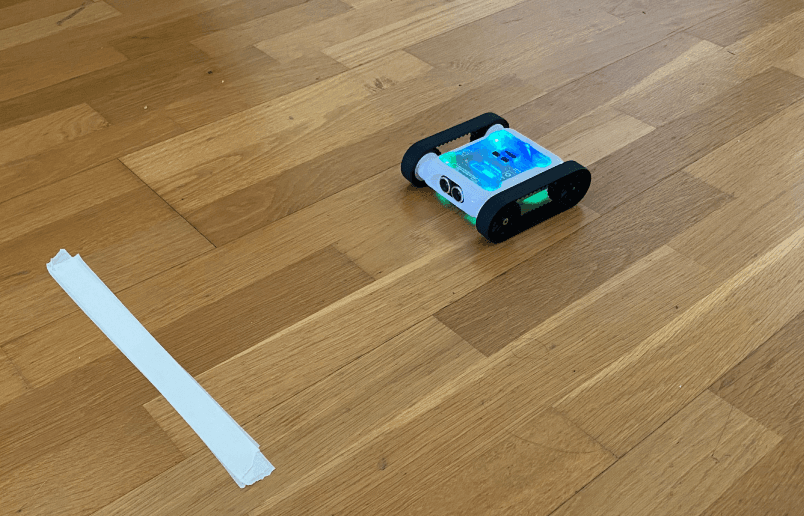
Beginner
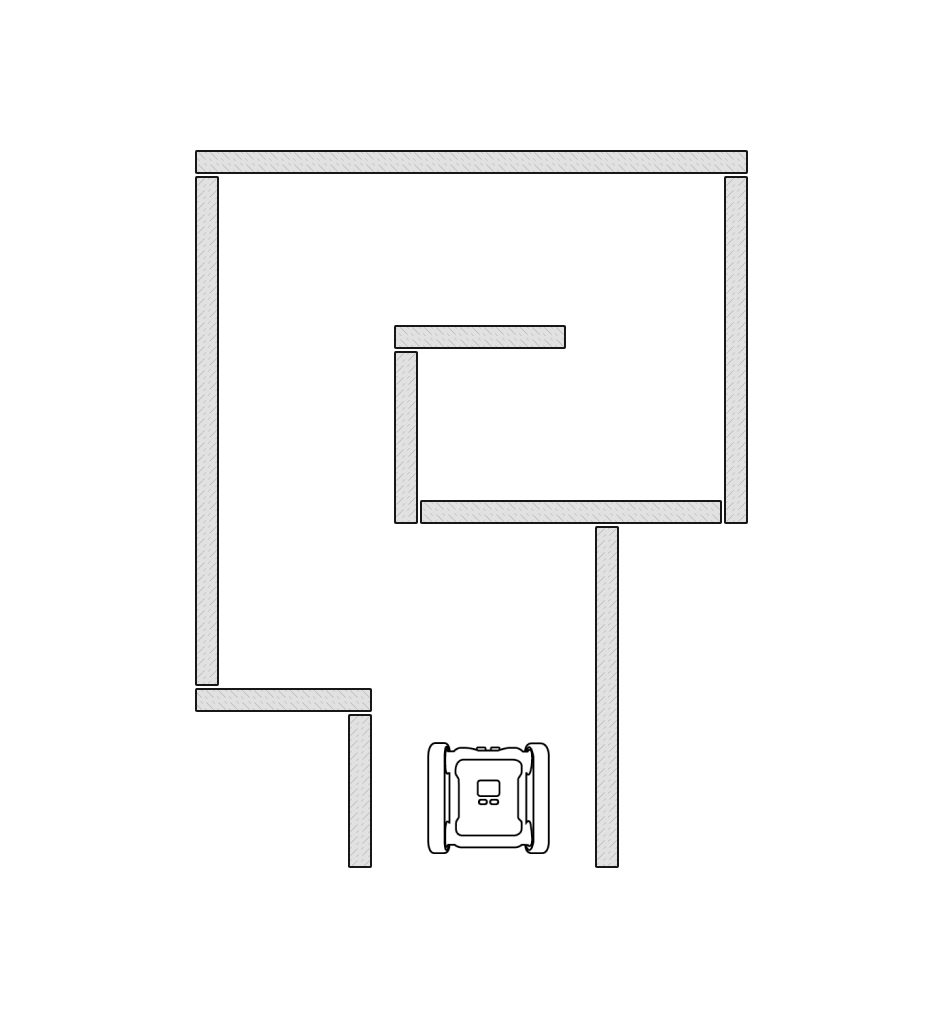
Beginner maze layout
This beginner maze has simple path formations, no dead ends or T-intersections, only left and right turns. It can be solved with just the ultrasonic and IR distance sensors. A basic understanding of branching and iteration can be learnt from completing a maze like this.
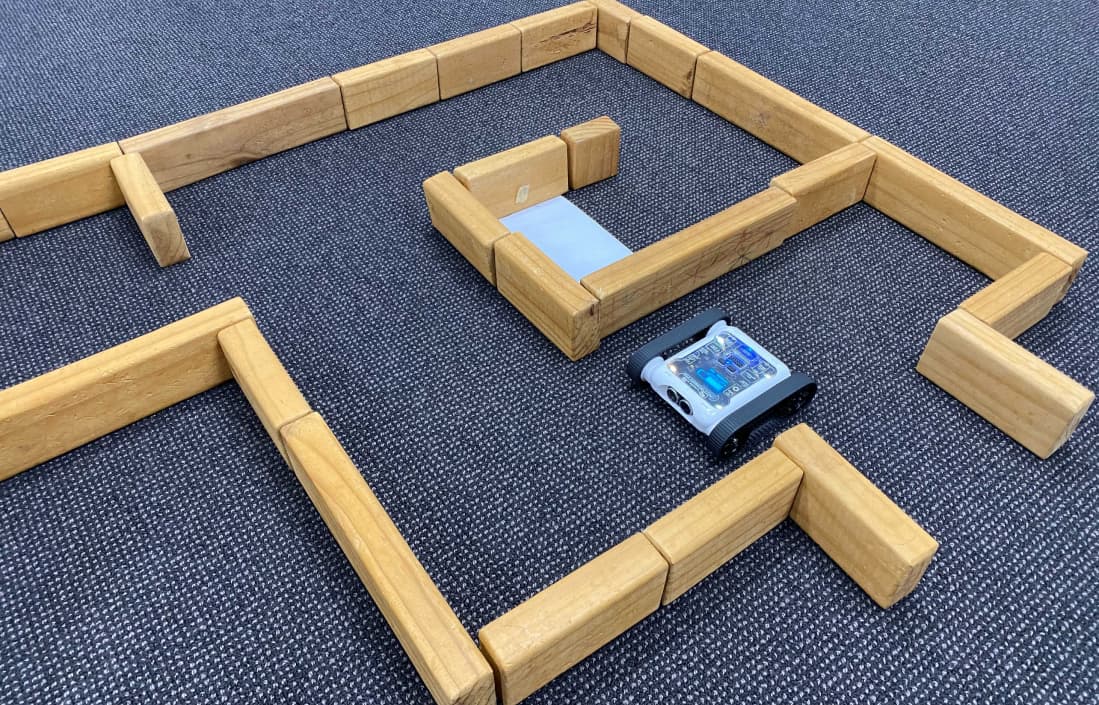
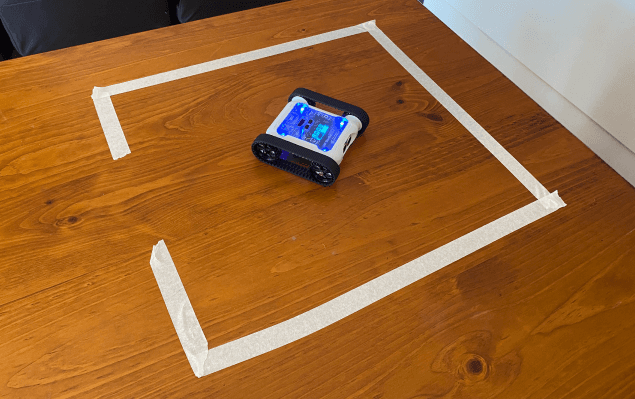
Intermediate
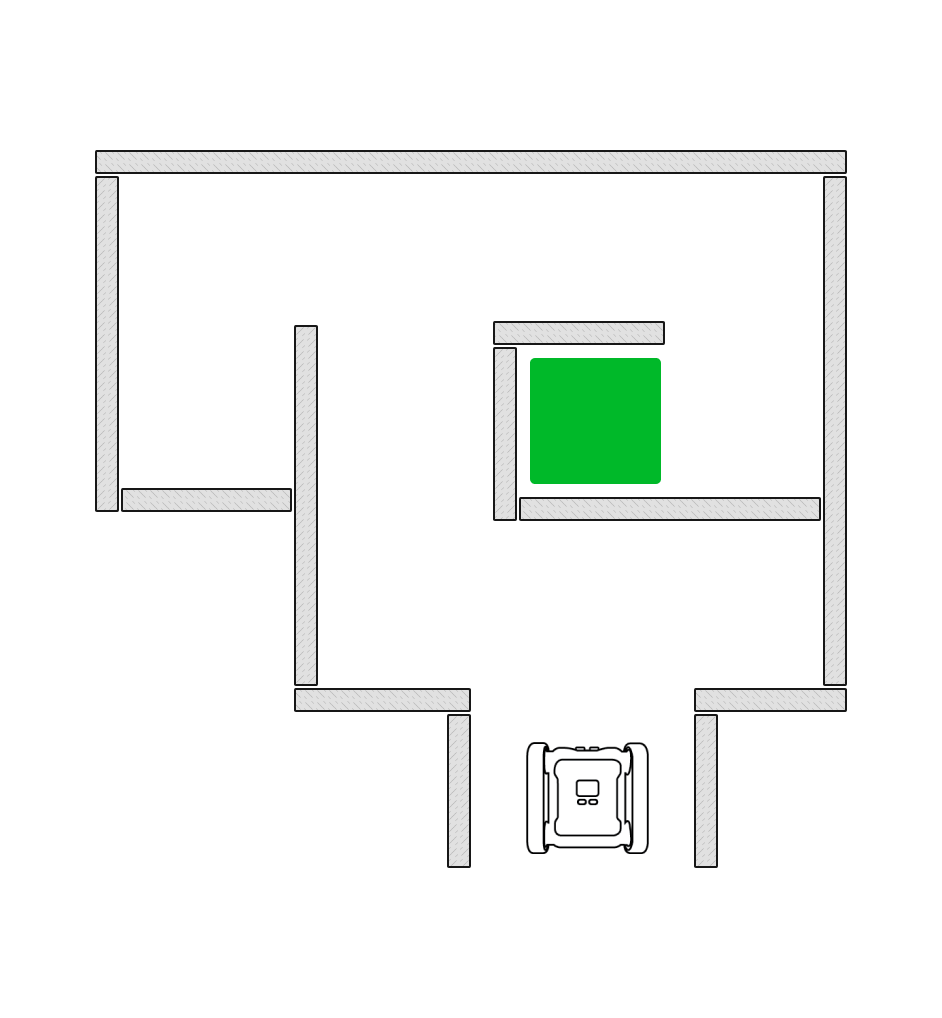
Intermediate maze with a green finish zone
This maze has more complex path formations including T-intersections and dead ends. The green rectangle is a coloured floor that signifies the finish zone, students need to use the Rover’s colour sensors to detect and stop the Rover when it reaches the finish zone. This requires an understanding of colour sensor data and more complex branching logic.
Advanced
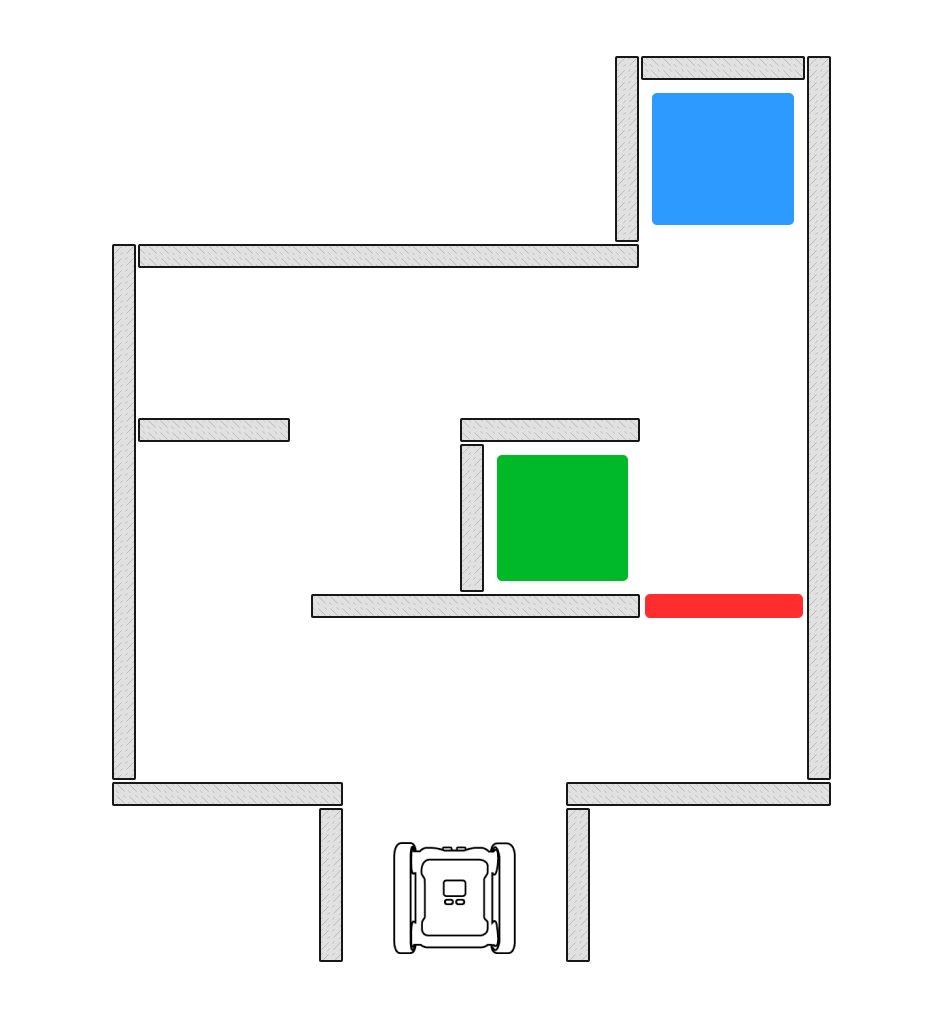
Advanced maze with red obstacles and a blue checkpoint
This maze has the same variety of path formations as the intermediate maze, plus more coloured floor challenges. The red section indicates an impassable obstacle (like a fire). Rovers are not allowed to cross it. The blue zone acts as an additional objective. Rovers must enter the blue zone before they can finish in the green zone. The two new colour challenges require more sophisticated branching logic than the intermediate maze.
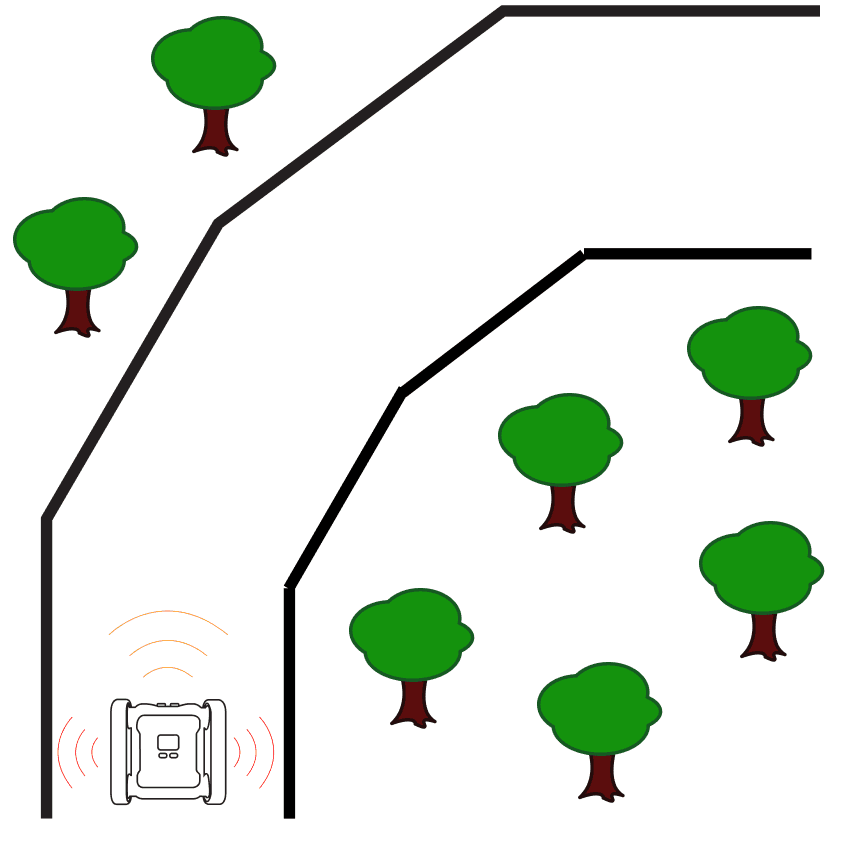
Other Ways To Vary Maze Complexity
Examples of additional challenges you can add to a maze
You can increase complexity in a variety of ways beyond what we’ve mentioned. Some ideas:
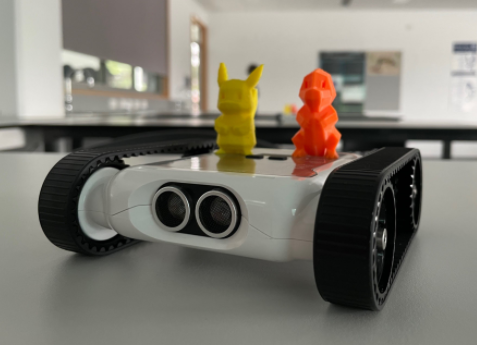
- Cargo runs. Have students keep a small object (e.g. a rubber duck pilot) balanced on the Rover. This makes it imperative not to drive into walls and lose the passenger.
- More colour challenges. For example, visit all three colour zones before completing the maze.
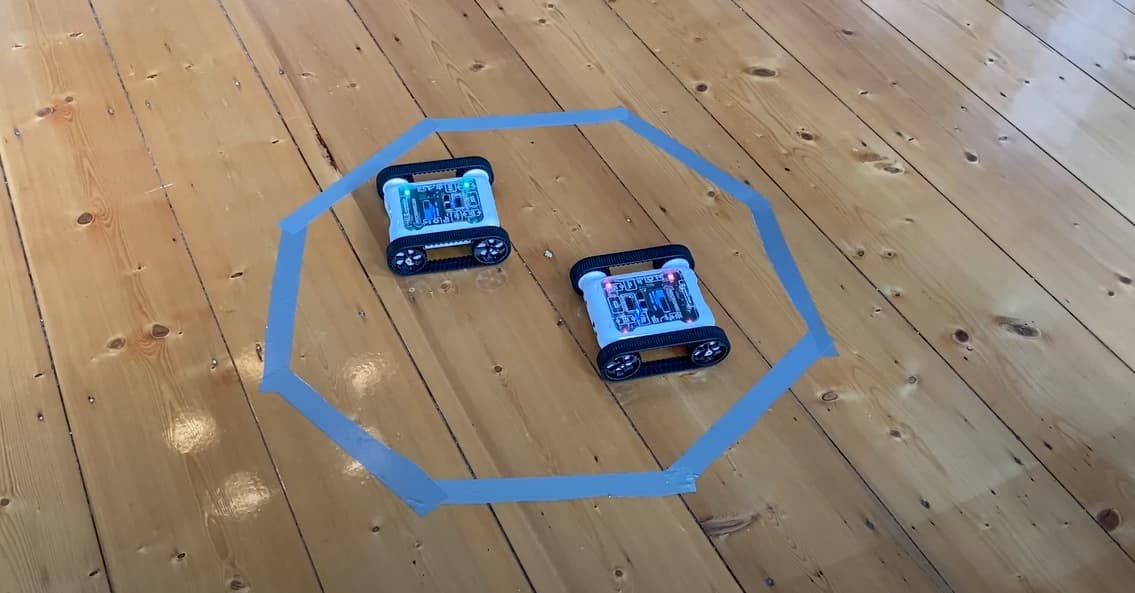
- A maze minotaur. A second Rover programmed to roam the maze, which students must avoid.
- Creative path formations: bridges and ramps detected with the gyroscope and accelerometer, turns at non-90° angles, or paths with changing widths.
- There and back. Students must find the centre of the maze, then return through it the way they came.
- 3D-printed attachments. Add scoops or grippers and have students collect treasure on their way through.
Not all of these will make the maze vastly harder, but they make it more interesting and fun, and the more interesting the maze, the more invested students are in solving it. Get creative.
Assessing Successful Maze Solutions
The goal of running any unit like maze solving is to give students the opportunity to learn programmatic thinking and demonstrate their understanding through application. Assessment doesn’t have to be pass/fail based on whether students solve the maze. Below are different ways to assess understanding in a complex challenge like this.
Completing The Maze
The easiest way to test a maze algorithm is to run it. Ideally all students will solve the maze. For students who don’t finish, the next sections cover ways to still assess their understanding. For students who do finish, there are still ways to distinguish higher-quality algorithms.
Below is an example task description for an assessment sheet using the intermediate maze.
Design and program an algorithm to navigate your Rover from the start point to the finish zone. The Rover must start at the designated start point and find its way to the finish zone.
Maze objectives
- The Rover reaches the finish zone (5 marks)
- The Rover comes to a complete stop in the green finish zone (2 marks)
- The Rover finishes within 3 minutes (2 marks)
- The Rover doesn’t collide with any walls (1 mark)
What is Hard Coding?
Completing the maze is a good indicator that the student created a satisfactory algorithm, but it’s possible the solution is hard coded. A hard-coded solution uses a predetermined set of instructions that always execute the same way. For a maze, a student might hard-code a solution so the Rover always moves and turns in the same pattern using only movement blocks, with no branching or iteration. Hard-coded solutions only work for one maze configuration. We want to avoid this, students haven’t demonstrated programmatic thinking. Some ways to structure your assignment to prevent hard-coded solutions:
- Multiple attempts, different start points. Students complete the same maze multiple times, but the Rover’s start point changes each time. Students aren’t allowed to change their code between attempts.
- Two or more mazes, same code. Students must run the exact same code on two (or more) mazes and complete them all.
- Inspect the code. Make sure they’re not using just motor blocks, branching and iteration should be present.
- Practise on a different maze. Have students write their algorithm on a different maze configuration than the assessed one. They won’t have the chance to hard-code a solution before the assessment.
Should A Maze Have A Time Limit?
A time limit can be a positive or negative addition. A well-tempered limit (which will change depending on maze complexity) encourages students to optimise their algorithm. An unforgiving limit, however, may fail an algorithm that would have eventually succeeded. Speed isn’t the only metric for algorithm quality. Solving a maze in a specific time can be a great additional challenge for advanced students, but we don’t recommend making it a pass/fail criterion.
Supporting Documentation
It’s often a good idea to give students a chance to demonstrate their understanding of programmatic thinking outside of code. This gives students who haven’t completed the maze, or are still struggling to translate their thinking into code, a chance to demonstrate the achievement standard. A supporting document submitted with their maze attempt is one way to do this. The form is up to you, what matters is that students explain the thinking behind their algorithm.
Supporting documentation can be submitted before or after the maze code is actually written. If submitted before, students get a chance to think through how their solution will work before jumping into code.
Here’s an example task description for a supporting document:
Provide a flowchart showing the steps your Rover follows when executing your maze-solving algorithm. Your flowchart should show where you’ve used branching and iteration, and where your algorithm uses sensor data. Explain what type of data the sensors produce and how you’ve used that data in your algorithm.
Objectives
- Identify where you’ve used branching and explain why (1 mark)
- Identify where you’ve used iteration and explain why (1 mark)
- Identify what type of data you’re gathering from the sensors and explain why your algorithm needs to collect this data (3 marks)
Assessing The Code
The code itself is important to look at, but it’s also important not to judge a program purely on code quality. As with all programming assessment, it’s hard to judge an algorithm solely by its line count, two different programs can solve the same maze with the same speed and efficiency but look completely different. Check student code to make sure they’re producing a genuine algorithm and not a hard-coded solution, but we wouldn’t recommend creating marking criteria around the code itself. Instead, base marks on how the algorithm completes the maze and on how students explain it, as outlined above.
Building Knowledge Needed For A Maze
If your students aren’t at the skill level yet to attempt the maze configuration you’ve planned, build their knowledge first. If prematurely tasked with a complex maze they may get overwhelmed. Below is a general structure for teaching the required skills incrementally. Start at the step that feels most appropriate for how familiar your students are with coding generally and the Micromelon Rover specifically.
How you organise these lessons will depend on student skill level and time available. They don’t have to be rigid lessons, you may accomplish multiple steps in one lesson, or set some activities for homework using the Micromelon Robot Simulator.

Step 1: Rover Movement
The primary challenge of a maze is to navigate the path formations. Students need to know how to program the Rover’s motors to move and turn.
If your students have no Rover experience, start with Driving Shapes: a beginner activity that has them learn the basics of moving the Rover forwards and turning, with the potential for some loop usage. More advanced motor control will come up naturally as students complete activities later in this list.
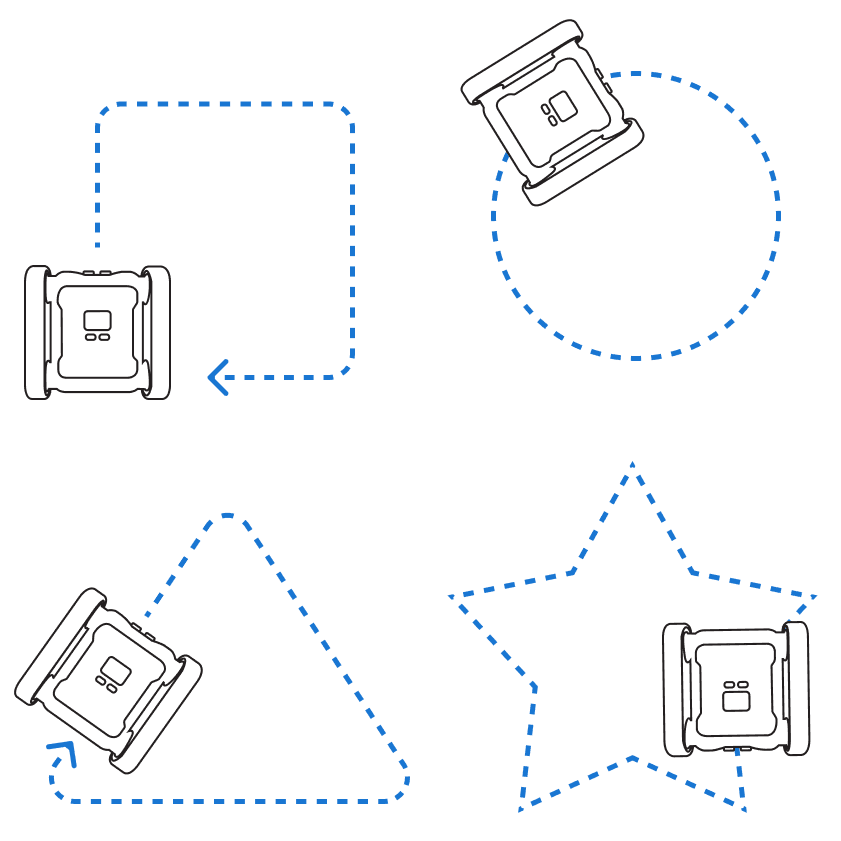 Related resourceActivity: Driving ShapesLearn iteration and how to control the Rover’s motors.
Step 2: Introducing The Colour Sensor, Branching, and Iteration
Once students have basic Rover programming down, move on to incorporating sensors using branching and iteration. This gets them familiar with combining branching and iteration in a single algorithm and with programming the colour sensor. (If your maze has no colour-based challenges, you can skip this step.)
The Colour Sensor post covers the science behind how the sensor works, its limitations, and how to code it. If you’re short on class time, assign it as homework reading.
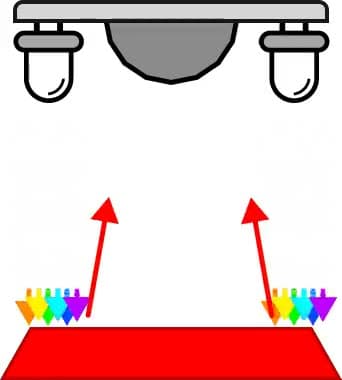
The activities Stop on Colour and Prison Escape are great for learning how to implement sensor data into simple branching/iteration algorithms. Both use the colour sensor.
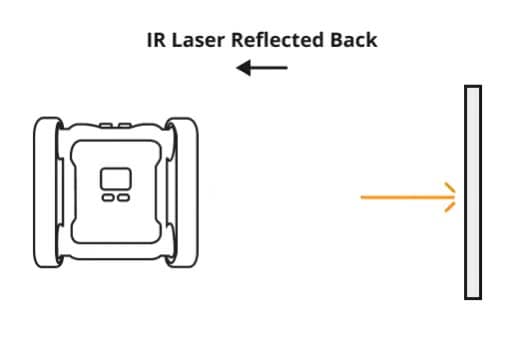
Step 3: The IR and Ultrasonic Sensors
The primary maze challenge is navigating path formations. To move the Rover through the maze efficiently, students need to monitor where the walls are. The front ultrasonic sensor and the two side IR sensors are all distance sensors that can be used to detect walls. A thorough understanding of how these sensors work is essential to a successful maze solution.
The posts below cover the science behind each sensor, the limitations and how to use them appropriately.

Puppy Bot and Lane Guidance both require distance sensing. Puppy Bot uses the ultrasonic sensor; Lane Guidance uses the IR sensors. Solutions require students to understand sensor data in conditional operators, and continue practising IF / ELSE / ELSE IF branching logic and Loops.
 Related resourceActivity: Puppy BotBranching and looping with the ultrasonic sensor.
Step 4: Practising In A Maze
Once students are familiar with all the required sensors and with branching and iteration, it’s a good time to start running mazes. This doesn’t have to be the final assessment maze, it could be an alternative version, or a less complex practice maze.
Maze running in the Micromelon Robot Simulator
The Micromelon Robot Simulator is the easiest way to give students maze practice without setting one up physically. The Simulator provides a virtual environment where you can generate an endless number of maze configurations students can practise in. Students can also access the Simulator from home.
Wrapping Up
In this post we’ve covered what maze challenges are, what they teach, how to assess them, and how to prepare your students for them. Hopefully from here you can incorporate a maze challenge into your Digital Technologies classroom.
If you’ve got any questions about running maze challenges or about Micromelon Robotics, please feel free to get in touch.
Get in TouchSend us a message and we will get back to you within 1 business day.