The Micromelon Robot Simulator is a virtual world for simulating the Micromelon Rover and classroom activities. The simulator’s virtual environment facilitates Digital Technologies education without any physical setup. In this post, we’ll outline how you can run an entire term of Digital Technologies classes entirely with the Simulator.
Why Use The Simulator
The Simulator is entirely virtual, which makes it an ideal tool for remote learning and lets students complete digitech work at home without a physical Rover. It includes typical digitech exercises like line following, sumo, and mazes, all runnable with a single click. It also enhances these exercises with computer-generated challenges and AI opponents that are only possible inside a virtual world. The Simulator also alleviates the hassles of running physical exercises by reducing classroom setup.
What You Need To Get Started With The Simulator
Accessing The Micromelon Platform
The Simulator is one part of the Micromelon learning platform. To learn more about how your school can access the platform, contact us to organise a demo or video call. If you’re just looking to try out the Simulator, you can access it free for 30 days when you create a Micromelon home account from the Code Editor.
Downloading The Simulator
The Simulator can be downloaded and installed on Mac and Windows computers.
How To Use The Simulator

This post explores the Simulator in the context of a term plan, so we assume you’re already somewhat familiar with how to use it. If this is your first time using the Simulator, check out the getting started guide above, it covers the basics of the interface and tools.
Creating An 8 Week Term Plan
In this section we outline 8 weeks of classroom and homework activities. We assume a single 1-hour lesson each week (8 contact hours in the term). The plan has three parts: introduction, knowledge building, and assessment. Throughout we mention exercises: these are all built into the Simulator and can be found in the Simulator’s exercise list. Don’t worry if your term isn’t structured exactly like this; the content adapts to most classroom settings and schedules.
Week 1: Introduction
The primary objective this week is to make sure everyone in class has the Simulator and Code Editor installed and working. Use the Getting Started guide as your primary teaching resource and share it with the class.
Downloading and installing the Simulator and Code Editor. Depending on the age of your students, you can send the getting started post to students (or their parents) before class so they can install the software ahead of time. If they can’t prepare beforehand, you’ll need to spend time in class downloading and installing, don’t be too concerned if downloading takes most of the class. Some schools may even be able to have the IT department install both pieces of software for the students at the start of the term.
Once everything is installed. Once everyone has the Code Editor and Simulator working, jump into coding. We outline three exercises below. Driving Shapes, Prison Escape, and Invisible Bridge, that you can cover in the remaining time.
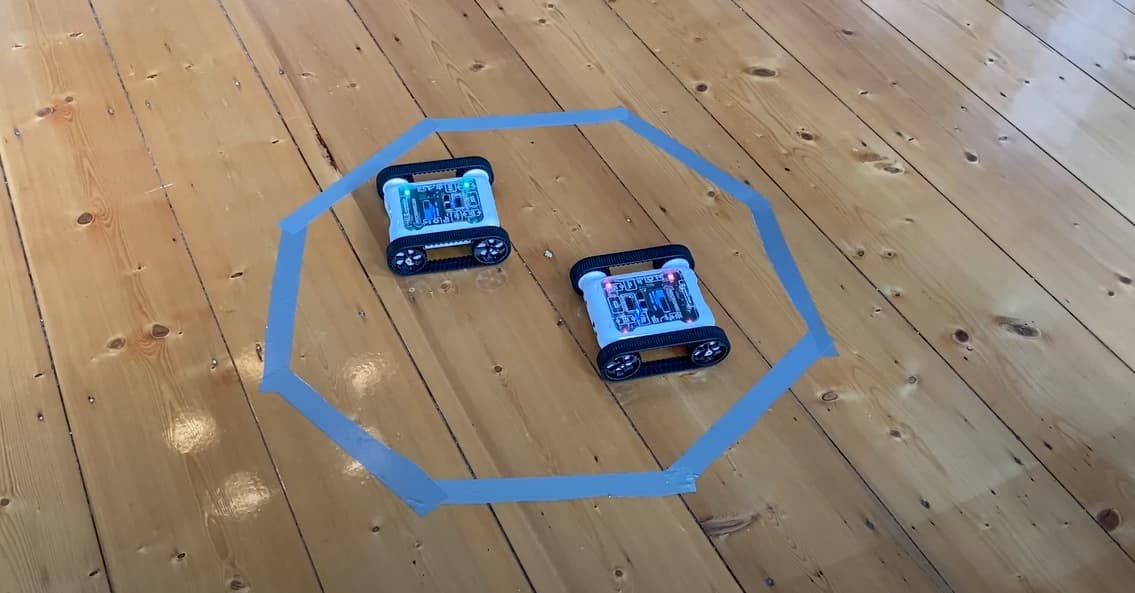
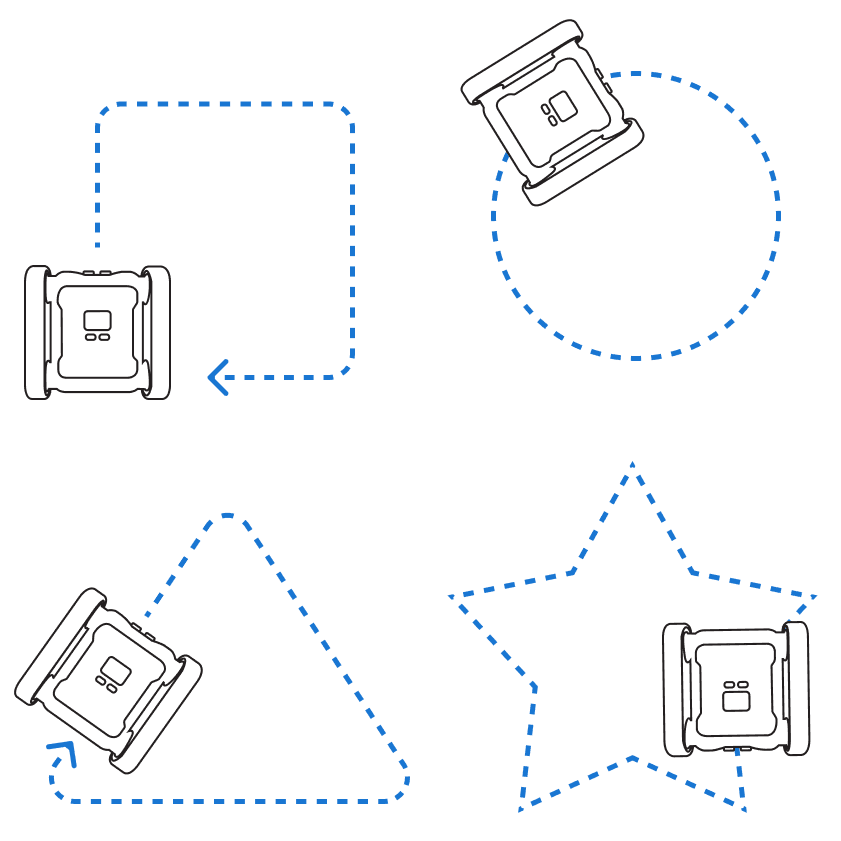
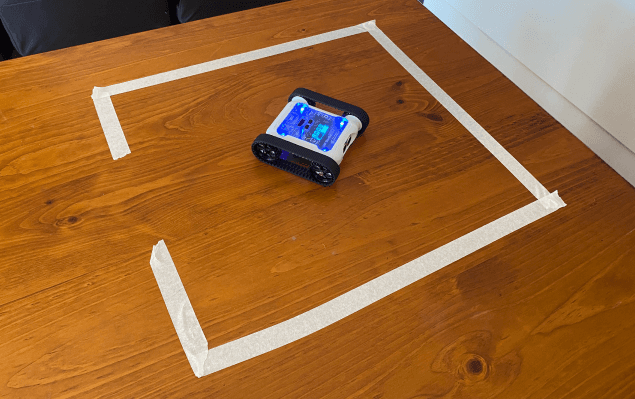
To start with: Driving Shapes. The Driving Shapes exercise space offers a simple area for students to play around in. We typically ask students to program their Rover to drive in a shape, e.g. a square or a triangle.
If you get to it: Prison Escape. If you complete Driving Shapes and still have time, move on to Prison Escape. This exercise introduces the colour sensor and some simple algorithm design that we’ll continue to use in future weeks.
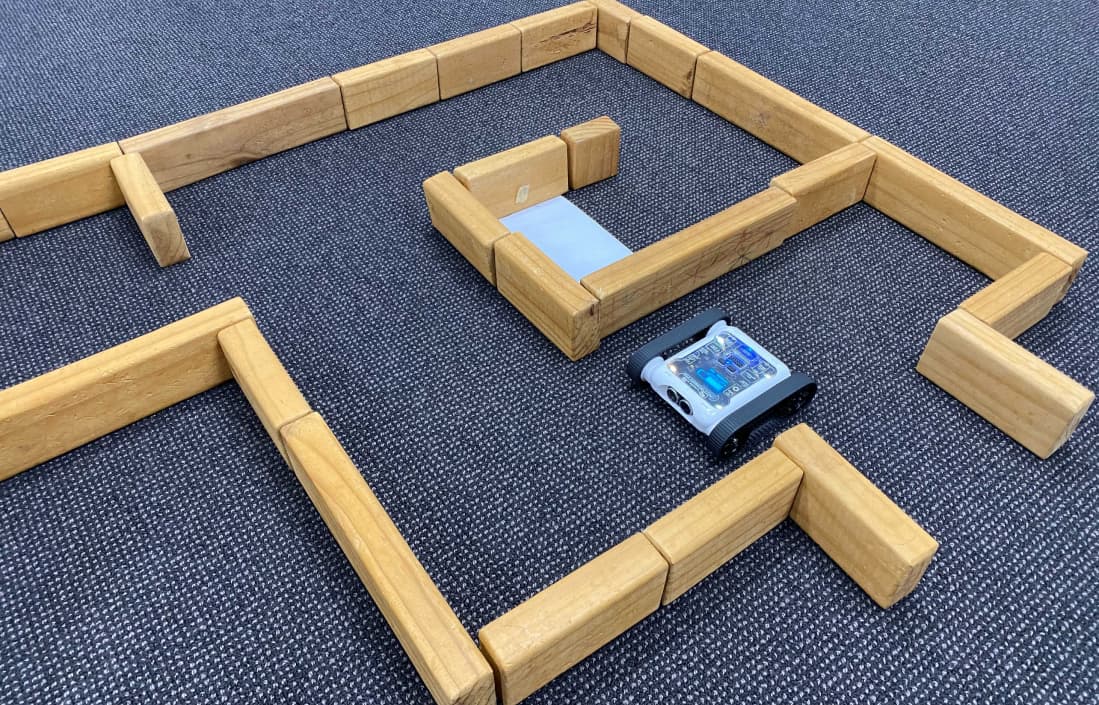
For students needing a challenge: Invisible Bridge. Invisible Bridge is an interesting challenge for students who finish the previous two exercises quickly. It also gives them an opportunity to explore concepts that become more relevant in later weeks.
Homework. If students couldn’t get the Simulator and Code Editor installed, make sure they attempt this before next class. If you’re short on time or looking to challenge students, issue Prison Escape as a homework activity for anyone who didn’t complete it in class. This ensures students are introduced to the concepts needed for future lessons. You can have students form small groups and present their solutions to each other to discuss the quality of their programs.
Related Activities
 Related resourceActivity: Driving ShapesLearn iteration and how to control the Rover’s motors.
Weeks 2–4: Building Knowledge
For this section we develop students’ knowledge and understanding in preparation for the assessment in weeks 5–8. Because each curriculum grade-band dictates different required knowledge, we can’t prescribe a single assessment to fit all classrooms (more on that in the assessment section). Since this knowledge-building section presupposes the assessment, it too will change depending on your class.
To make this outline applicable to as many classrooms as possible, we describe three exercises, line following, maze solving, and balance challenges: and what digitech concepts each one builds. We leave the choice of exercises and how long to spend on them up to you, so you can match them to your class’s requirements. These exercises are presented in no particular order; you may choose to cover a new exercise each week or spend more than a week on one.
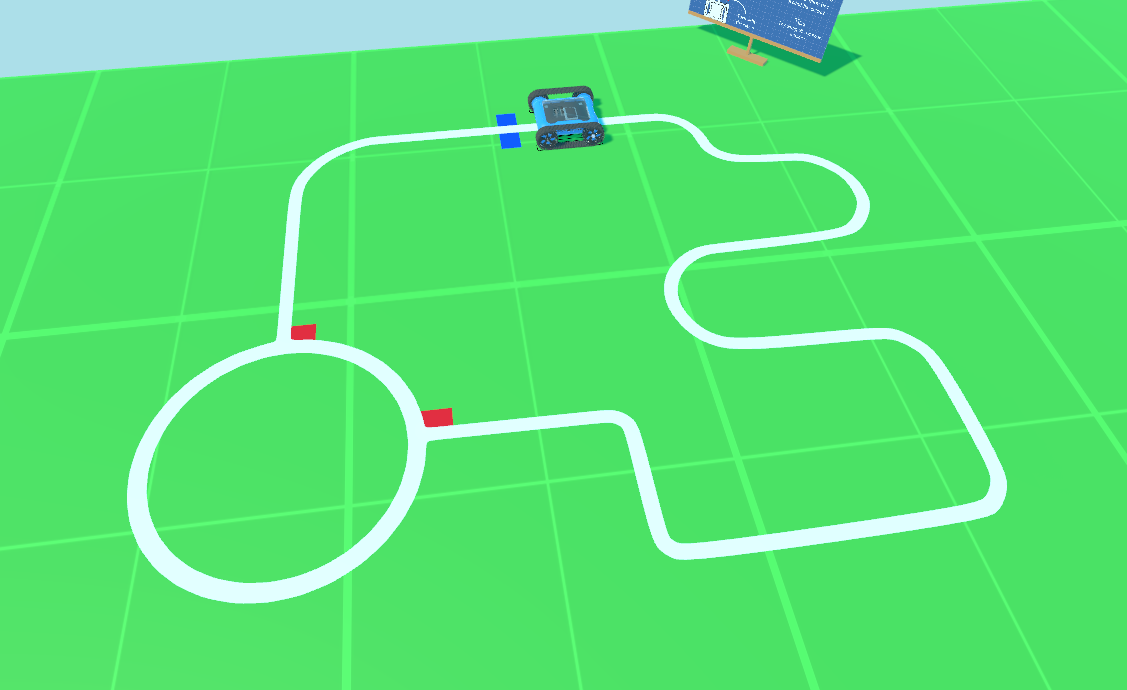
Line following exercise in the Simulator
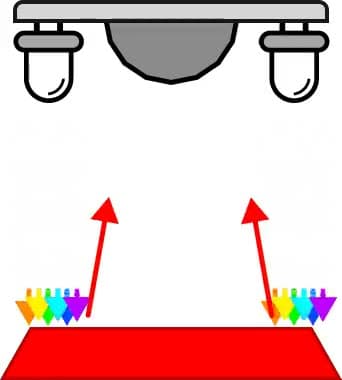
The line following exercise gives students an opportunity to combine basic iteration and branching logic to form a relatively simple algorithm. Line following algorithms require an understanding of the Rover’s colour sensors. The colour sensors generate colour data, opening the door to exploring complex data types with additional activities centred on understanding and using the sensor.
How to vary complexity
- Level 1: Have the Rover follow the entire course, indicative of a successful, simple line-following algorithm. Achievable for most students.
- Level 2: Require students to detect the additional colour indicators (the red and blue markers). On red, the Rover should turn right. On blue, it should recognise it has completed the course and stop. This requires more sophisticated branching logic.
- Level 3: Challenge the class to produce the fastest line-following algorithm. A shorter time window forces students to move the Rover faster, which is challenging when using sensors to guide direction. A friendly class competition keeps quicker students occupied while slower ones can still complete the exercise.
Related reading. The colour sensor produces complex colour data. While completing this exercise, you can run additional activities around understanding the data types we use to represent colour information (RGB, HSL, hex codes). Use the Colour Sensor post as an introductory teaching resource.
Related Reading
Maze solving in the Simulator
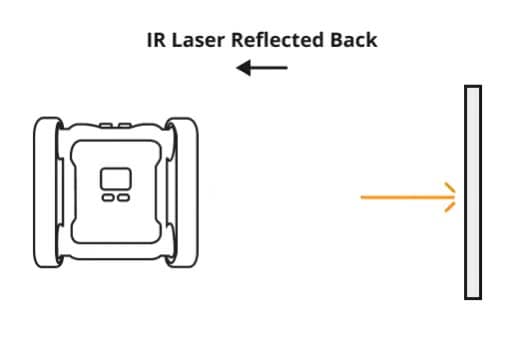
Maze challenges give students an opportunity to combine basic iteration and branching logic into a simple algorithm. Maze-solving algorithms require students to use the Rover’s Infrared Distance and/or Ultrasonic sensors. These distance sensors provide data on the proximity of objects around the Rover (e.g. detecting maze walls).
How to vary complexity
The Simulator’s maze exercise provides controls to change which kind of maze you can attempt, you can customise the maze’s size and shape from the exercise options.
- Level 1: Complete a square maze.
- Level 2: Complete a triangle maze.
- Level 3: Complete a hexagonal maze.
There’s no linear increase in complexity as a maze gets larger. An algorithm that can solve a small maze will also solve a larger maze of the same shape, it will just take the Rover more time, with no change to the underlying logic. Size 5 mazes are a good general size for students to attempt.
You can also add a time requirement, which encourages students to create a more efficient algorithm.
Related reading. The Ultrasonic and Infrared Distance sensors are essential for any maze-solving algorithm. For a deeper breakdown of how these sensors work, see the dedicated posts.
Related Activities and Reading


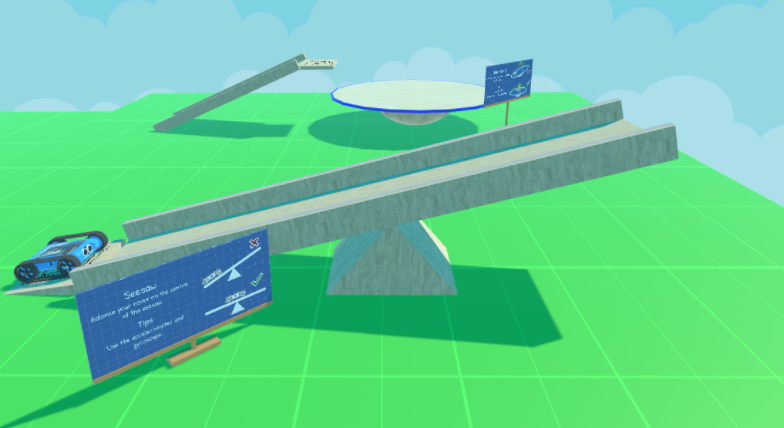
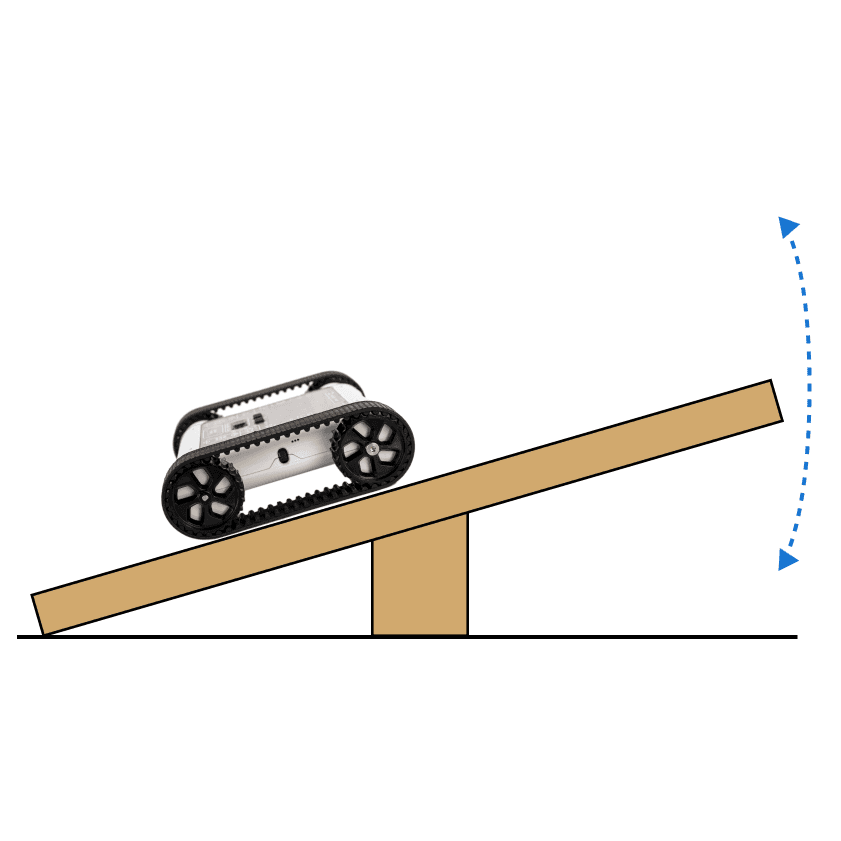
Balance Board challenge
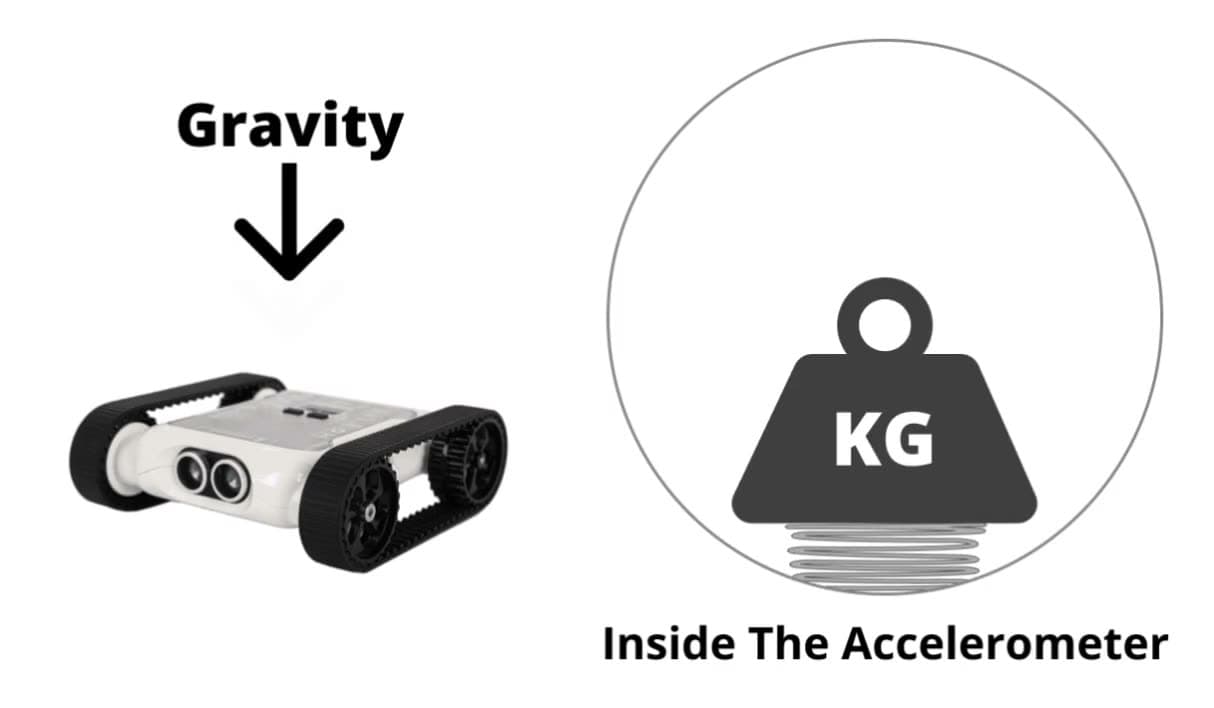
There are two balance exercises in the Simulator: See-Saw and Balance Board. Both require algorithms using iteration and a good understanding of the accelerometer and the data it produces. Depending on the implementation, branching logic may or may not be used. For example, an algorithm that relies heavily on mathematics to process accelerometer data may not need branching at all.
How to vary complexity
- See-Saw is the more basic of the two, it only uses 1 axis of the accelerometer. We recommend all students start with See-Saw first. They can apply their understanding of branching and iteration from Maze Solving and Line Following.
- Balance Board uses 2 axes of the accelerometer. The extra axis is a significant jump in complexity. Students attempting Balance Board may implement interesting solutions involving complex maths, or many branches in their code, to process movement in two directions.
Related reading. The accelerometer is essential for these challenges. For a deeper breakdown of how it works, see the dedicated post below.
Related Activities and Reading
Weeks 5–8: Assessment
This is the final section of our term plan, the assessment period, which has students create three accessible pieces of work. These pieces are spread across multiple weeks to reduce a single large marking burden at the end of term.
For this outline we use Sumo as our example exercise and the Digitech Assignment. Sumo as our assessment resource. You can open the assignment sheet from the buttons below.
Download Digitech Assignment. Sumo (PDF)
Download Digitech Assignment. Sumo (DOC)
This structure isn’t limited to a specific exercise, you can apply a similar assessment plan to any of the Simulator exercises. If sumo isn’t right for your class, experiment with Driving School or Maze Generator.
The aim this week is to introduce students to the assignment and let them start preparing for the first assessment item, the algorithm design flowchart.
Introducing the assignment. First, familiarise students with the assignment if they’re unfamiliar with sumo. Showing videos of battle bots, or demonstrating a sumo algorithm you’ve created, is a great way to get them excited and start them thinking about how to approach their own algorithm. Once everyone is familiar with the challenge, make sure students understand the algorithm rules outlined in the assignment sheet.
The algorithm design flowchart. The purpose of the flowchart is to give students an opportunity to demonstrate their computational thinking in a non-code setting. Think of it like the planning stage of an English essay. Students brainstorm and organise their ideas and create a plan for how they’ll construct their algorithm. This planning stage prevents students from regressing into unproductive trial-and-error programming and gives those who have a conceptual understanding of coding logic, but struggle to implement it in code, an opportunity to demonstrate their knowledge.
You can make the flowchart due at the start of the next lesson so students can work on it at home. Online tools like Draw.io are great for digitising flowcharts, but pen and paper works just as well.
Hopefully by the start of this lesson students have completed their algorithm design flowchart. If not, allow them to continue working on it in class, require it to be completed before they start coding. Once the flowchart is submitted, they can jump into coding.
Students should start by coding the algorithm they designed in their flowchart. Once they have something matching the design, they can start practising against the AI sumo opponents in the Simulator. As they practise, they’ll likely improve their algorithm and diverge from their flowchart, this is encouraged, since it creates good opportunities for reflection (the basis of the next assessment item).
All of class time and the time before the next lesson can be spent on algorithm development. If students struggle with the complexity of their code, take them back to their flowcharts and adjust with new ideas.
This class is devoted to running and marking the Algorithm Demonstration assessment item. As outlined in the assignment, each student demonstrates their sumo algorithm against each AI sumo opponent in a best-of-3 match (9 matches total). Approaches you can use:
- Common screen. Have each student demonstrate on a shared screen (e.g. interactive whiteboard or projector) so the whole class can take part in each match. Fun way to have the class cheering each other on.
- Walk-around. Visit each student’s device and have them demonstrate to you personally while the rest of the class works on other things.
- Submit and run later. Have students submit their final algorithm to you and run it on your own device. Great if class time is short, though logistically frustrating with a lot of students.
We recommend a mix of the first and second approaches: demonstrate personally with each student, note the best-performing algorithm, and have them present to the class after all demonstrations. This preserves the fun of watching a sumo battle together while using class time efficiently and avoiding embarrassing students whose algorithms aren’t performing well.
If demonstrations finish early (or you’re marking submitted algorithms later), ask students to begin work on the reflective questions component. There’s more time for this next week, so don’t worry if they don’t start in class.
This week gives students more time to complete the reflective questions assessment item. The purpose of this item is to give students an opportunity to reflect on what was successful and what wasn’t, especially important for students whose demonstrations didn’t go well and who are looking to earn more marks. Feel free to change, add to, or remove from the list of questions provided in the sumo sheet depending on your class.
Once submitted, the answers can be marked and feedback returned to students. The term is now complete, hooray!
Wrapping Up
The Robot Simulator is a great teaching tool for any Digital Technologies classroom. Hopefully this 8-week outline helps you use the Simulator in your classes. If you have any feedback or suggestions for this post, please get in touch.
Get in TouchSend us a message and we will get back to you within 1 business day.